> ## Documentation Index
> Fetch the complete documentation index at: https://openmetadata-fix-release-notes.mintlify.site/llms.txt
> Use this file to discover all available pages before exploring further.
# Bulk Import Data Assets via CSV in OpenMetadata
> Learn to bulk import databases, schemas, and tables in OpenMetadata using CSV files. Edit inline, validate changes, and import via UI or API.
# Import Data Asset
Importing a Data Asset is simple. Below are the steps to bulk import various data assets, such as Databases, Schemas, and Tables.
## How to Bulk Import a Database Service
To import a Database Service:
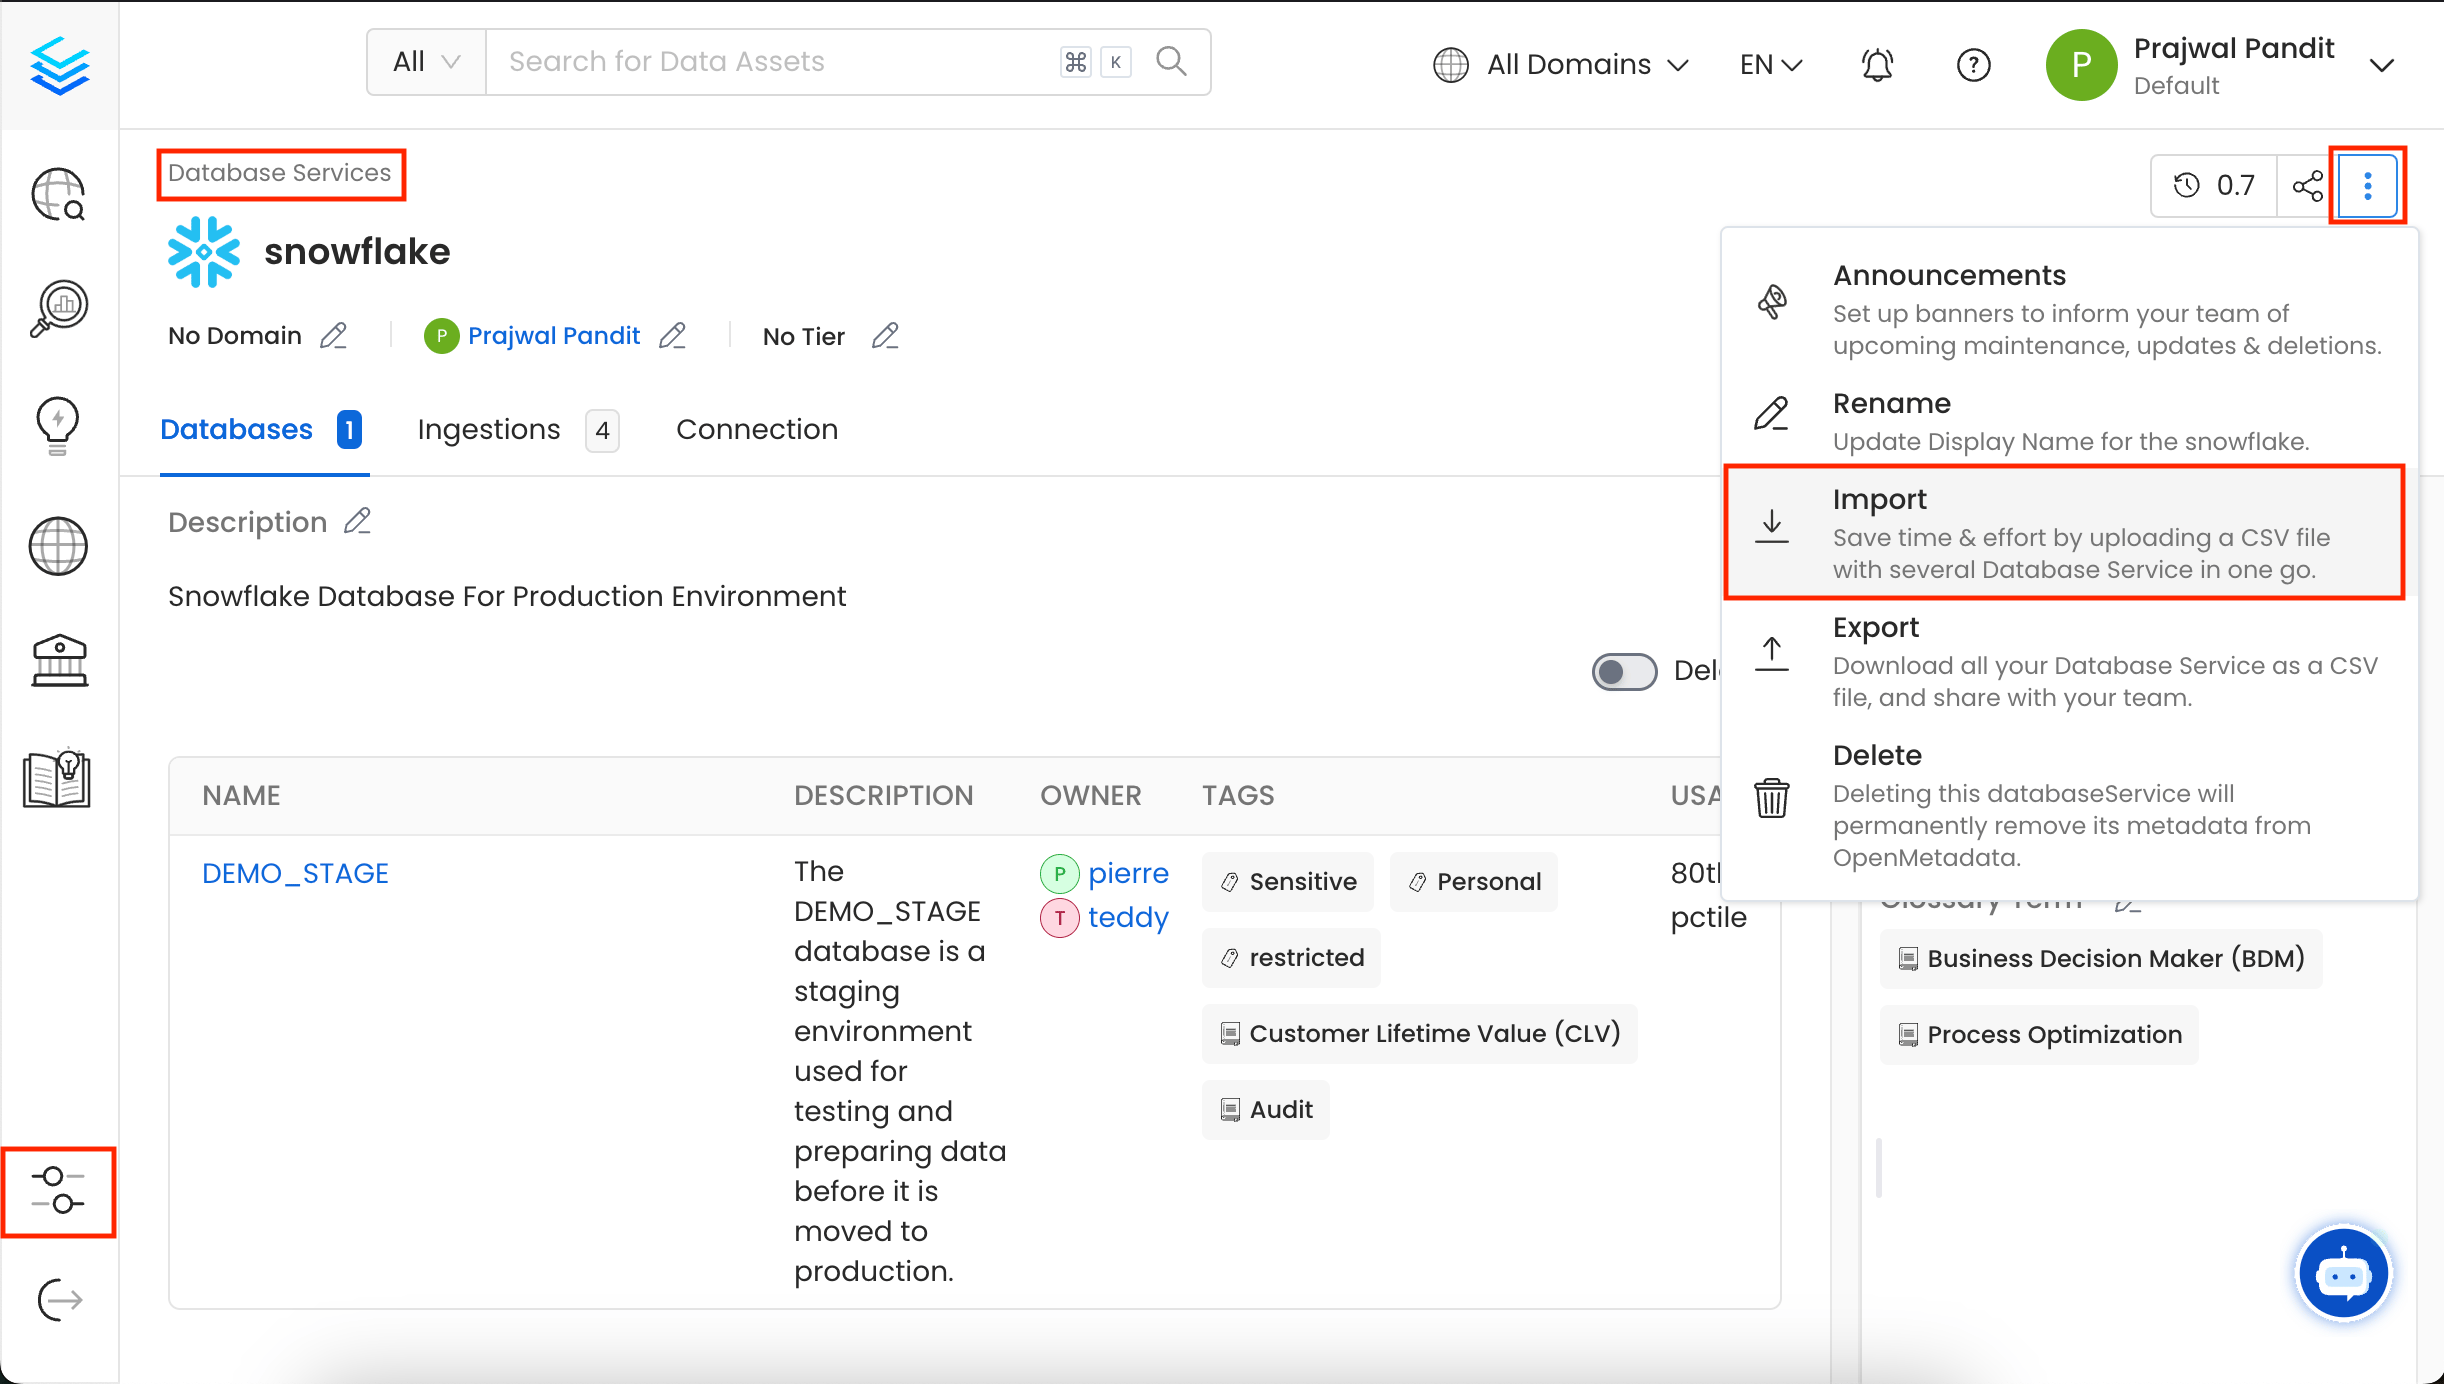
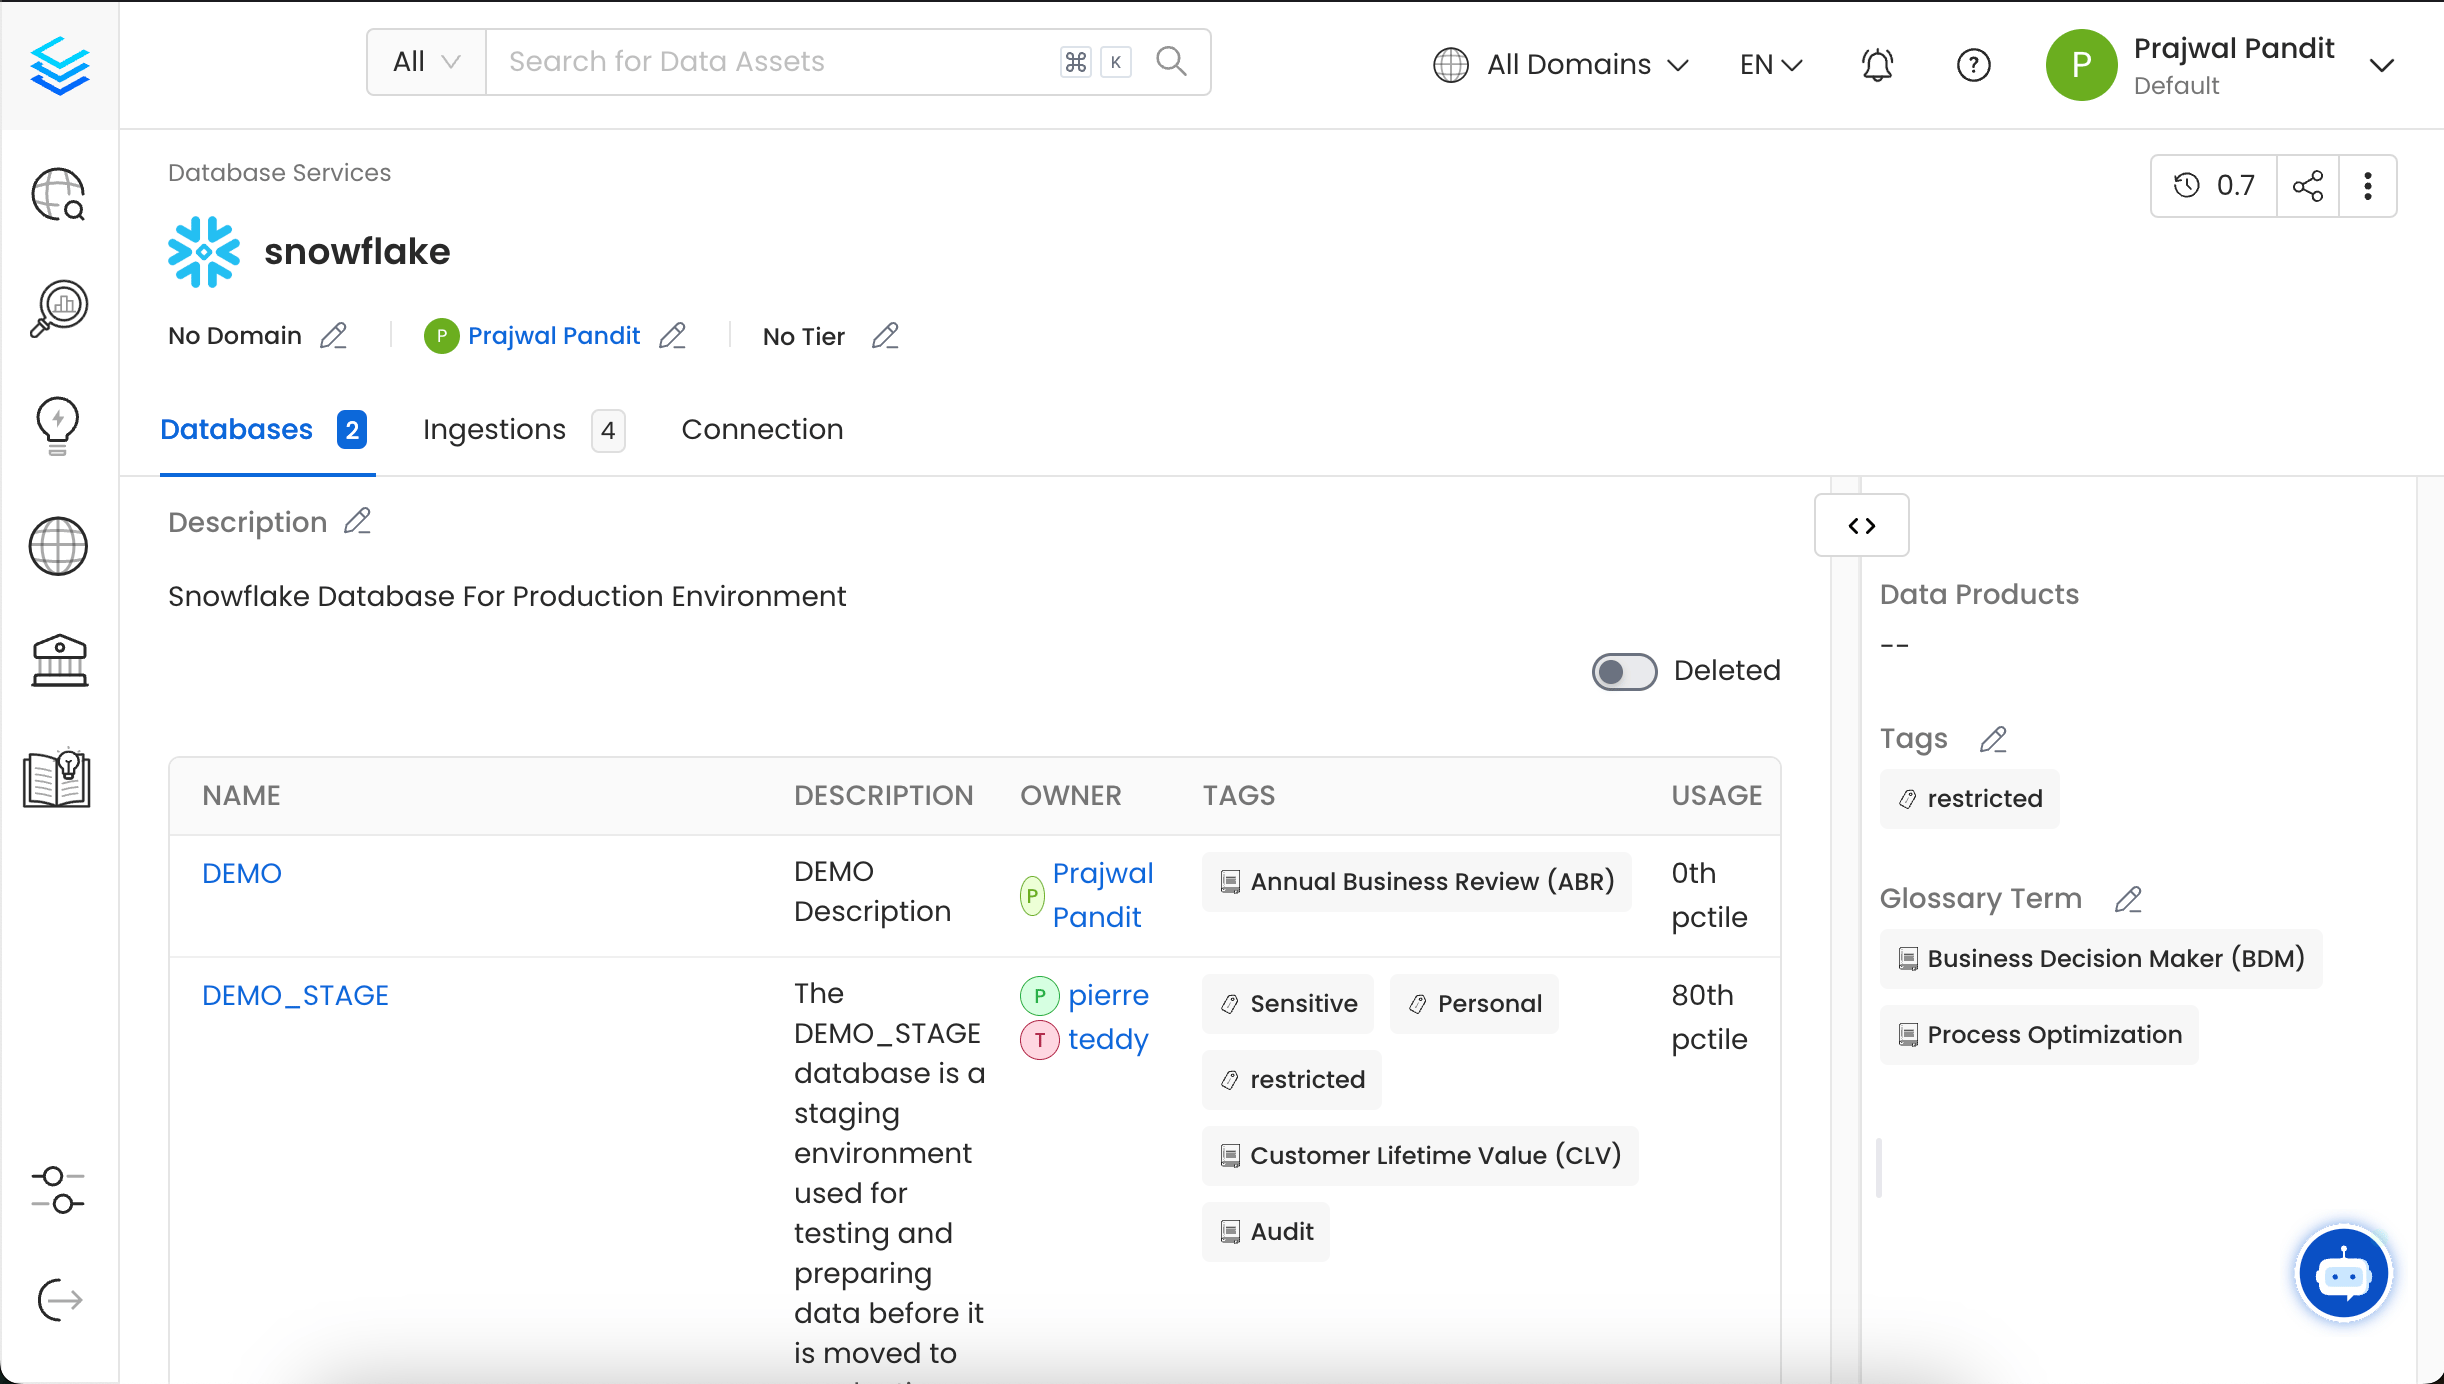
1. Navigate to the Database Service you want to import by going to **Settings > Services > Database**.
2. For this example, we are importing in the `Snowflake` service.
3. Click on the **⋮** icon and select **Import** to download the Database Service file.
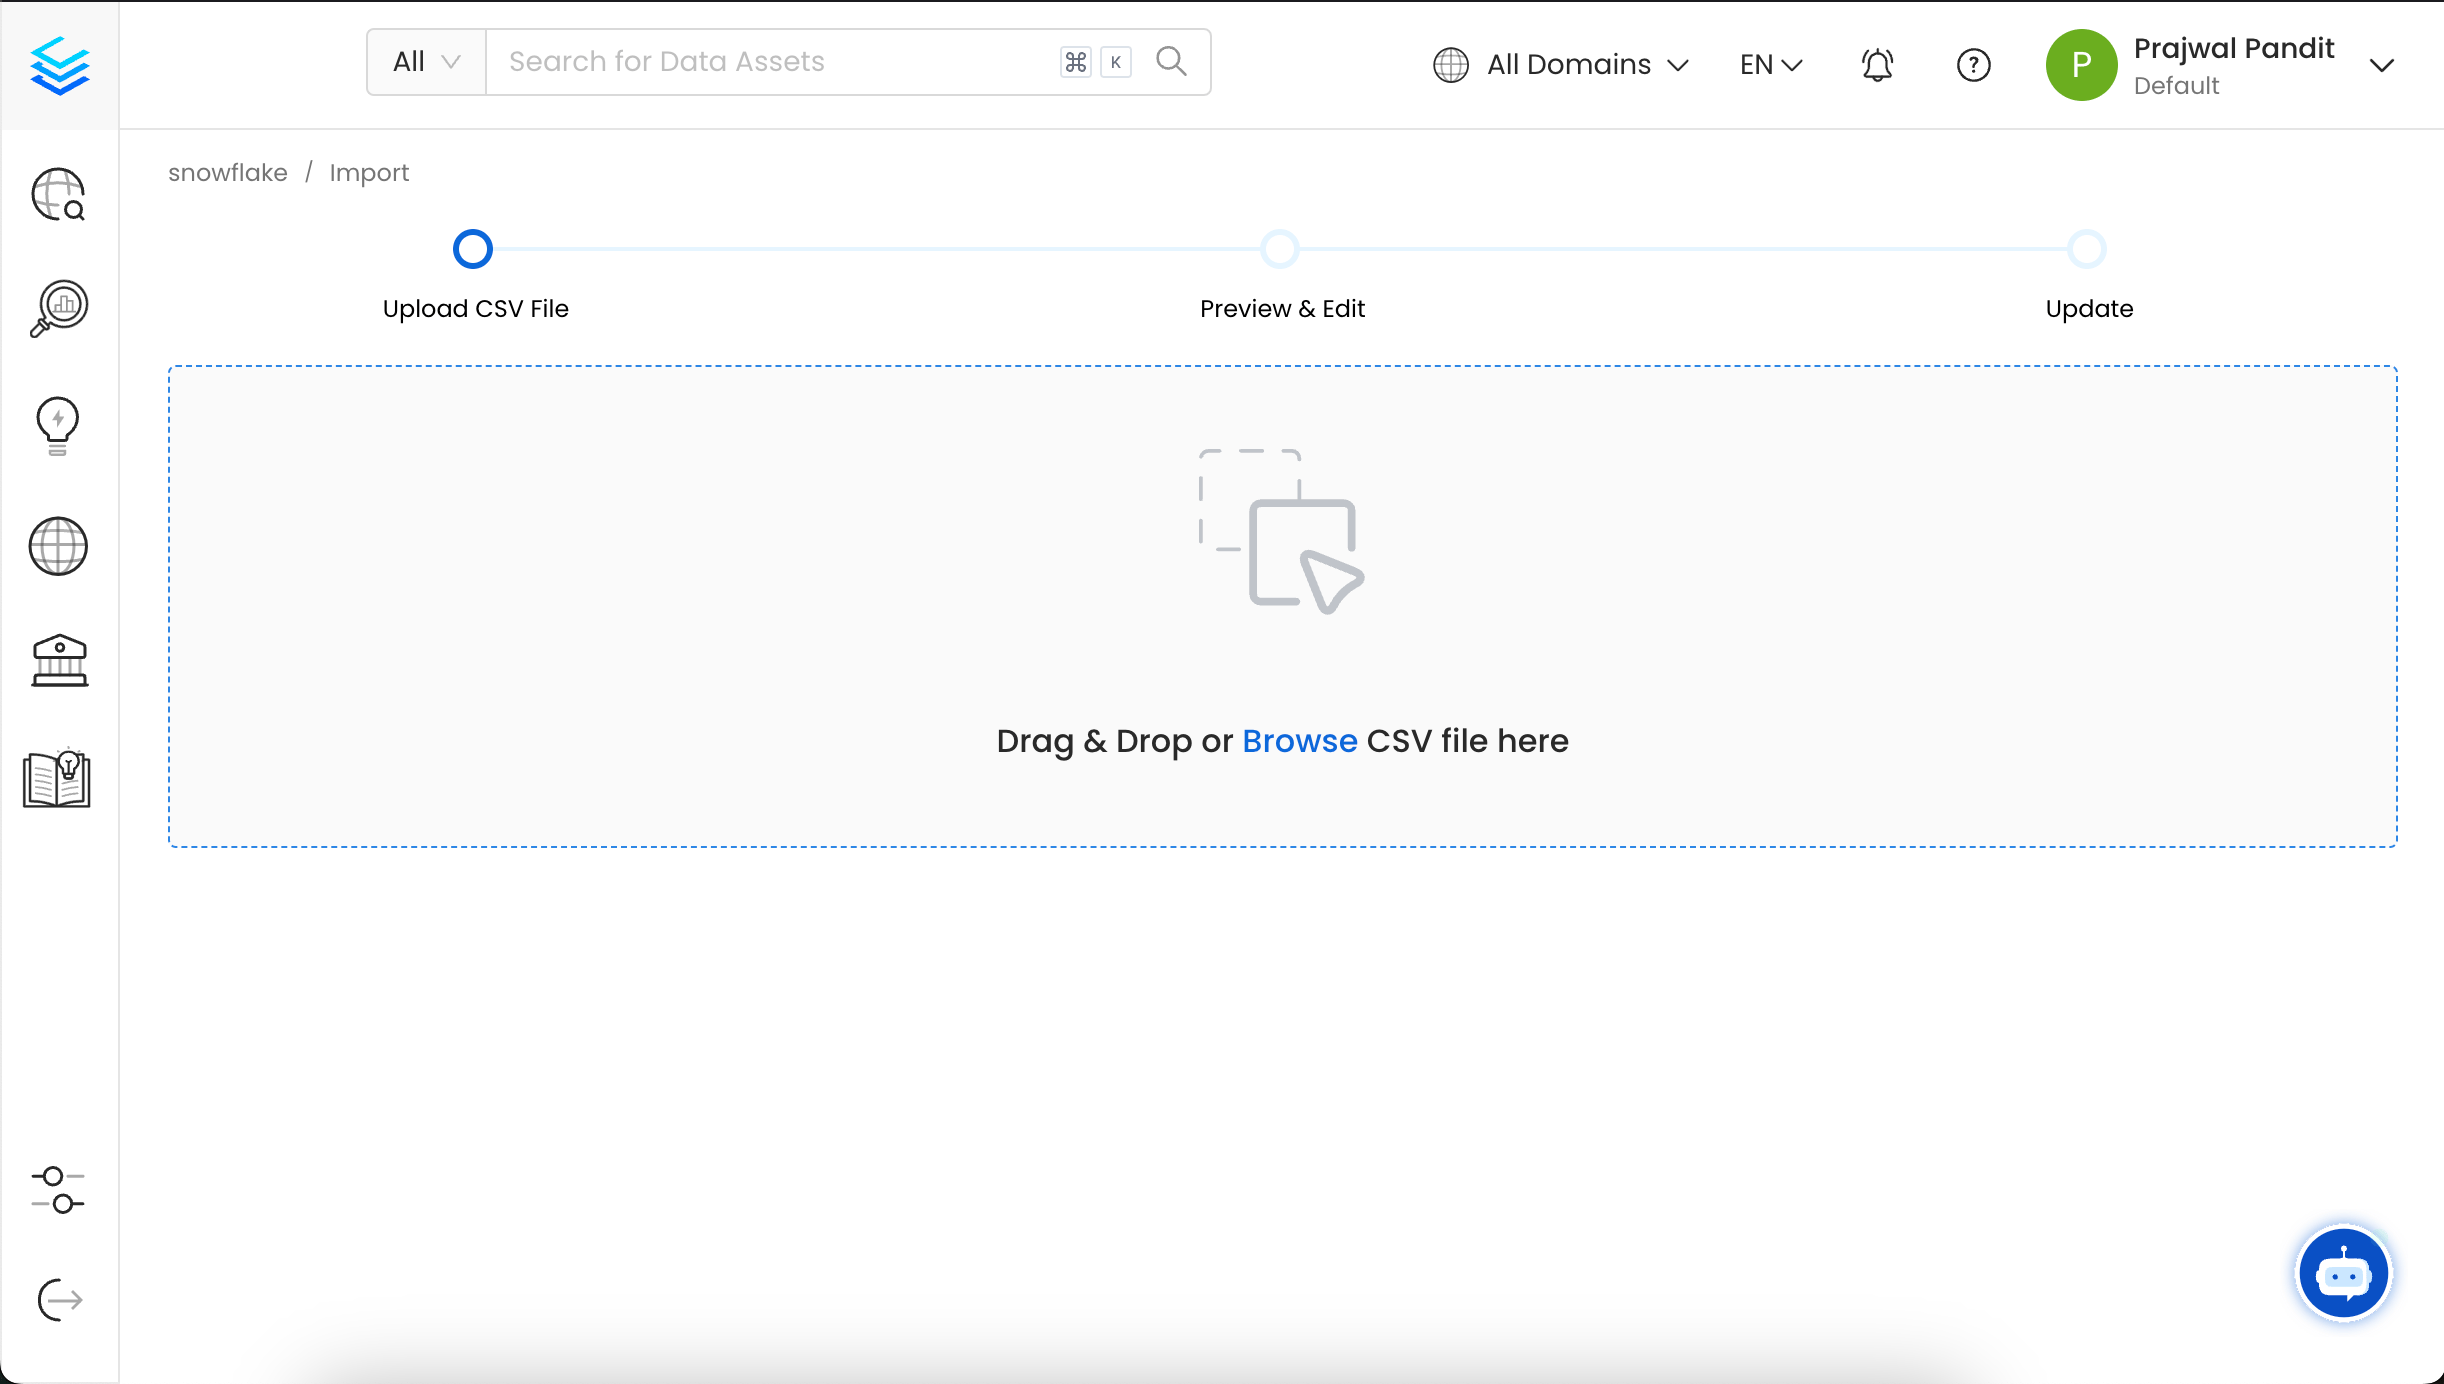
 4. Upload/Drop the Database Service CSV file that you want to import. Alternatively, you can `export` an existing Database Service CSV as a template, make the necessary edits, and then upload the updated file.
Once you have the template, you can fill in the following details:
* **name** (required): This field contains the name of the database.
* **fullyQualifiedName** (required): This field contains the fully qualified name of the database service.
* **displayName**: This field holds the display name of the database.
* **description**: This field contains a detailed description or information about the database.
* **owner**: This field specifies the owner of the database.
* **tags**: This field contains the tags associated with the database.
* **glossaryTerms**: This field holds the glossary terms linked to the database.
* **tiers**: This field defines the tiers associated with the database service.
* **domain**: This field contains the domain assigned to the data asset.
4. Upload/Drop the Database Service CSV file that you want to import. Alternatively, you can `export` an existing Database Service CSV as a template, make the necessary edits, and then upload the updated file.
Once you have the template, you can fill in the following details:
* **name** (required): This field contains the name of the database.
* **fullyQualifiedName** (required): This field contains the fully qualified name of the database service.
* **displayName**: This field holds the display name of the database.
* **description**: This field contains a detailed description or information about the database.
* **owner**: This field specifies the owner of the database.
* **tags**: This field contains the tags associated with the database.
* **glossaryTerms**: This field holds the glossary terms linked to the database.
* **tiers**: This field defines the tiers associated with the database service.
* **domain**: This field contains the domain assigned to the data asset.
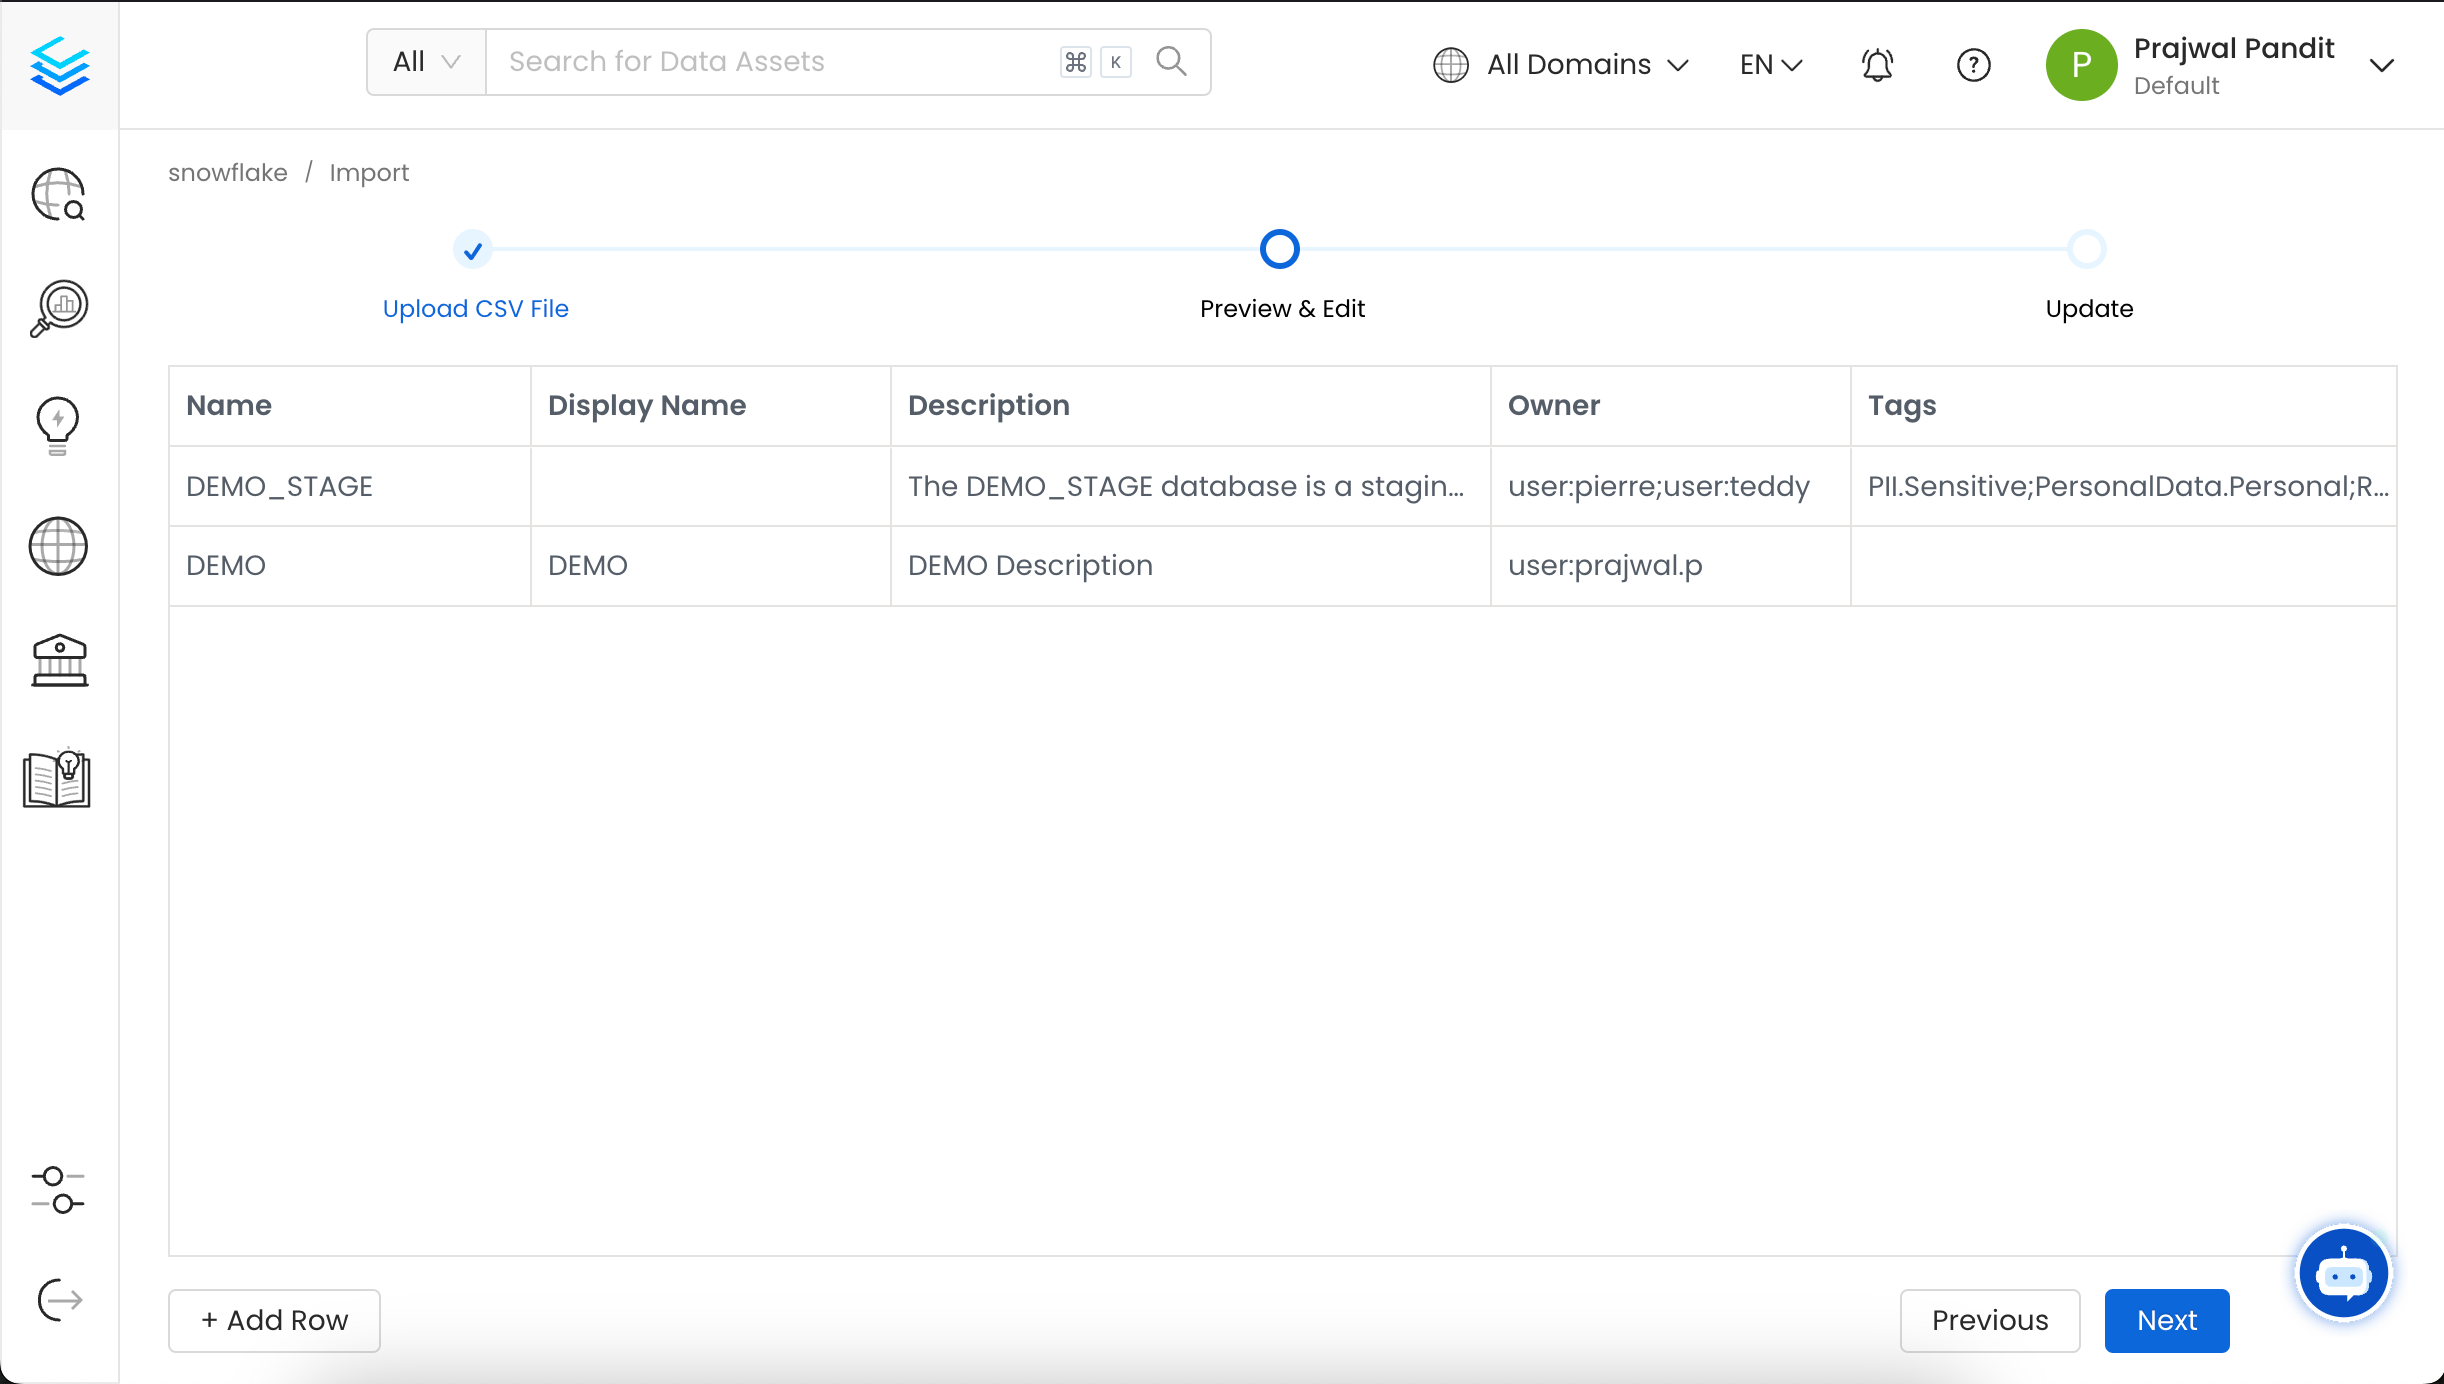
 5. You can now preview the uploaded Database Service CSV file and add or modify data using the inline editor.
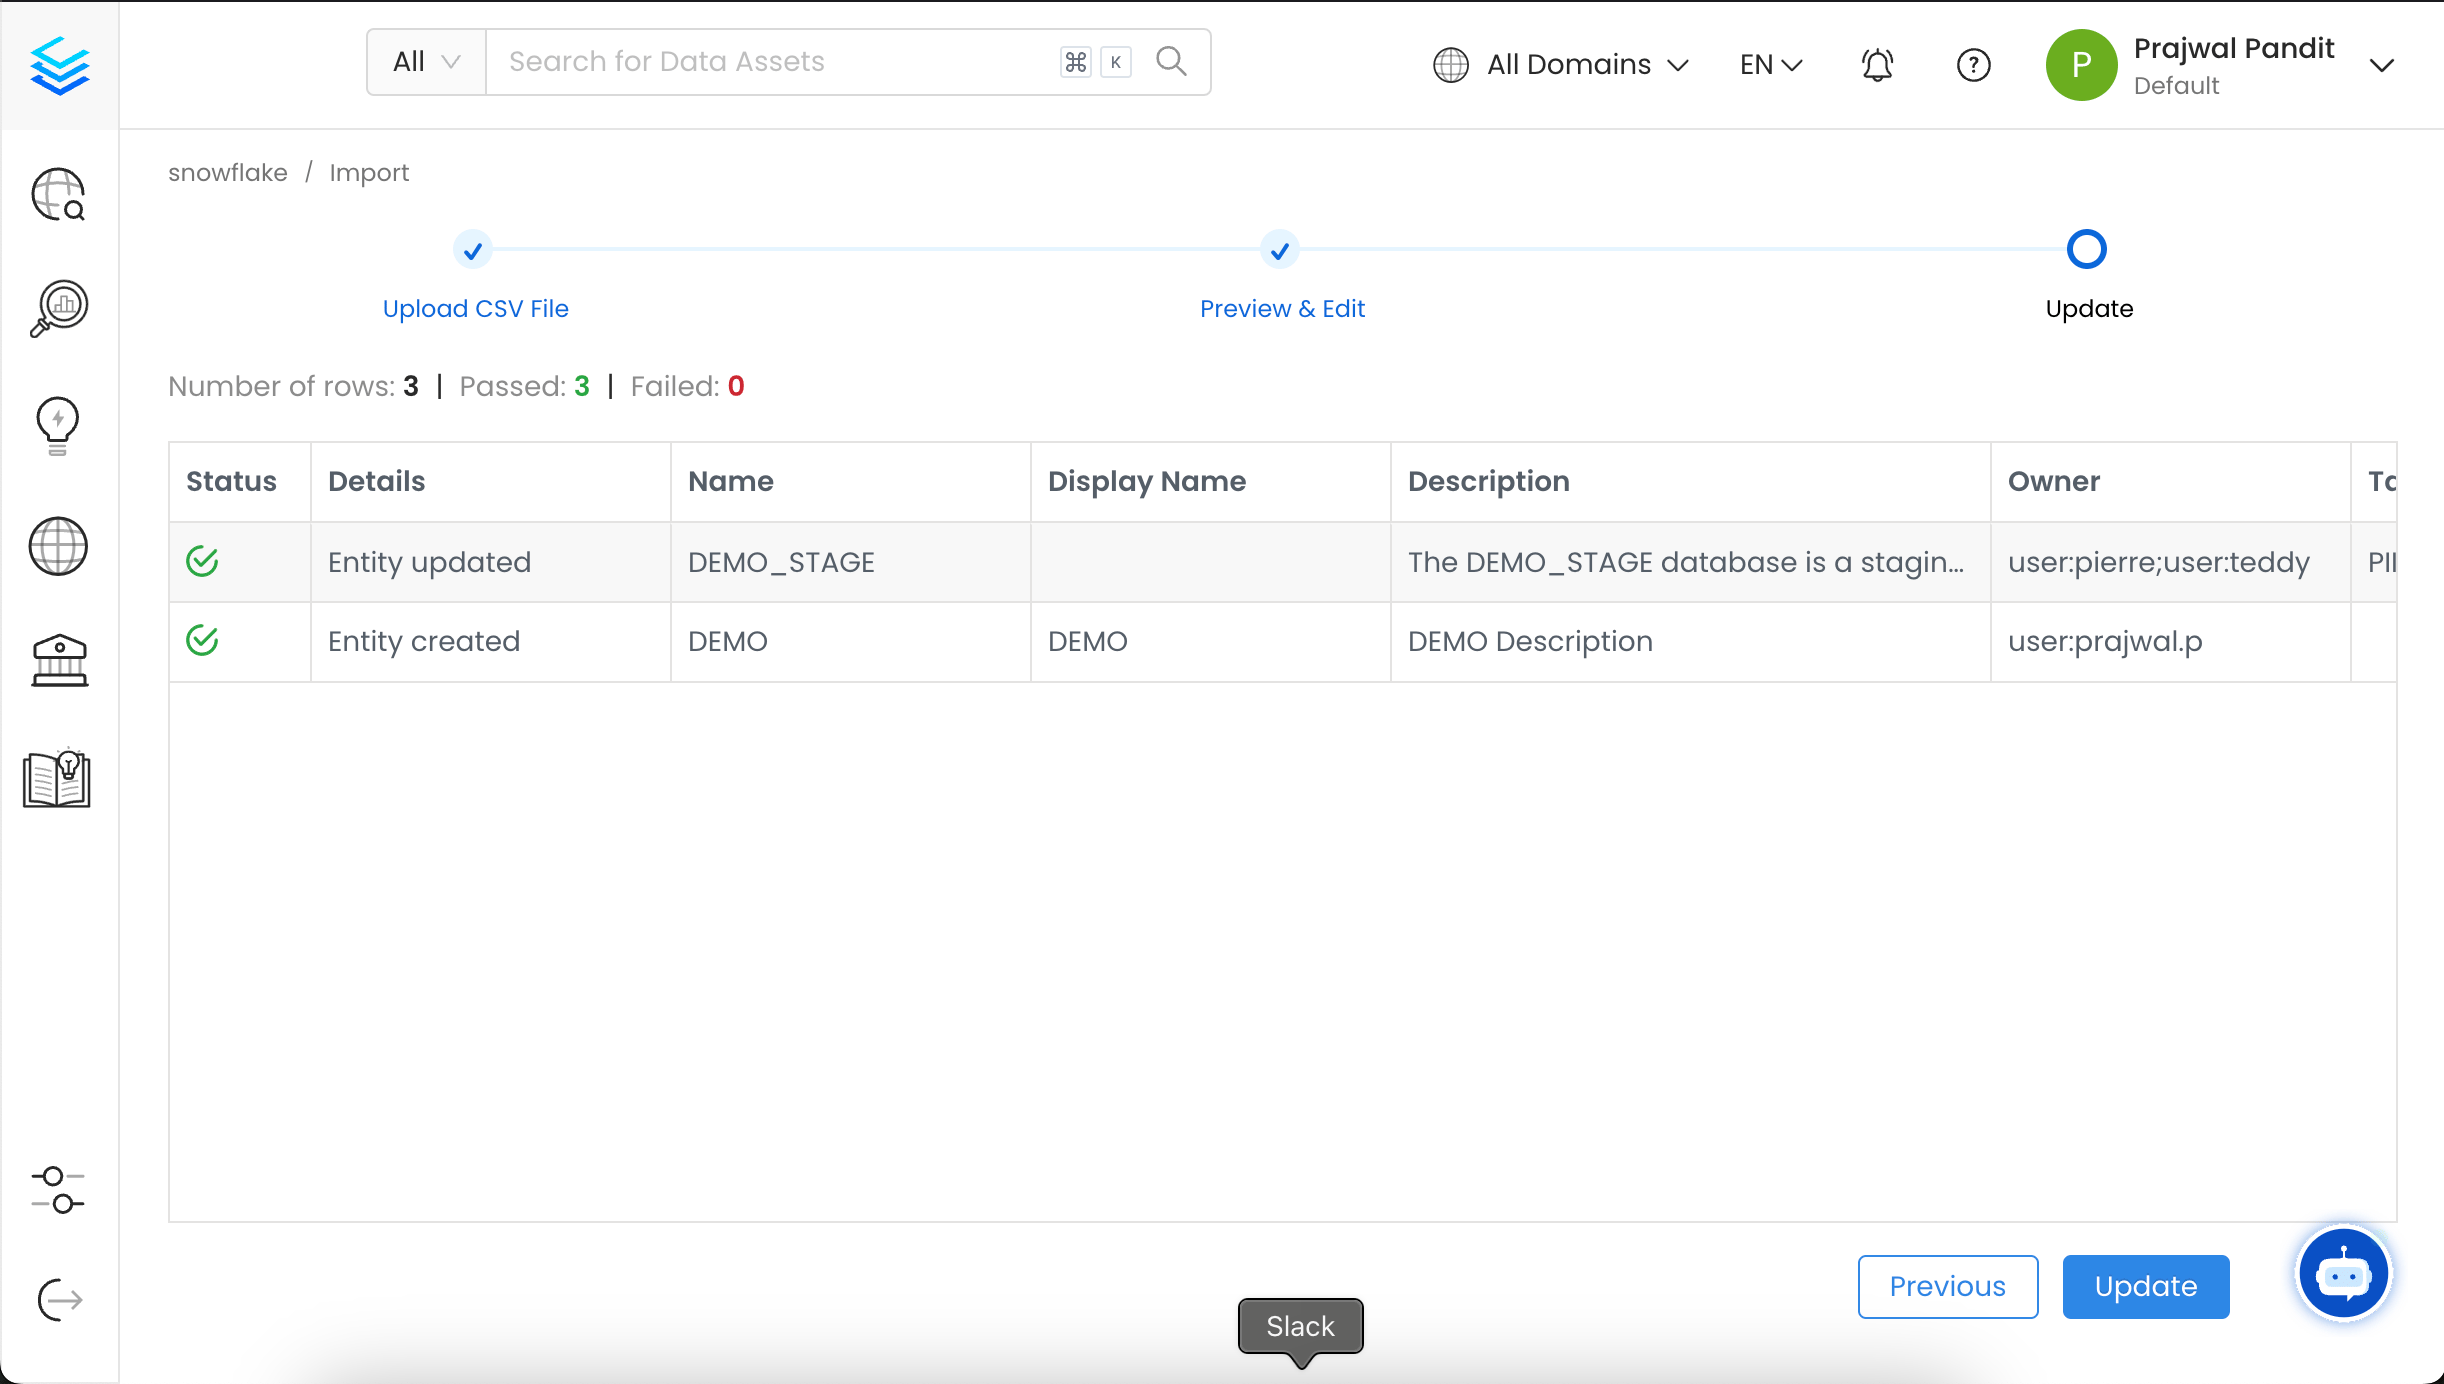
 6. Validate the updated Data Assets and confirm the changes. A success or failure message will then be displayed based on the outcome.
 7. The Database Service has been updated successfully, and you can now view the changes in the Database Service.
 You can also import the Database Service using the API with the following endpoint:
`/api/v1/services/databaseServices/name/{name}/import`
Make sure to replace `{name}` with the Fully Qualified Name (FQN) of the Database Service.
## How to Bulk Import a Database
To import a Database:
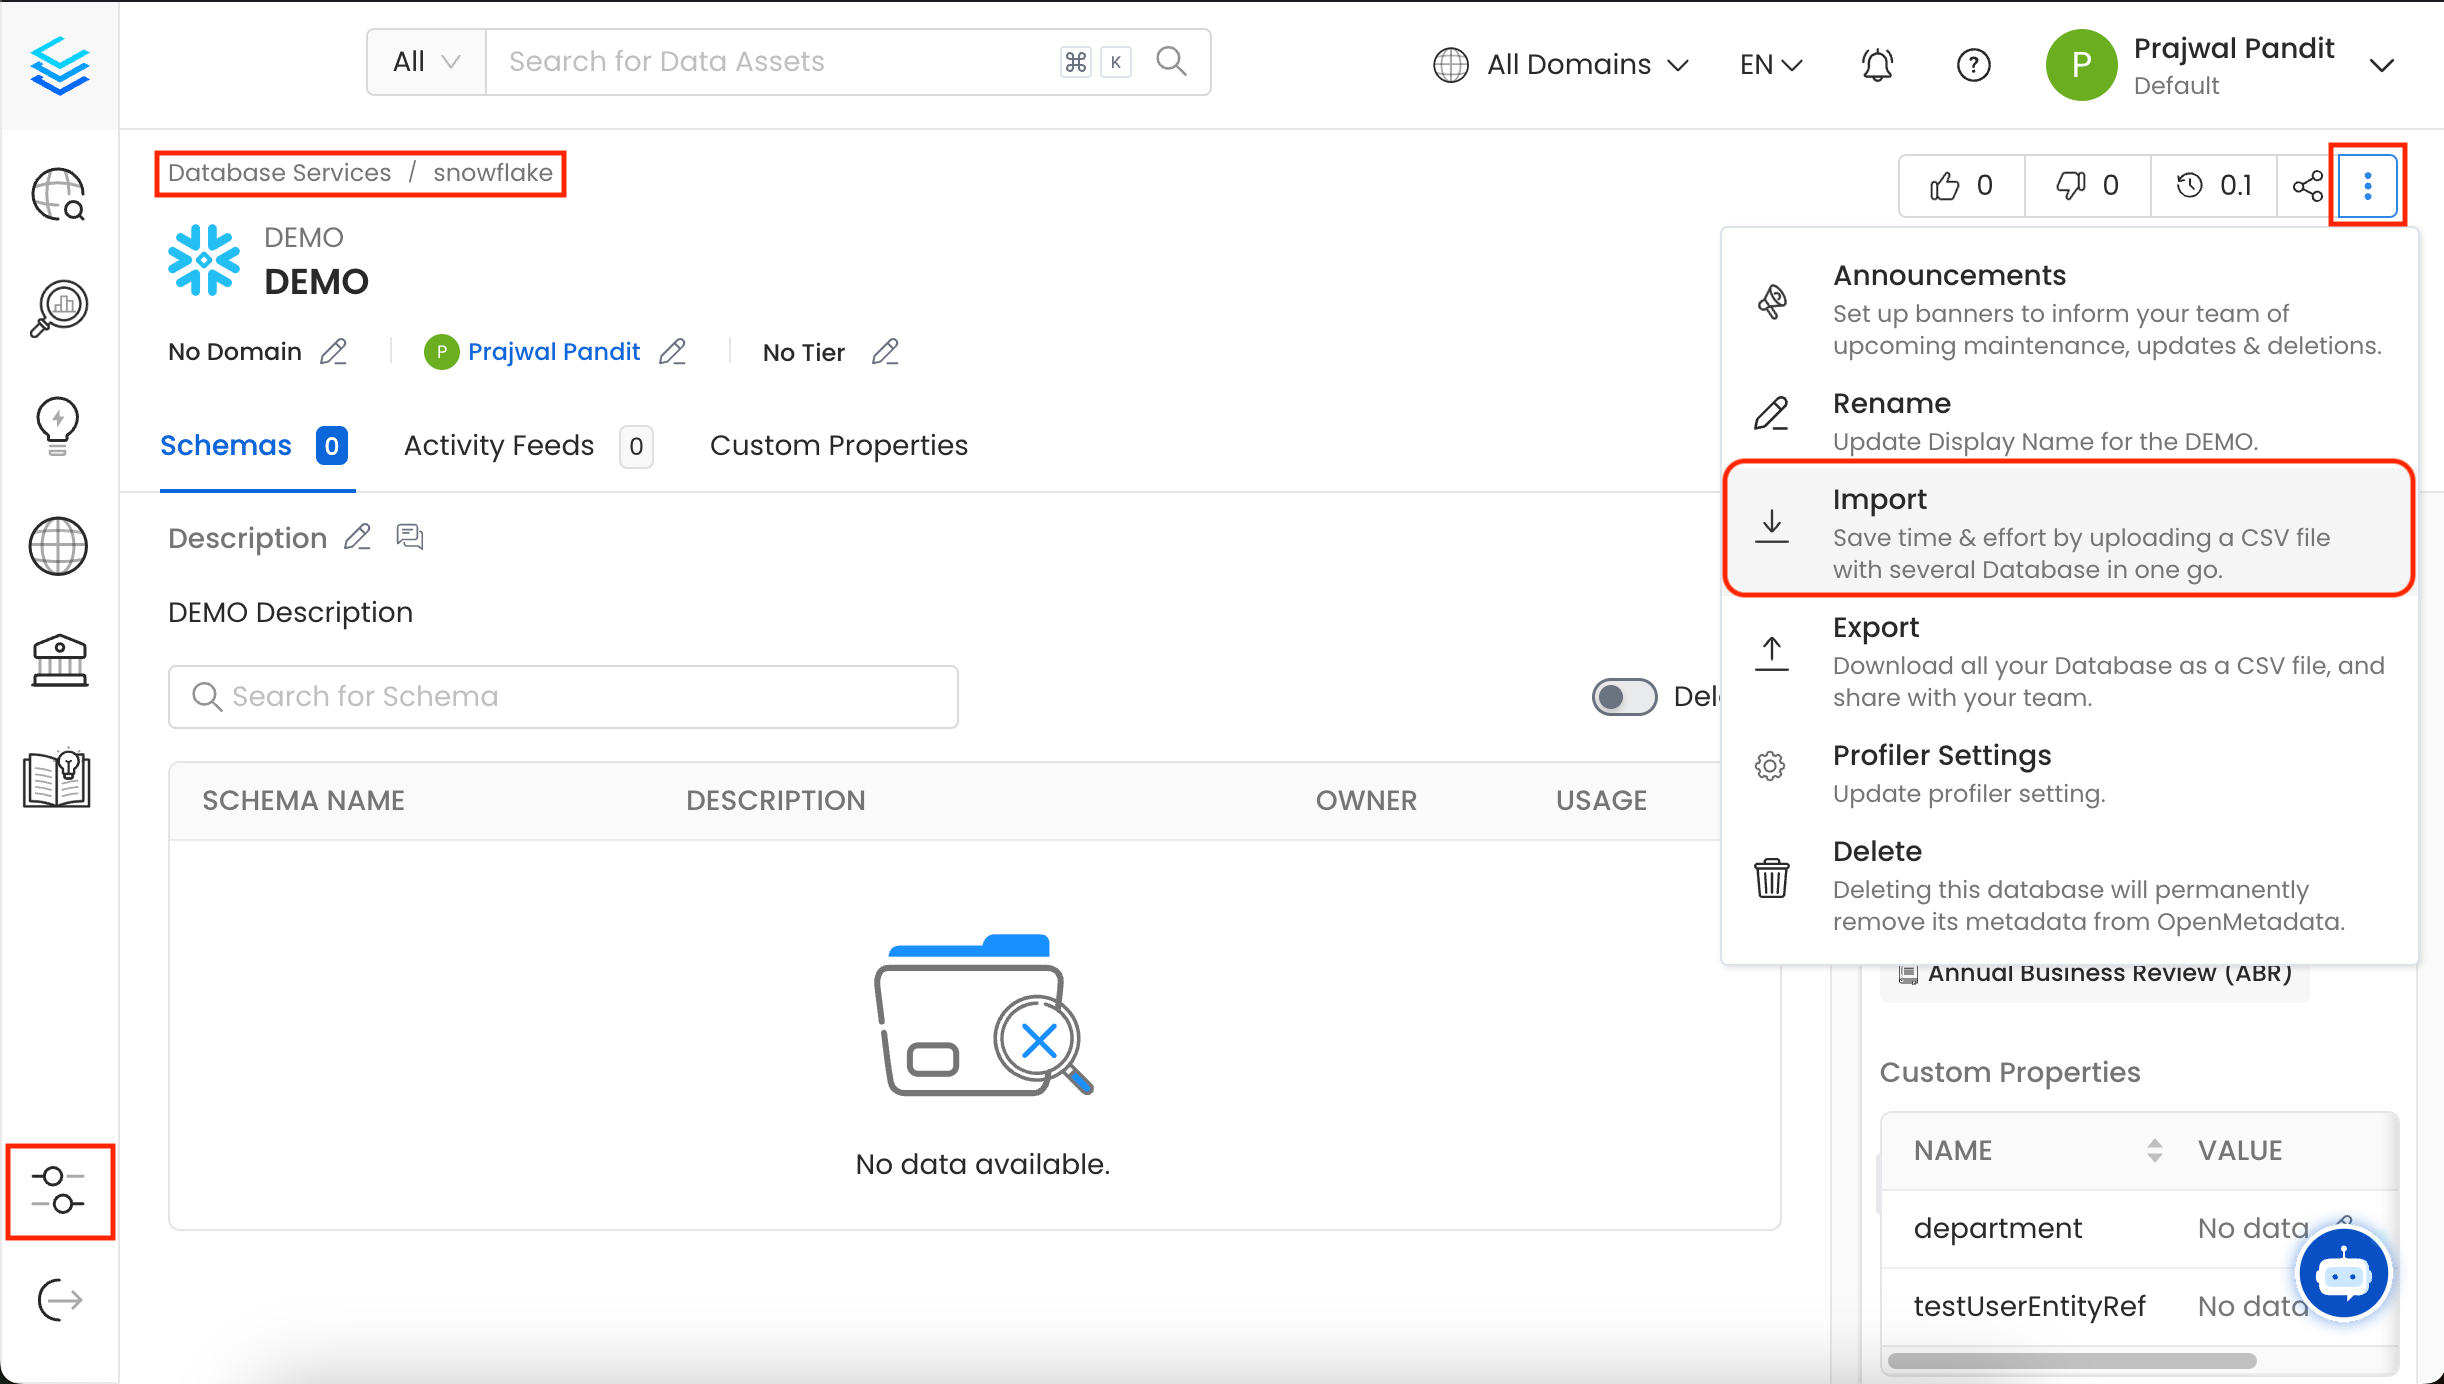
1. In this example, we are Importing the `DEMO` database under **Snowflake**.
2. Click on the **⋮** icon and select **Import** to upload the Database CSV file.
You can also import the Database Service using the API with the following endpoint:
`/api/v1/services/databaseServices/name/{name}/import`
Make sure to replace `{name}` with the Fully Qualified Name (FQN) of the Database Service.
## How to Bulk Import a Database
To import a Database:
1. In this example, we are Importing the `DEMO` database under **Snowflake**.
2. Click on the **⋮** icon and select **Import** to upload the Database CSV file.
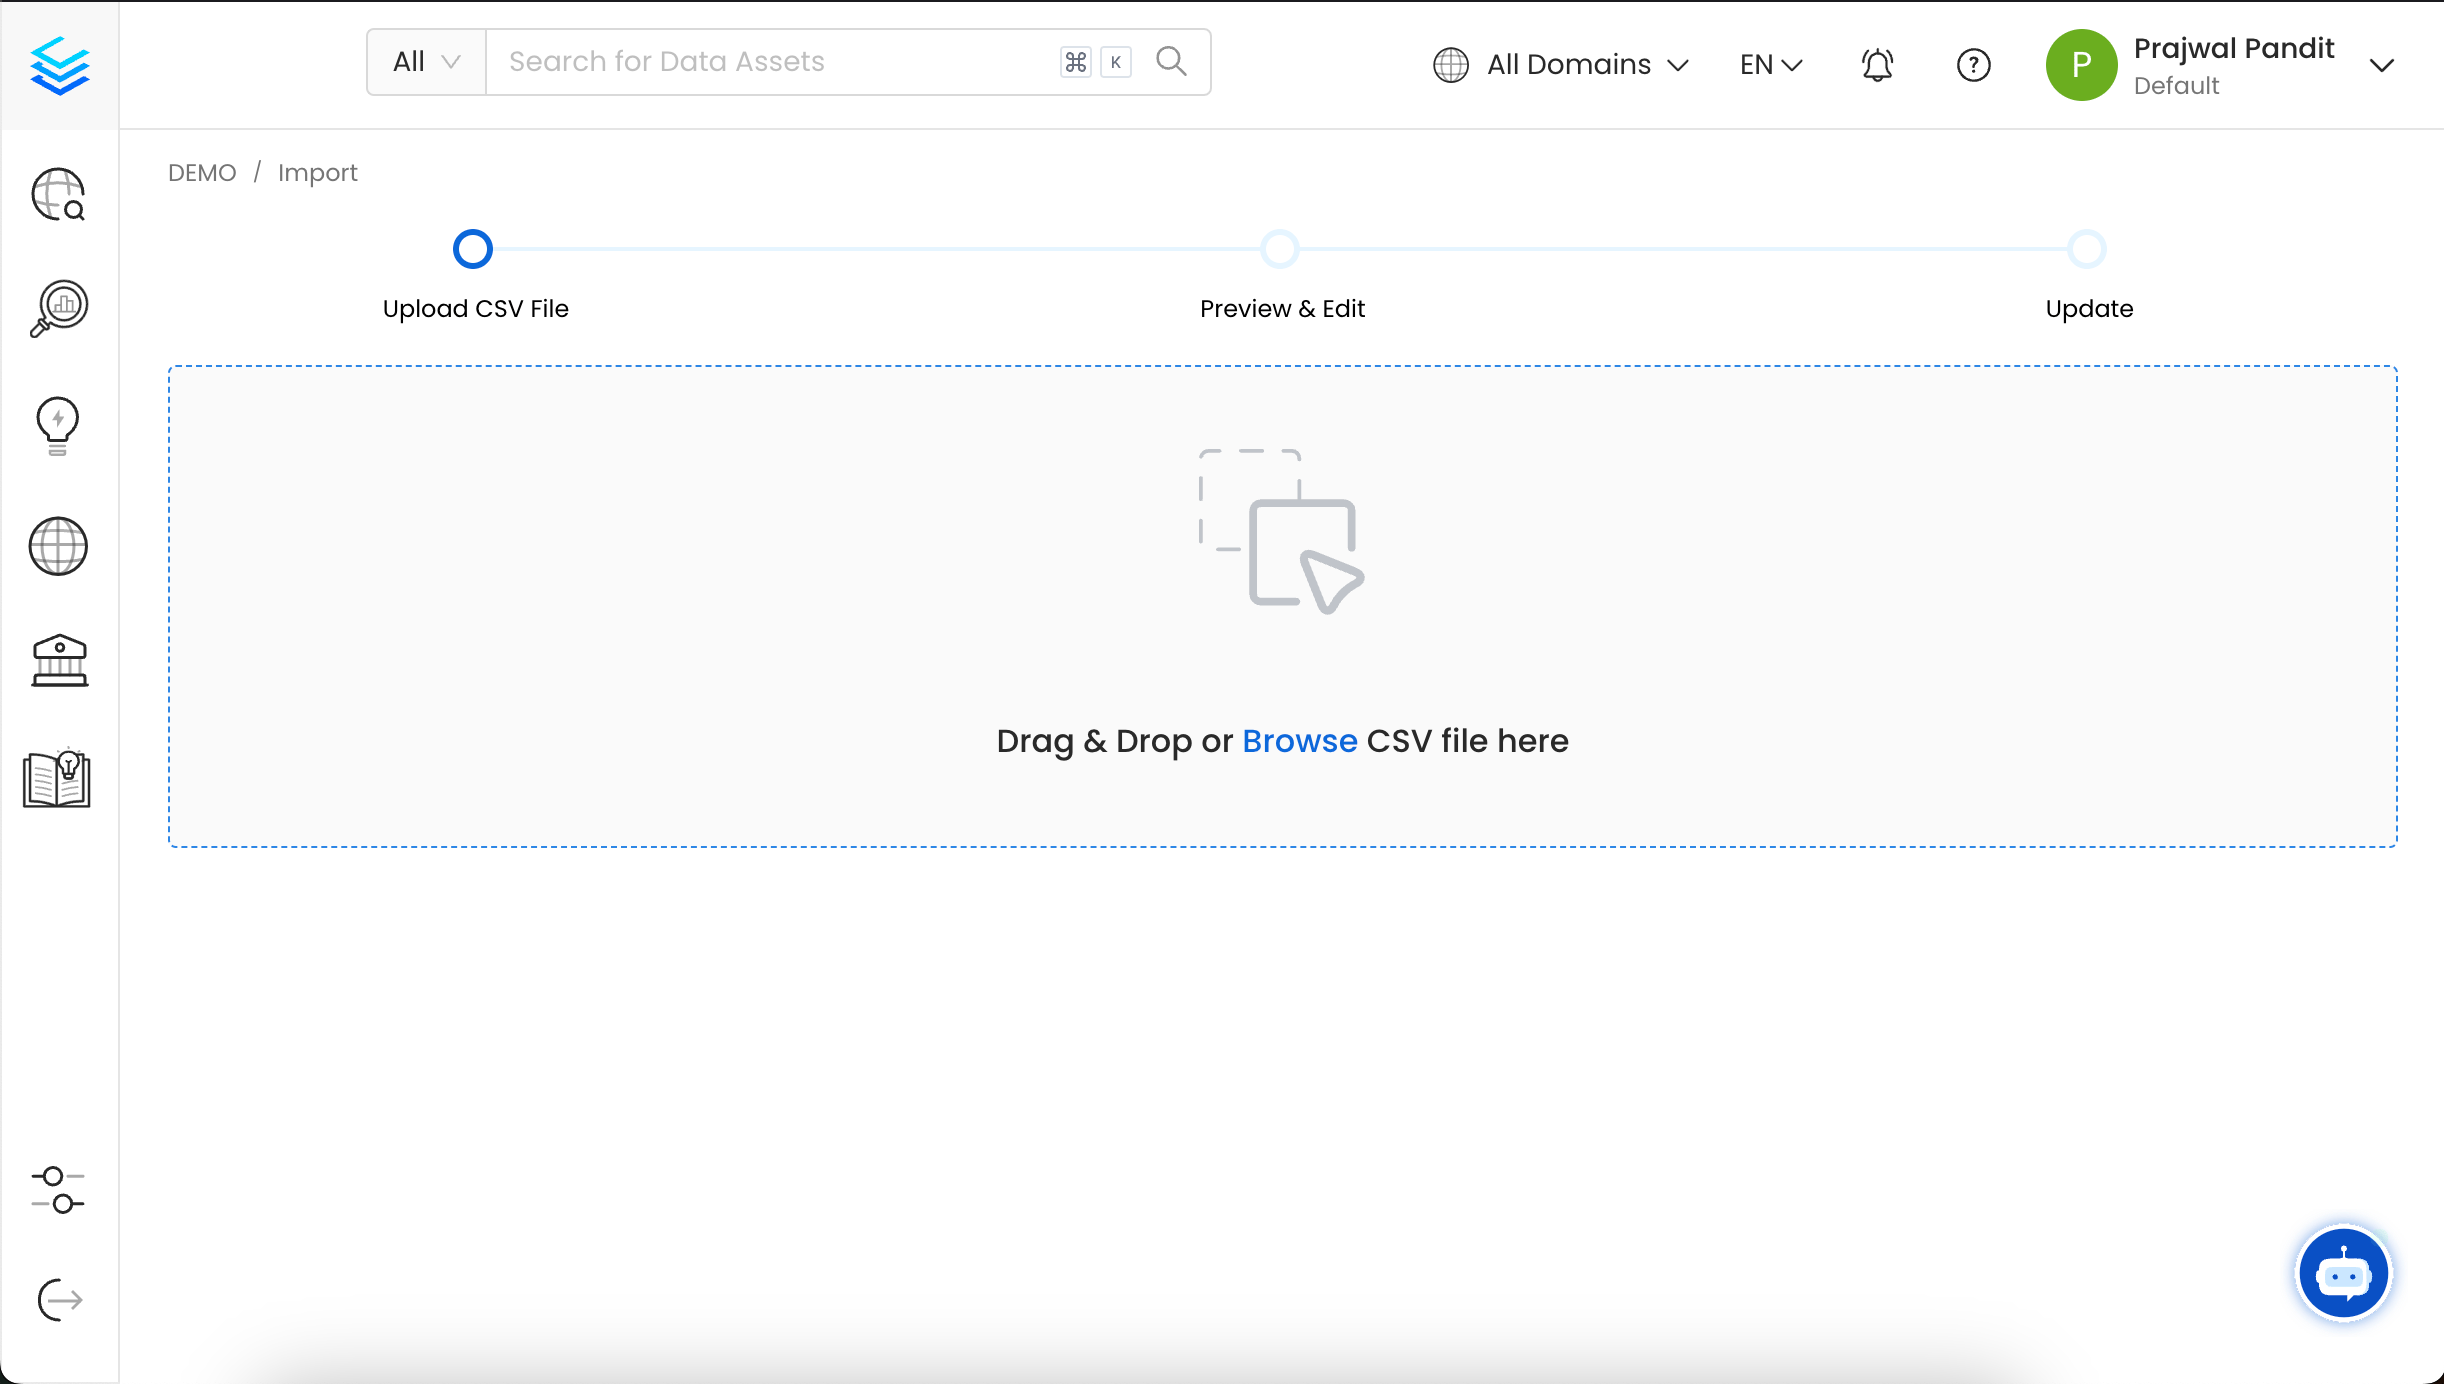
 3. Upload/Drop the Database CSV file that you want to import. Alternatively, you can `export` an existing Database CSV as a template, make the necessary edits, and then upload the updated file.
Once you have the template, you can fill in the following details:
* **name** (required): This field contains the name of the database.
* **fullyQualifiedName** (required): This field contains the fully qualified name of the database.
* **displayName**: This field holds the display name of the database.
* **description**: This field contains a detailed description or information about the database.
* **owner**: This field specifies the owner of the database.
* **tags**: This field contains the tags associated with the database.
* **glossaryTerms**: This field holds the glossary terms linked to the database.
* **tiers**: This field defines the tiers associated with the database.
* **sourceUrl**: This field contains the Source URL of the data asset. Example for the Snowflake database: `https://app.snowflake.com//#/data/databases/DEMO/`
* **retentionPeriod**: This field contains the retention period of the data asset. Period is expressed as a duration in ISO 8601 format in UTC. Example - `P23DT23H`.
* **domain**: This field contains the domain assigned to the data asset.
3. Upload/Drop the Database CSV file that you want to import. Alternatively, you can `export` an existing Database CSV as a template, make the necessary edits, and then upload the updated file.
Once you have the template, you can fill in the following details:
* **name** (required): This field contains the name of the database.
* **fullyQualifiedName** (required): This field contains the fully qualified name of the database.
* **displayName**: This field holds the display name of the database.
* **description**: This field contains a detailed description or information about the database.
* **owner**: This field specifies the owner of the database.
* **tags**: This field contains the tags associated with the database.
* **glossaryTerms**: This field holds the glossary terms linked to the database.
* **tiers**: This field defines the tiers associated with the database.
* **sourceUrl**: This field contains the Source URL of the data asset. Example for the Snowflake database: `https://app.snowflake.com//#/data/databases/DEMO/`
* **retentionPeriod**: This field contains the retention period of the data asset. Period is expressed as a duration in ISO 8601 format in UTC. Example - `P23DT23H`.
* **domain**: This field contains the domain assigned to the data asset.
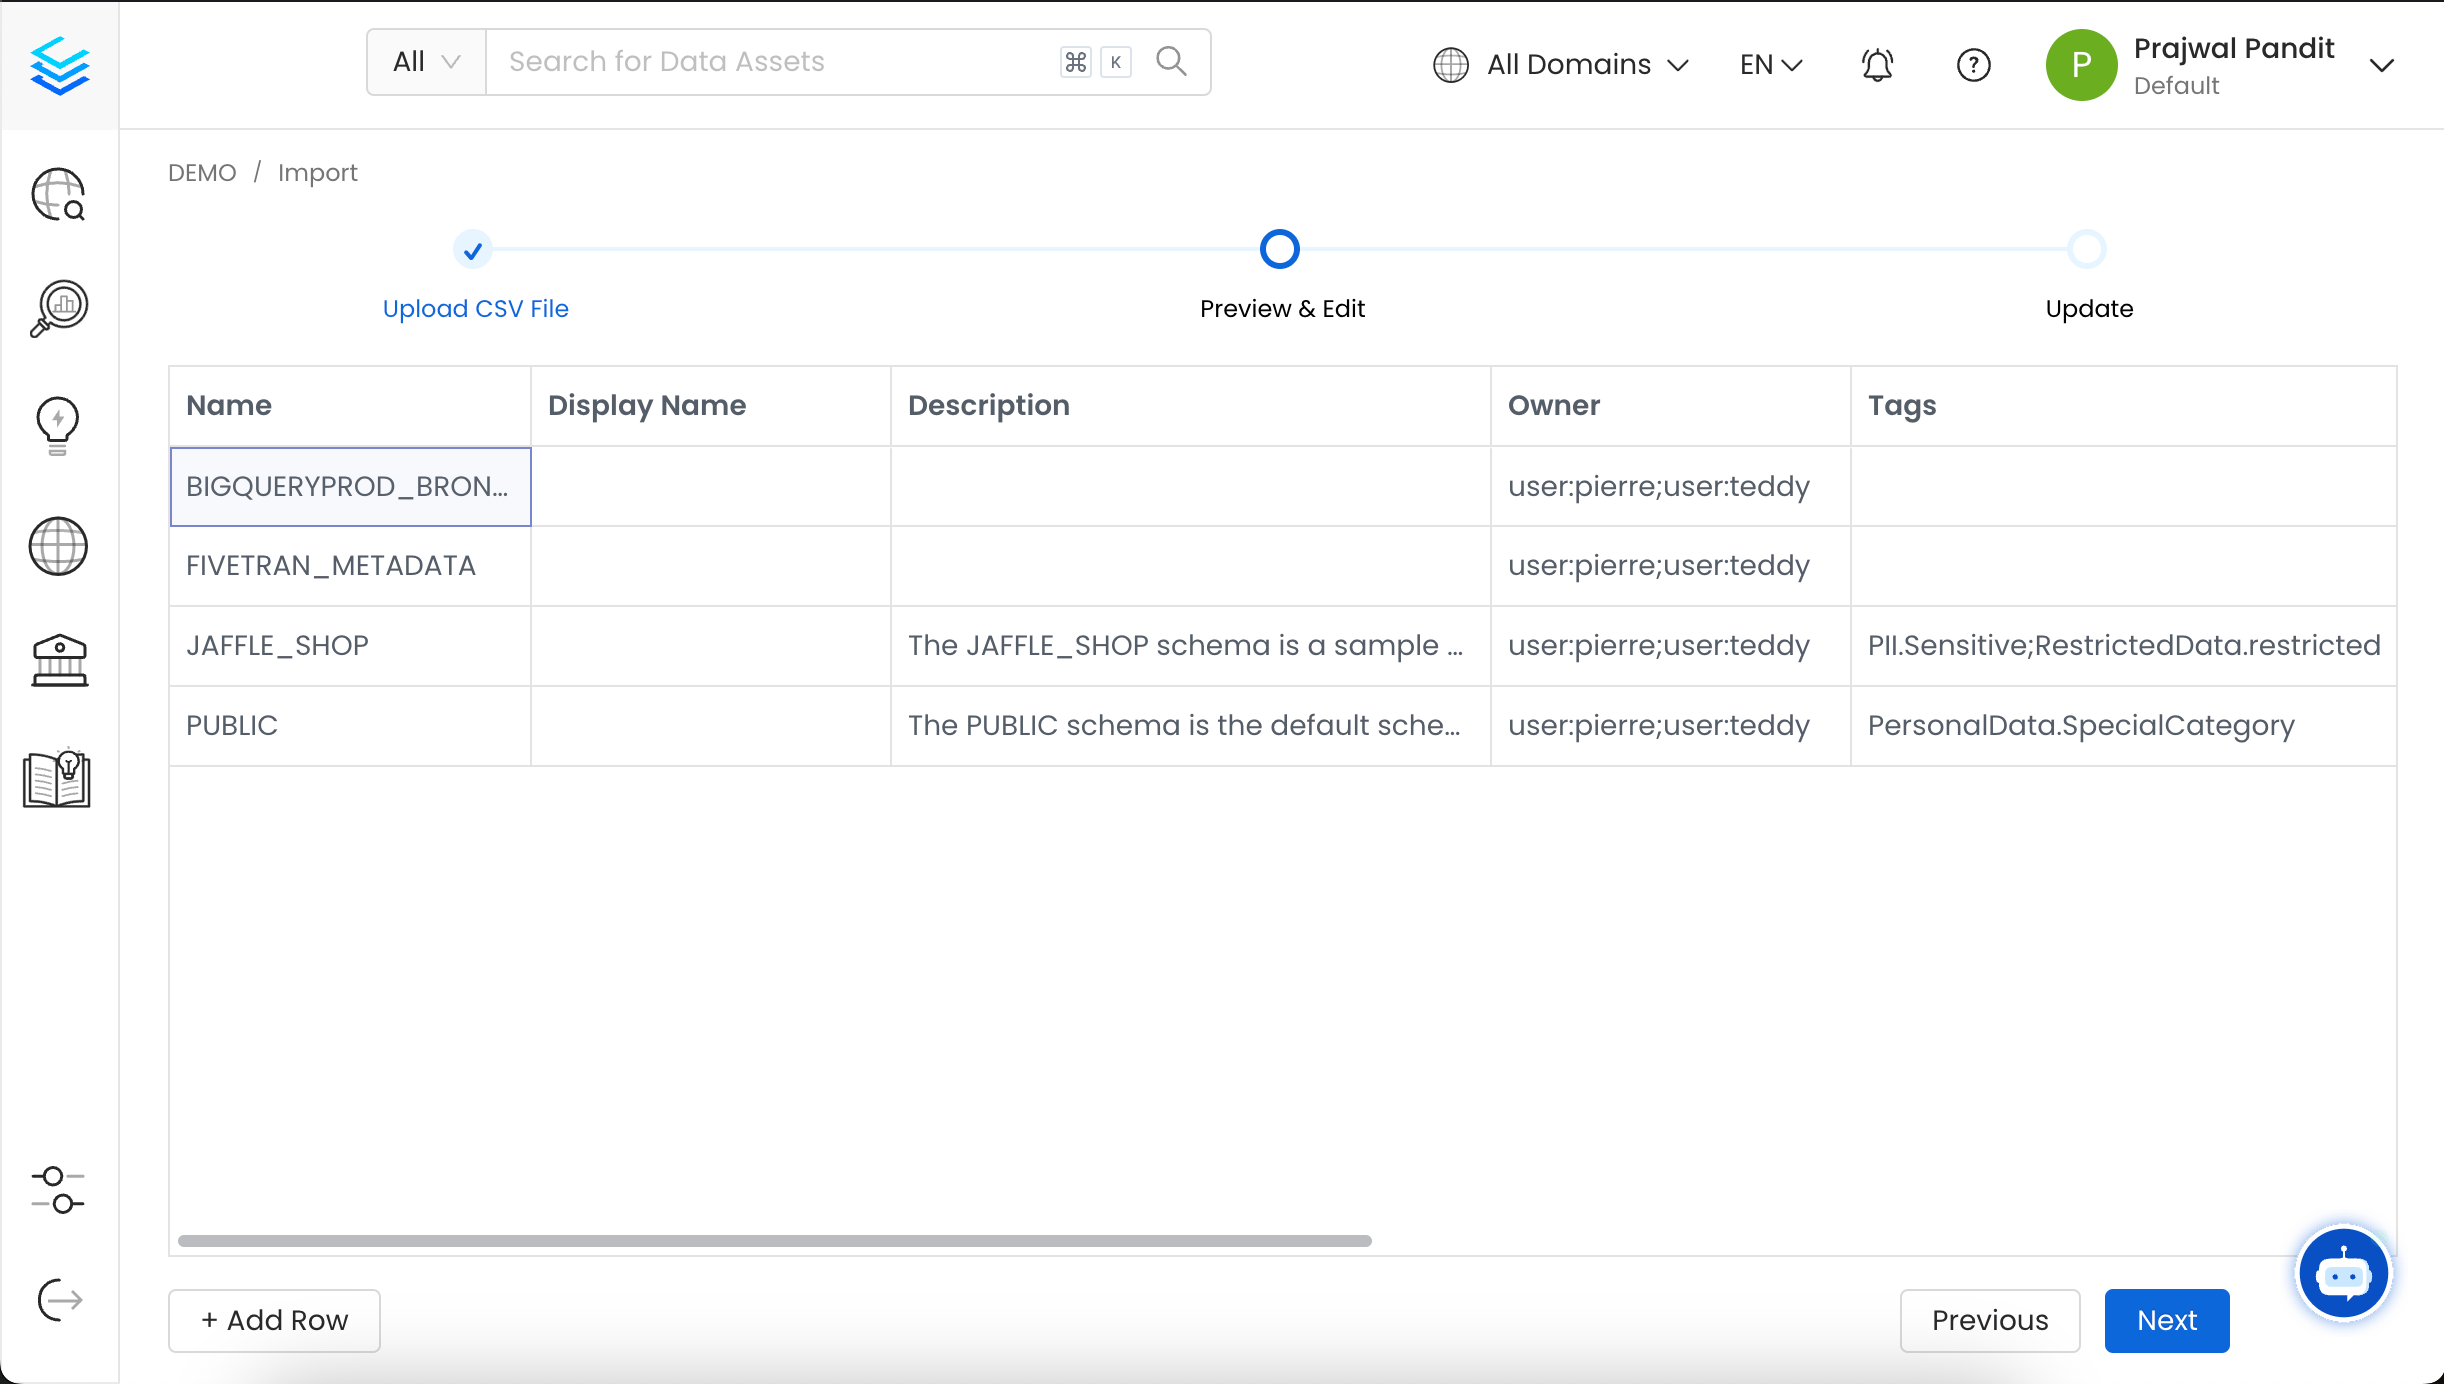
 4. You can now preview the uploaded Database CSV file and add or modify data using the inline editor.
 5. Validate the updated Data Assets and confirm the changes. A success or failure message will then be displayed based on the outcome.
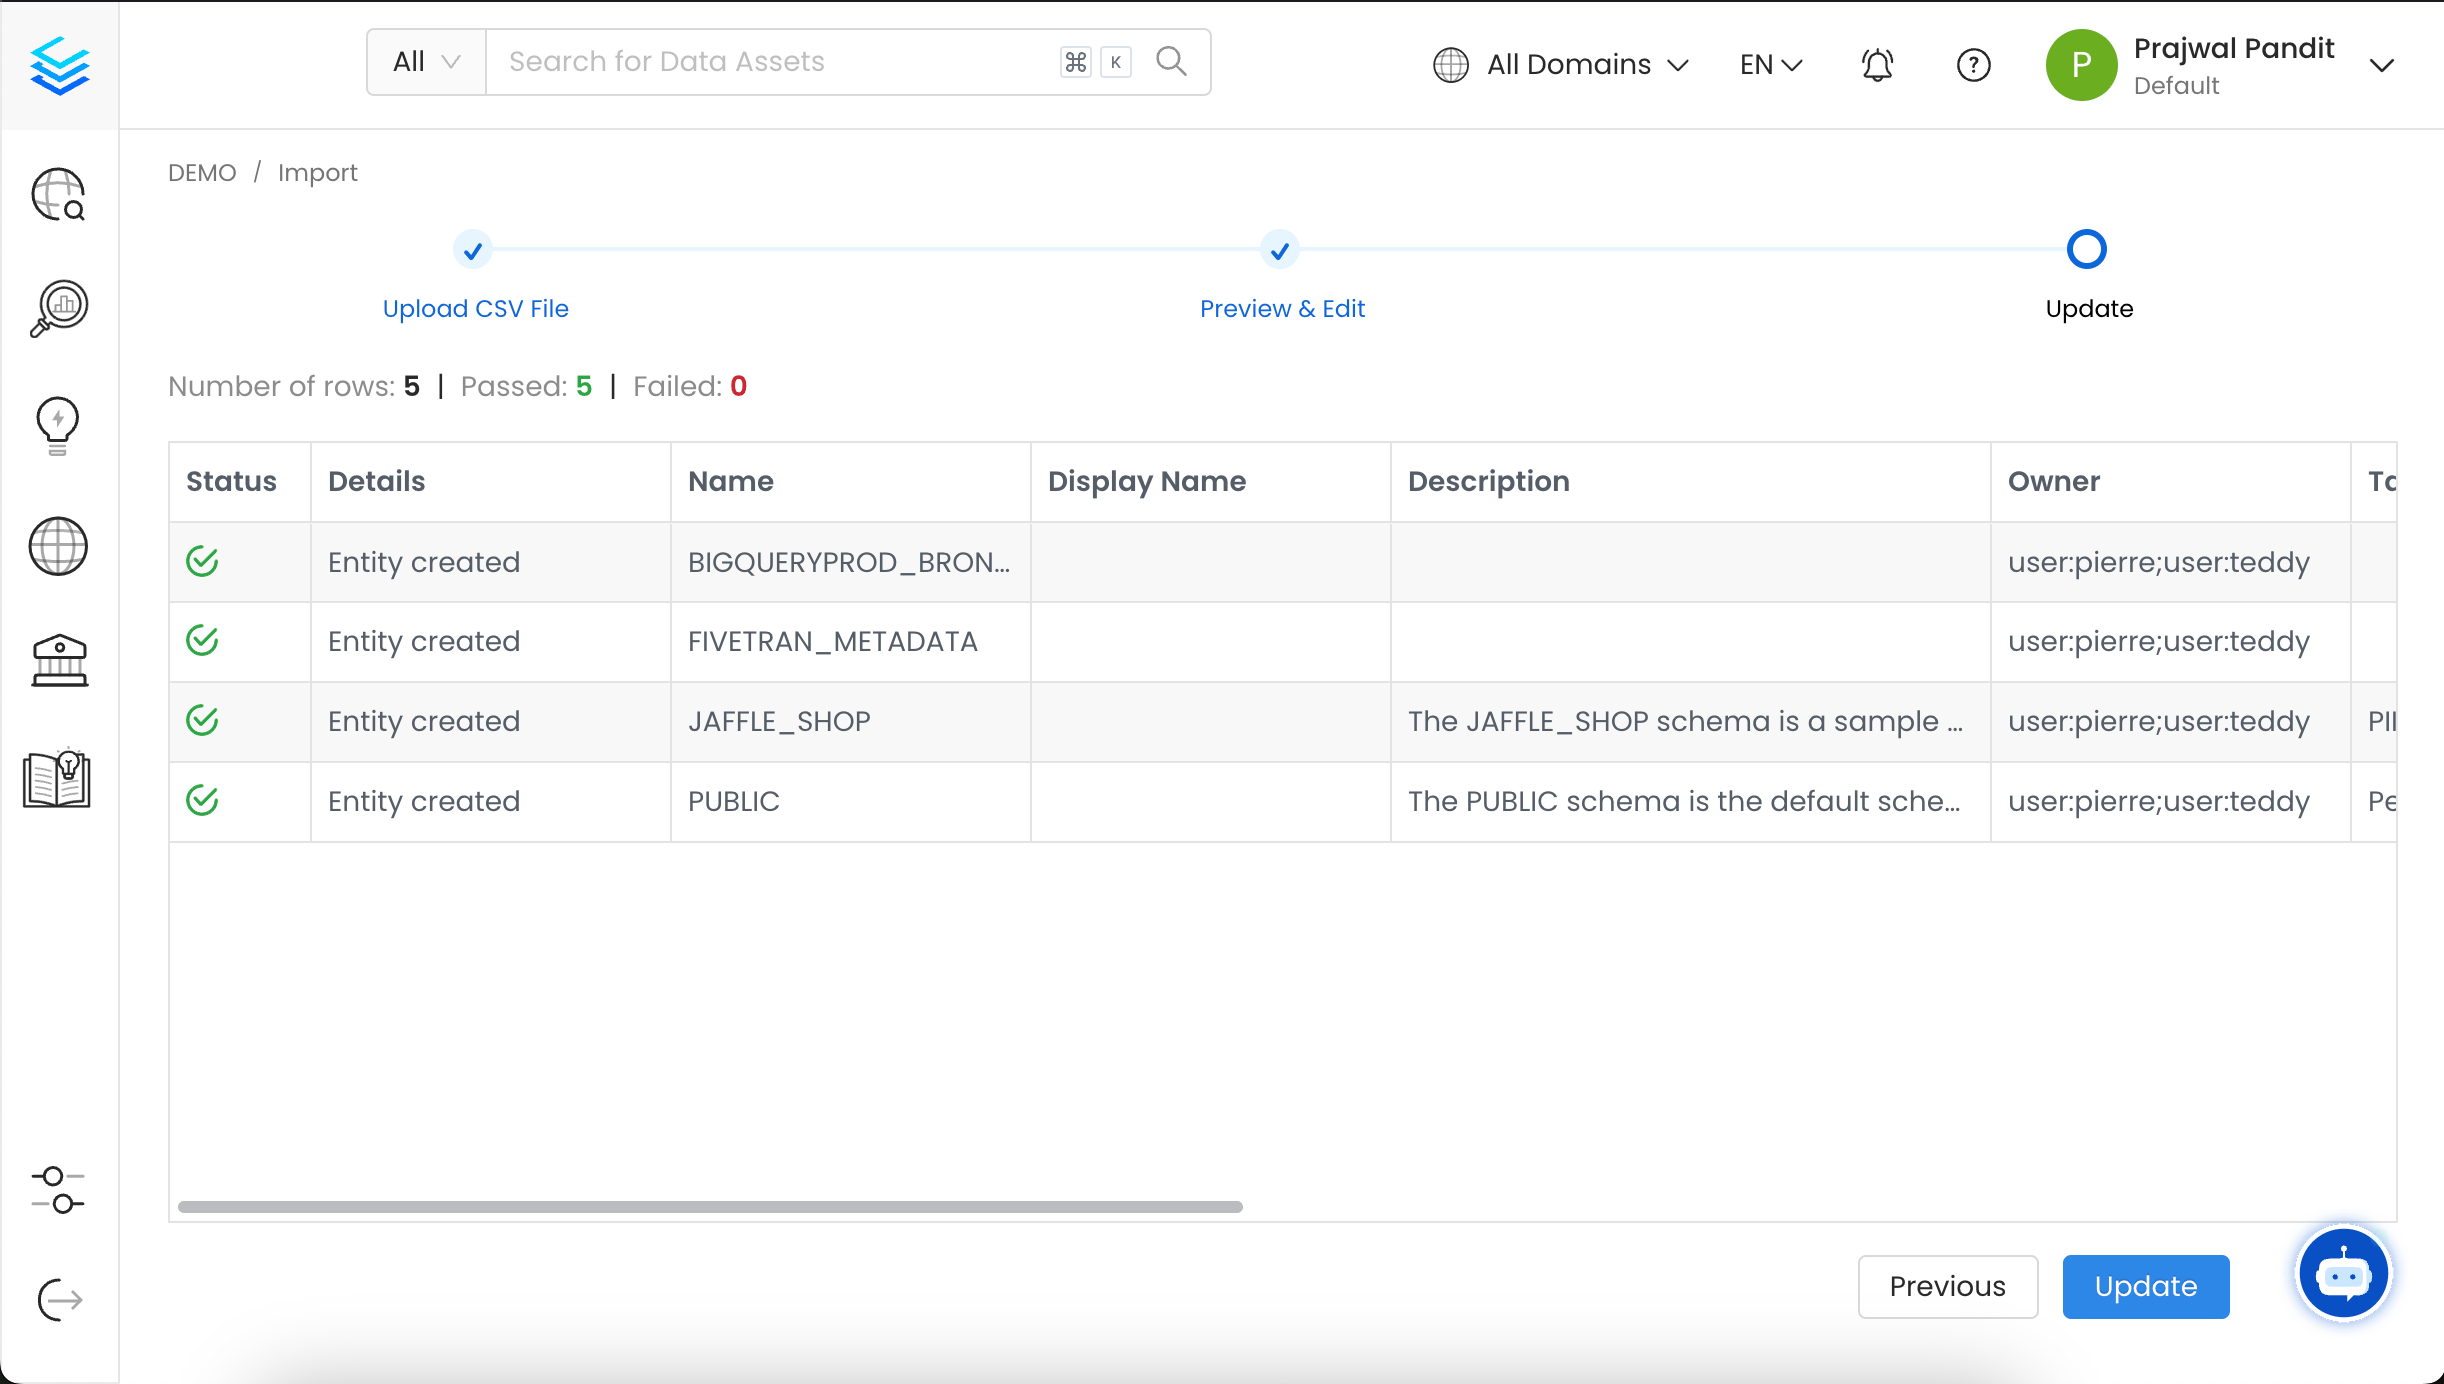 6. The Database has been updated successfully, and you can now view the changes in the Database.
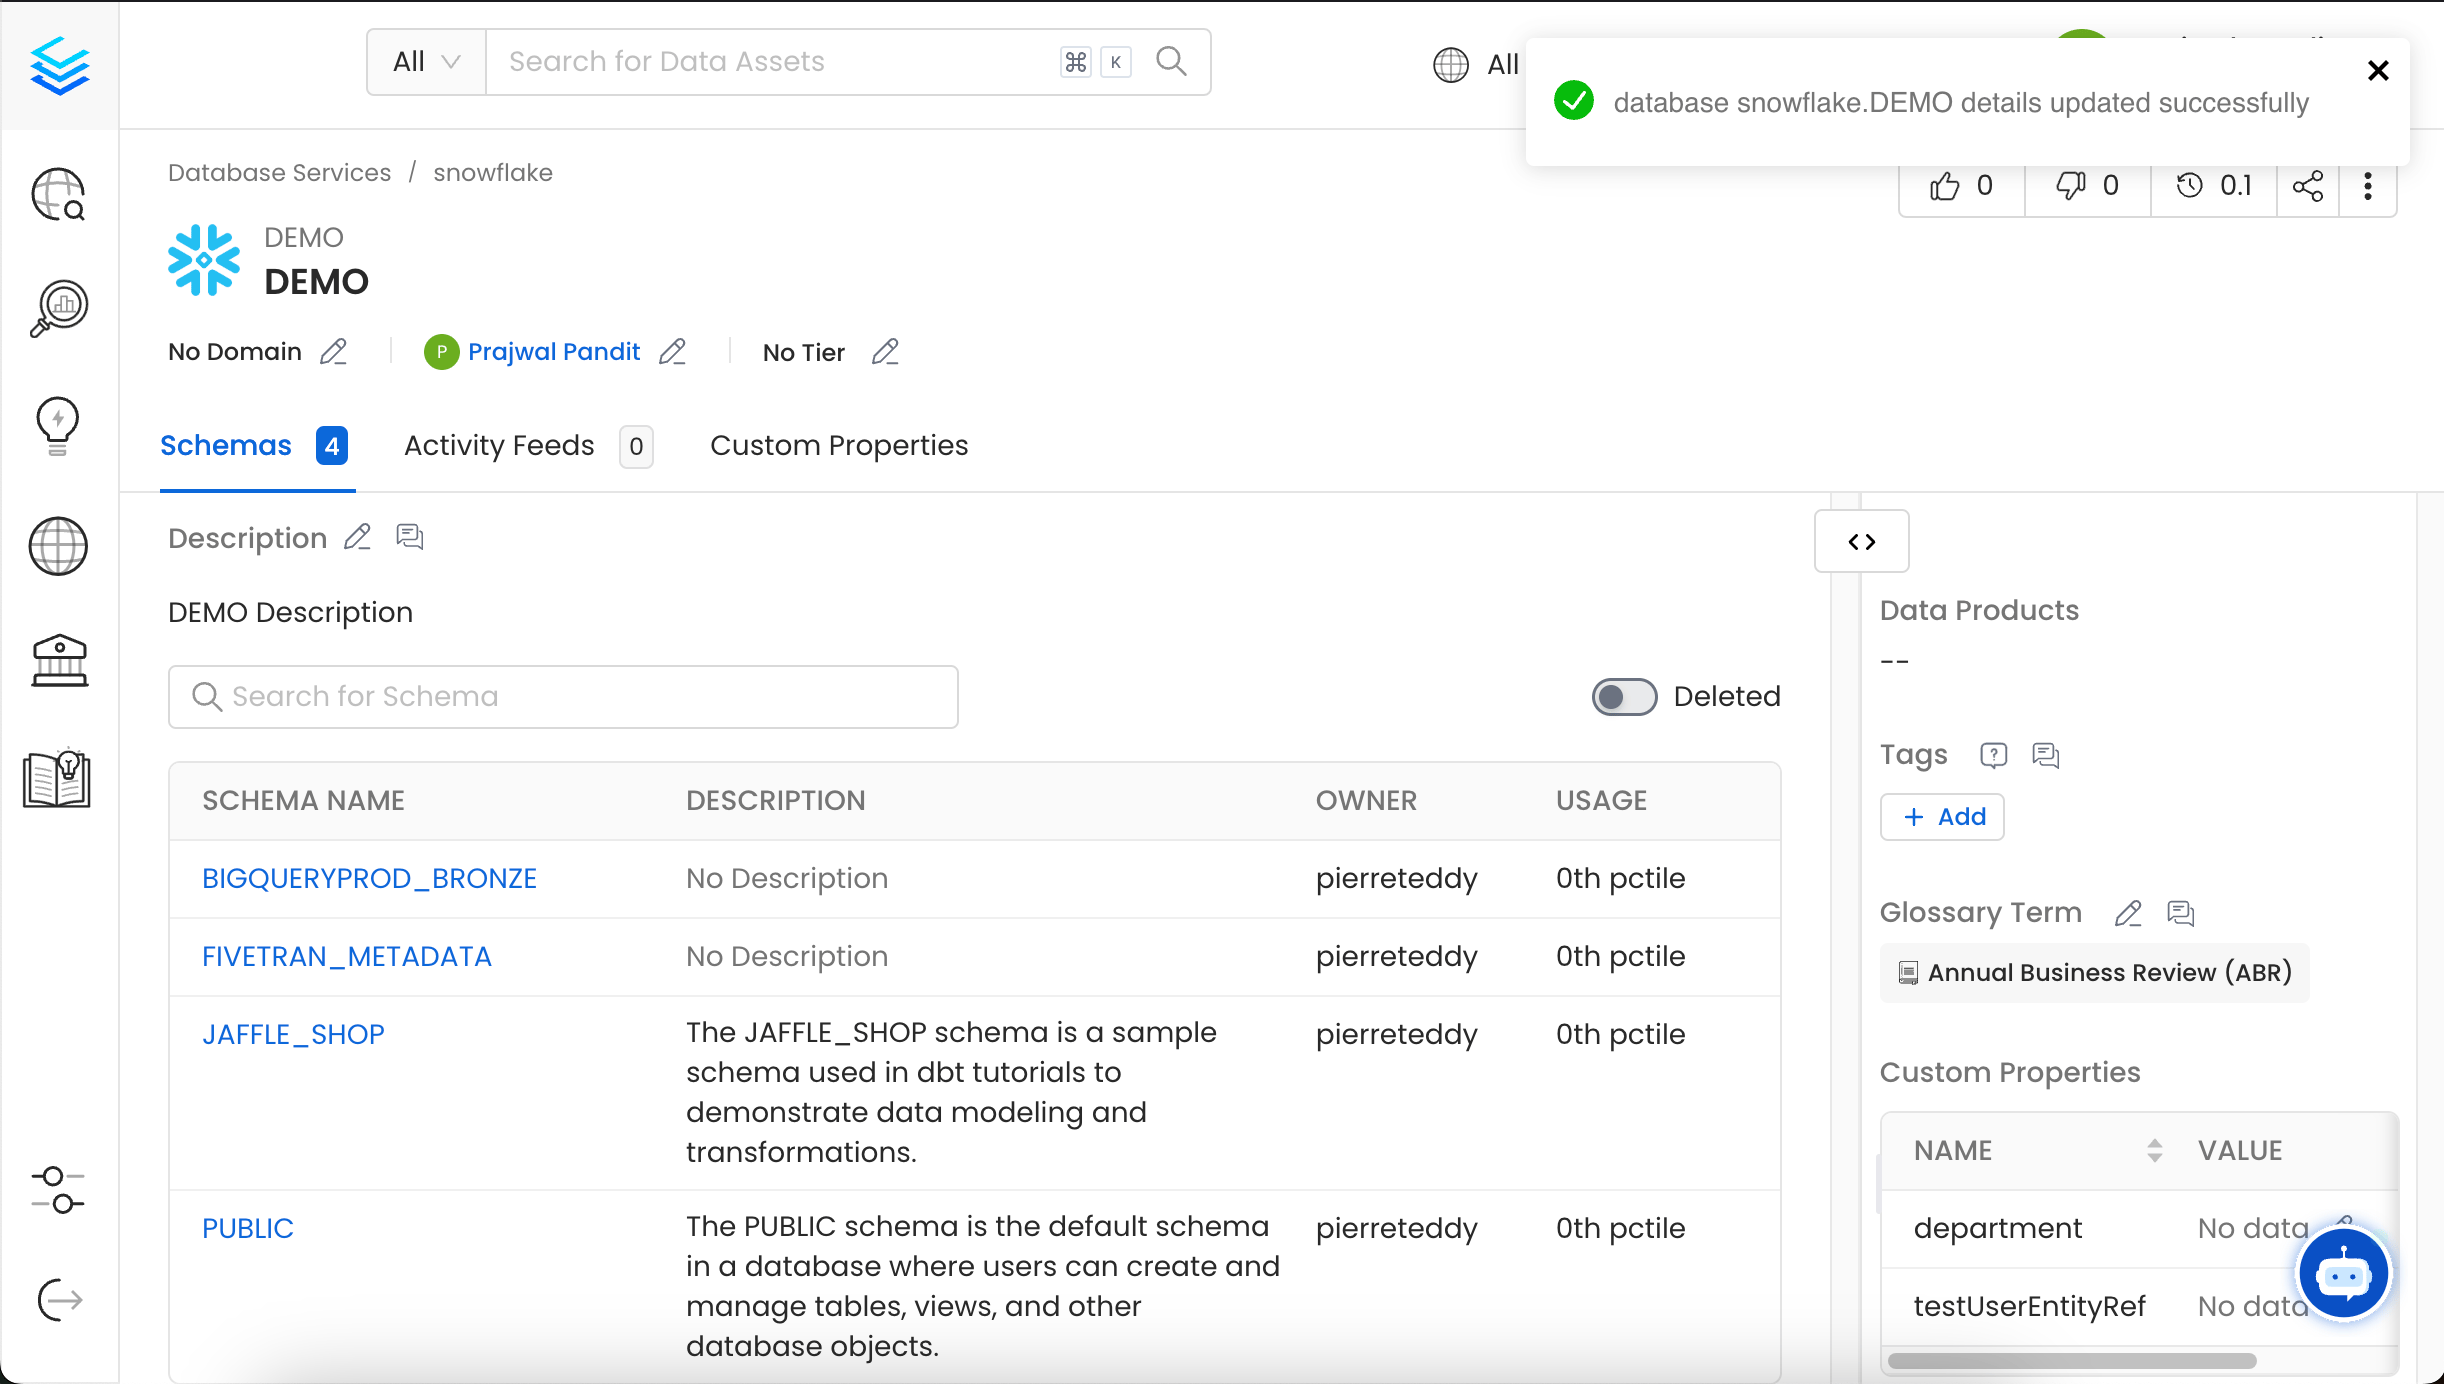 You can also import the Database using the API with the following endpoint:
`/api/v1/databases/name/{name}/import`
Make sure to replace `{name}` with the Fully Qualified Name (FQN) of the Database.
## How to Bulk Import a Database Schema
To import a Database Schema:
1. In this example, we are importing the `JAFFLE_SHOP` schema under **Snowflake > DEMO**.
2. Click on the **⋮** icon and select **Import** to upload the Database Schema CSV file.
You can also import the Database using the API with the following endpoint:
`/api/v1/databases/name/{name}/import`
Make sure to replace `{name}` with the Fully Qualified Name (FQN) of the Database.
## How to Bulk Import a Database Schema
To import a Database Schema:
1. In this example, we are importing the `JAFFLE_SHOP` schema under **Snowflake > DEMO**.
2. Click on the **⋮** icon and select **Import** to upload the Database Schema CSV file.
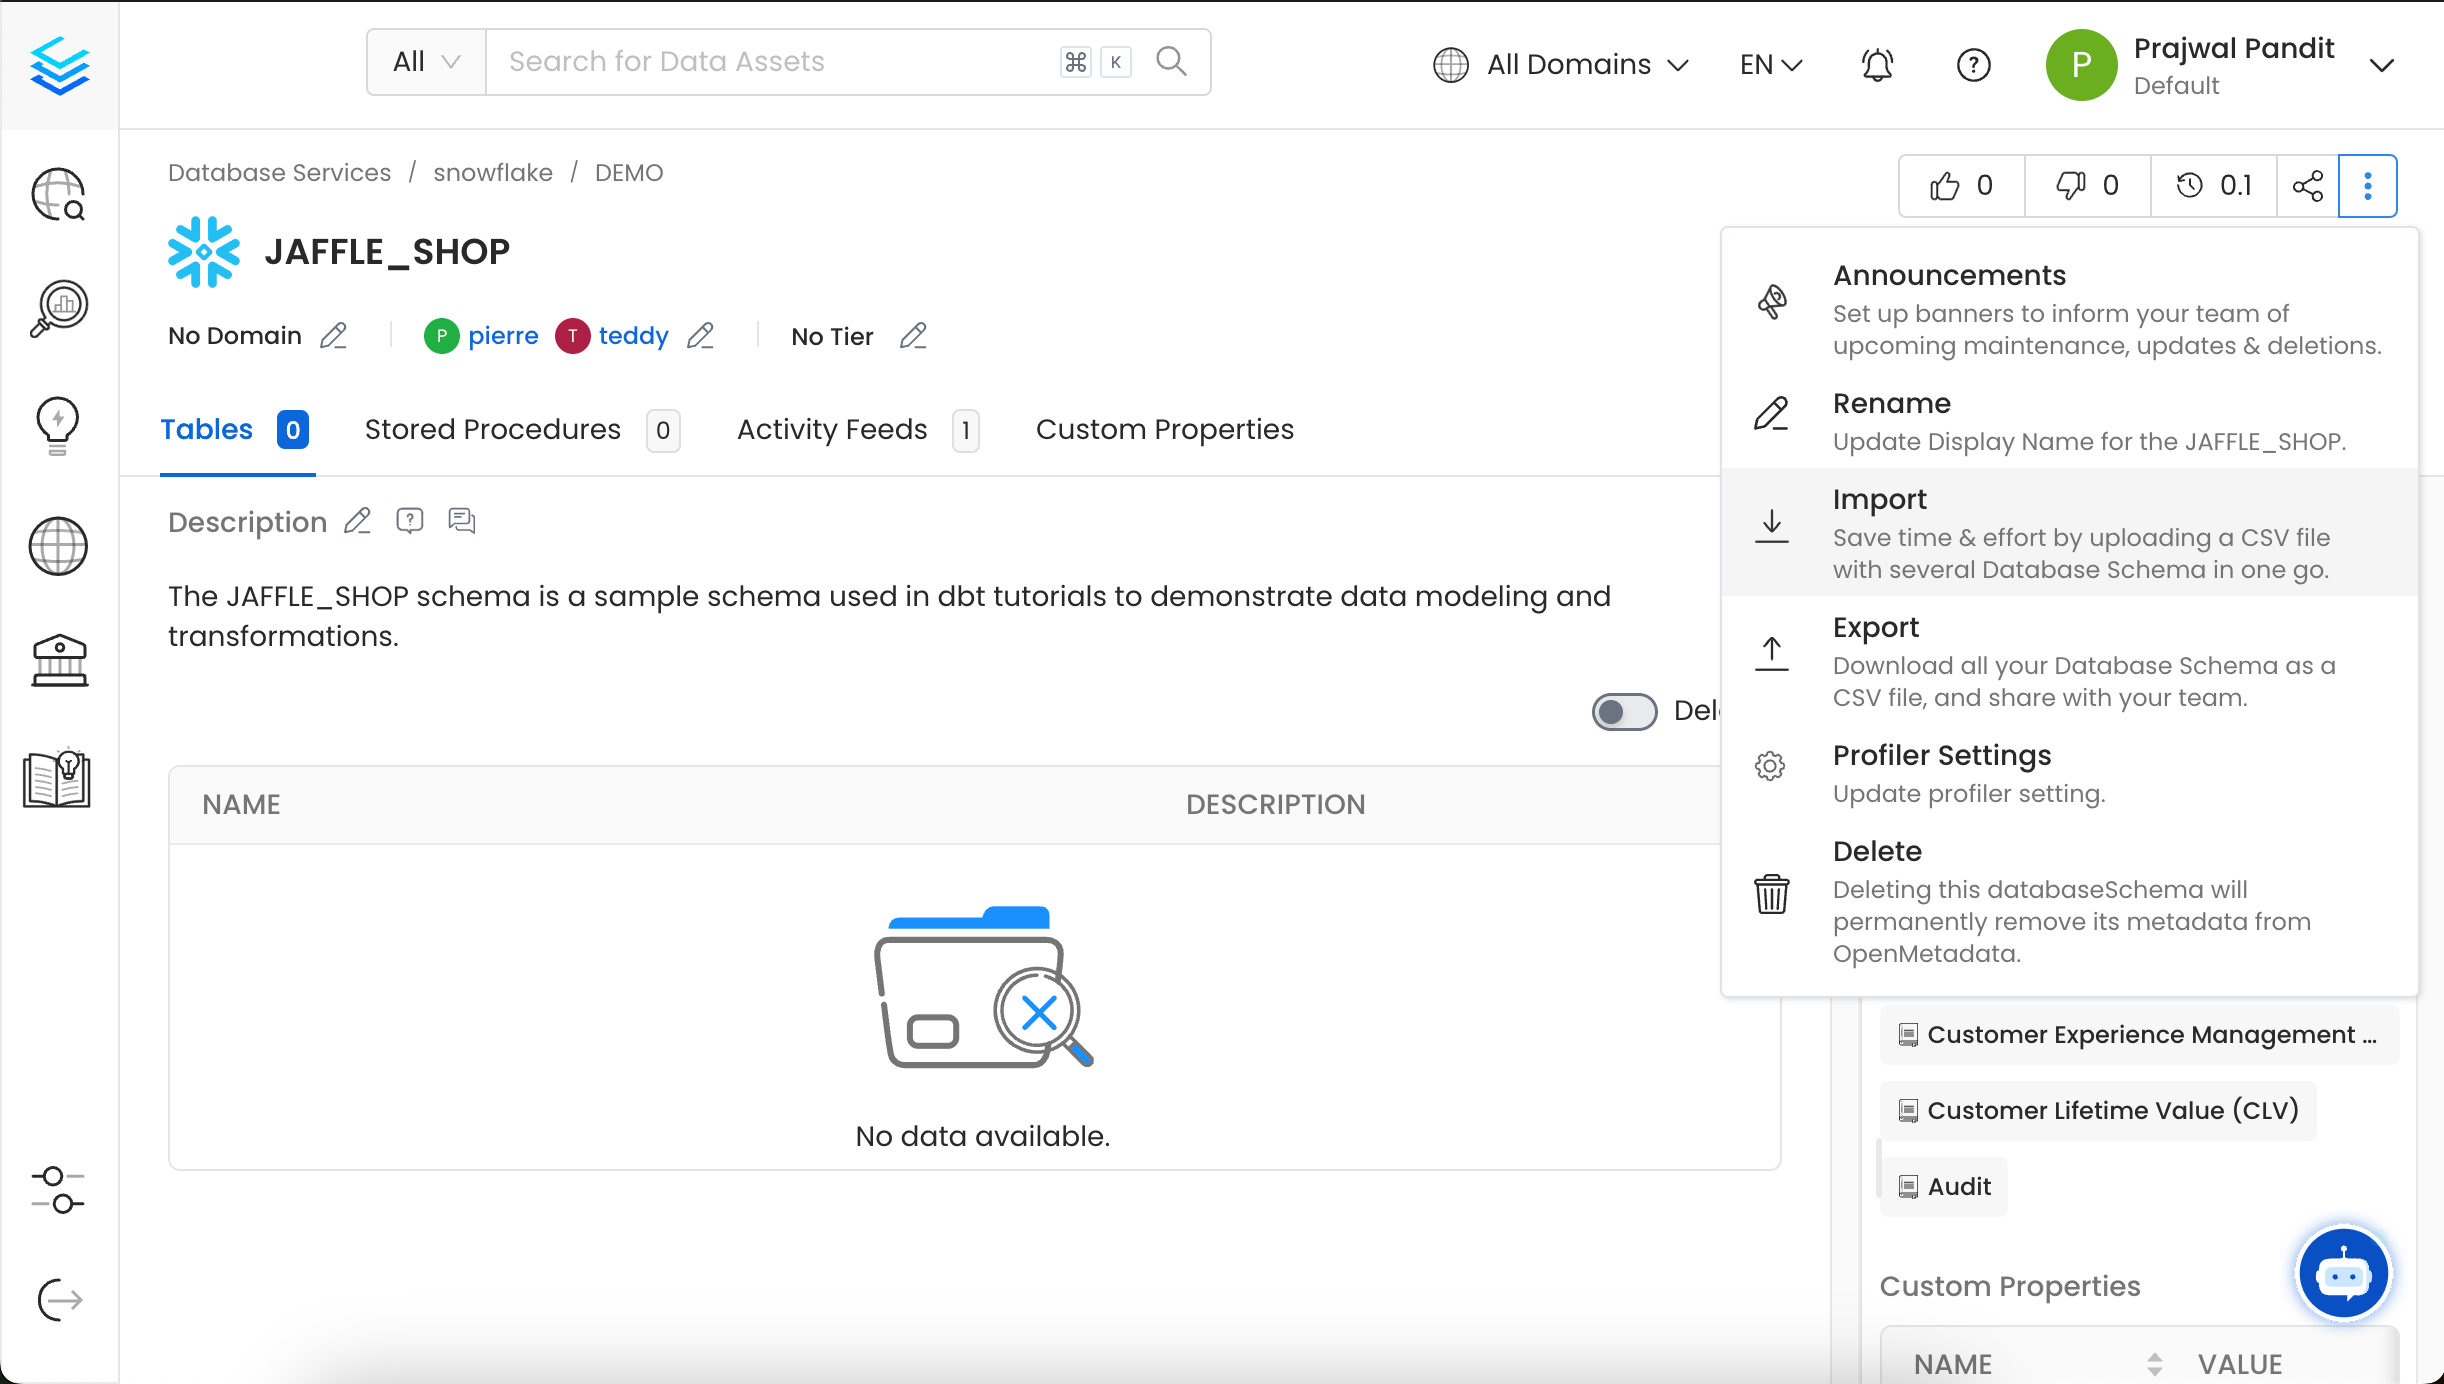 3. Upload/Drop the Database Schema CSV file that you want to import. Alternatively, you can `export` an existing Database Schema CSV as a template, make the necessary edits, and then upload the updated file.
Once you have the template, you can fill in the following details:
* **name** (required): This field contains the name of the database schema.
* **fullyQualifiedName** (required): This field contains the fully qualified name of the database schema.
* **displayName**: This field holds the display name of the database schema.
* **description**: This field contains a detailed description or information about the database schema.
* **owner**: This field specifies the owner of the database schema.
* **tags**: This field contains the tags associated with the database schema.
* **glossaryTerms**: This field holds the glossary terms linked to the database schema.
* **tiers**: This field defines the tiers associated with the database schema.
* **sourceUrl**: This field contains the Source URL of the data asset. Example for the Snowflake database schema: `https://app.snowflake.com//#/data/databases/DEMO/schemas/JAFFLE_SHOP`
* **retentionPeriod**: This field contains the retention period of the data asset. Period is expressed as a duration in ISO 8601 format in UTC. Example - `P23DT23H`.
3. Upload/Drop the Database Schema CSV file that you want to import. Alternatively, you can `export` an existing Database Schema CSV as a template, make the necessary edits, and then upload the updated file.
Once you have the template, you can fill in the following details:
* **name** (required): This field contains the name of the database schema.
* **fullyQualifiedName** (required): This field contains the fully qualified name of the database schema.
* **displayName**: This field holds the display name of the database schema.
* **description**: This field contains a detailed description or information about the database schema.
* **owner**: This field specifies the owner of the database schema.
* **tags**: This field contains the tags associated with the database schema.
* **glossaryTerms**: This field holds the glossary terms linked to the database schema.
* **tiers**: This field defines the tiers associated with the database schema.
* **sourceUrl**: This field contains the Source URL of the data asset. Example for the Snowflake database schema: `https://app.snowflake.com//#/data/databases/DEMO/schemas/JAFFLE_SHOP`
* **retentionPeriod**: This field contains the retention period of the data asset. Period is expressed as a duration in ISO 8601 format in UTC. Example - `P23DT23H`.
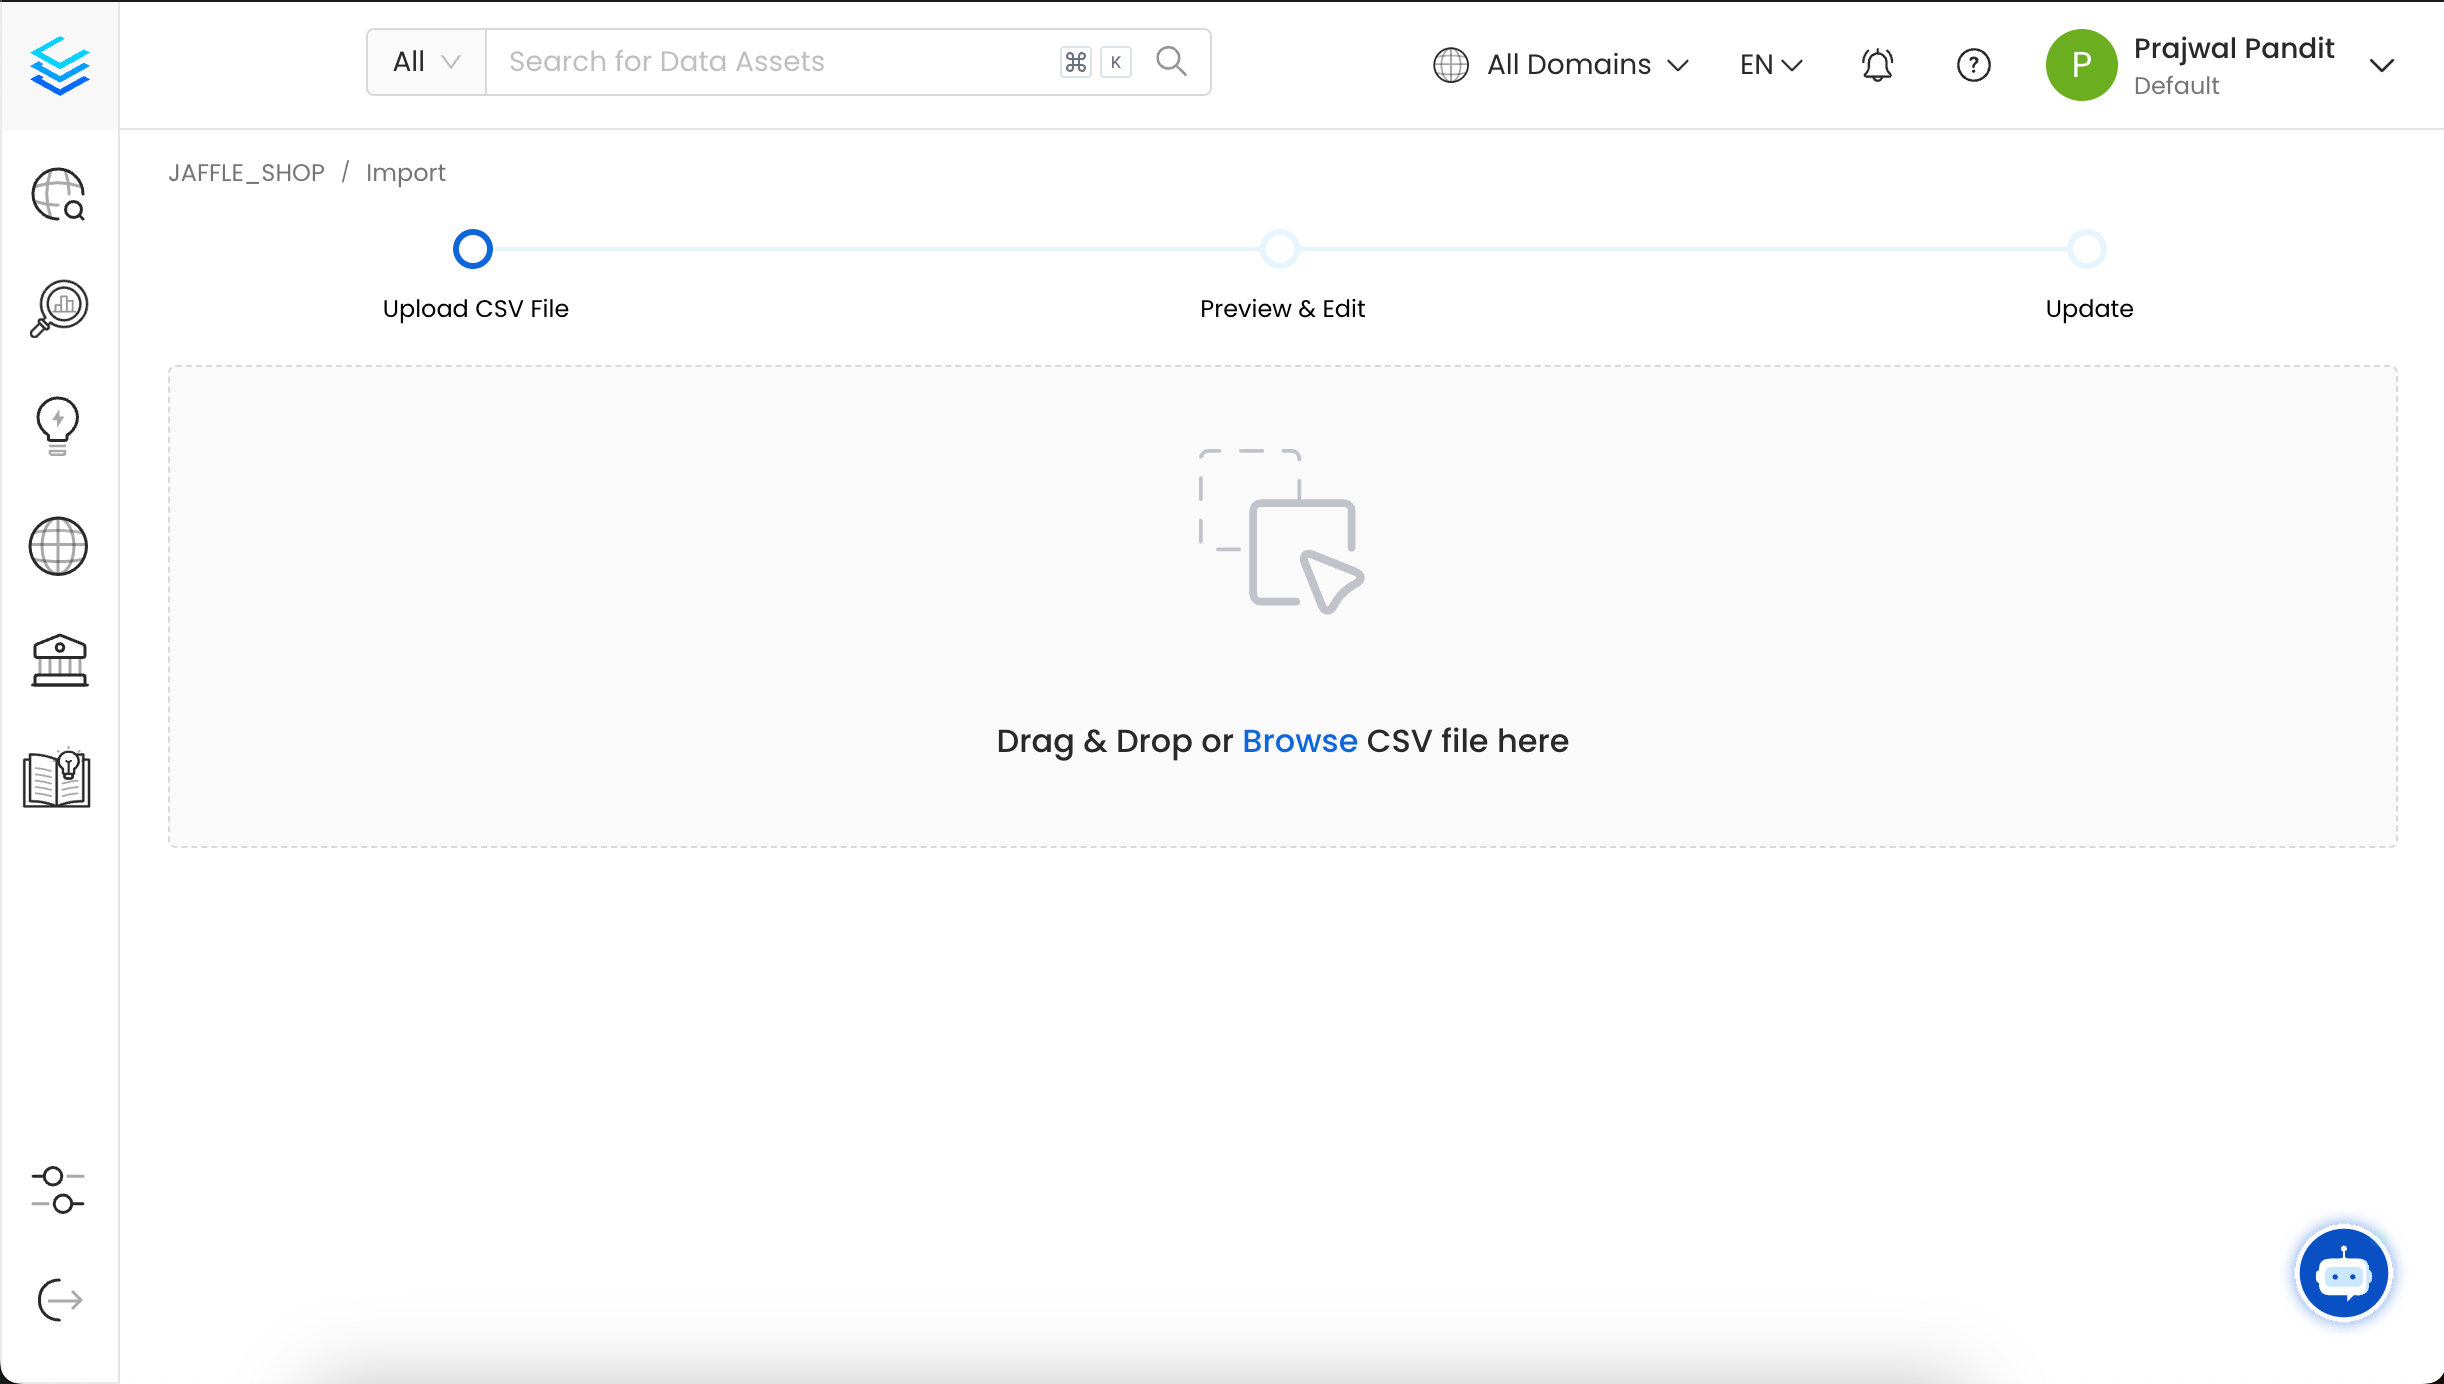 4. You can now preview the uploaded Database Schema CSV file and add or modify data using the inline editor.
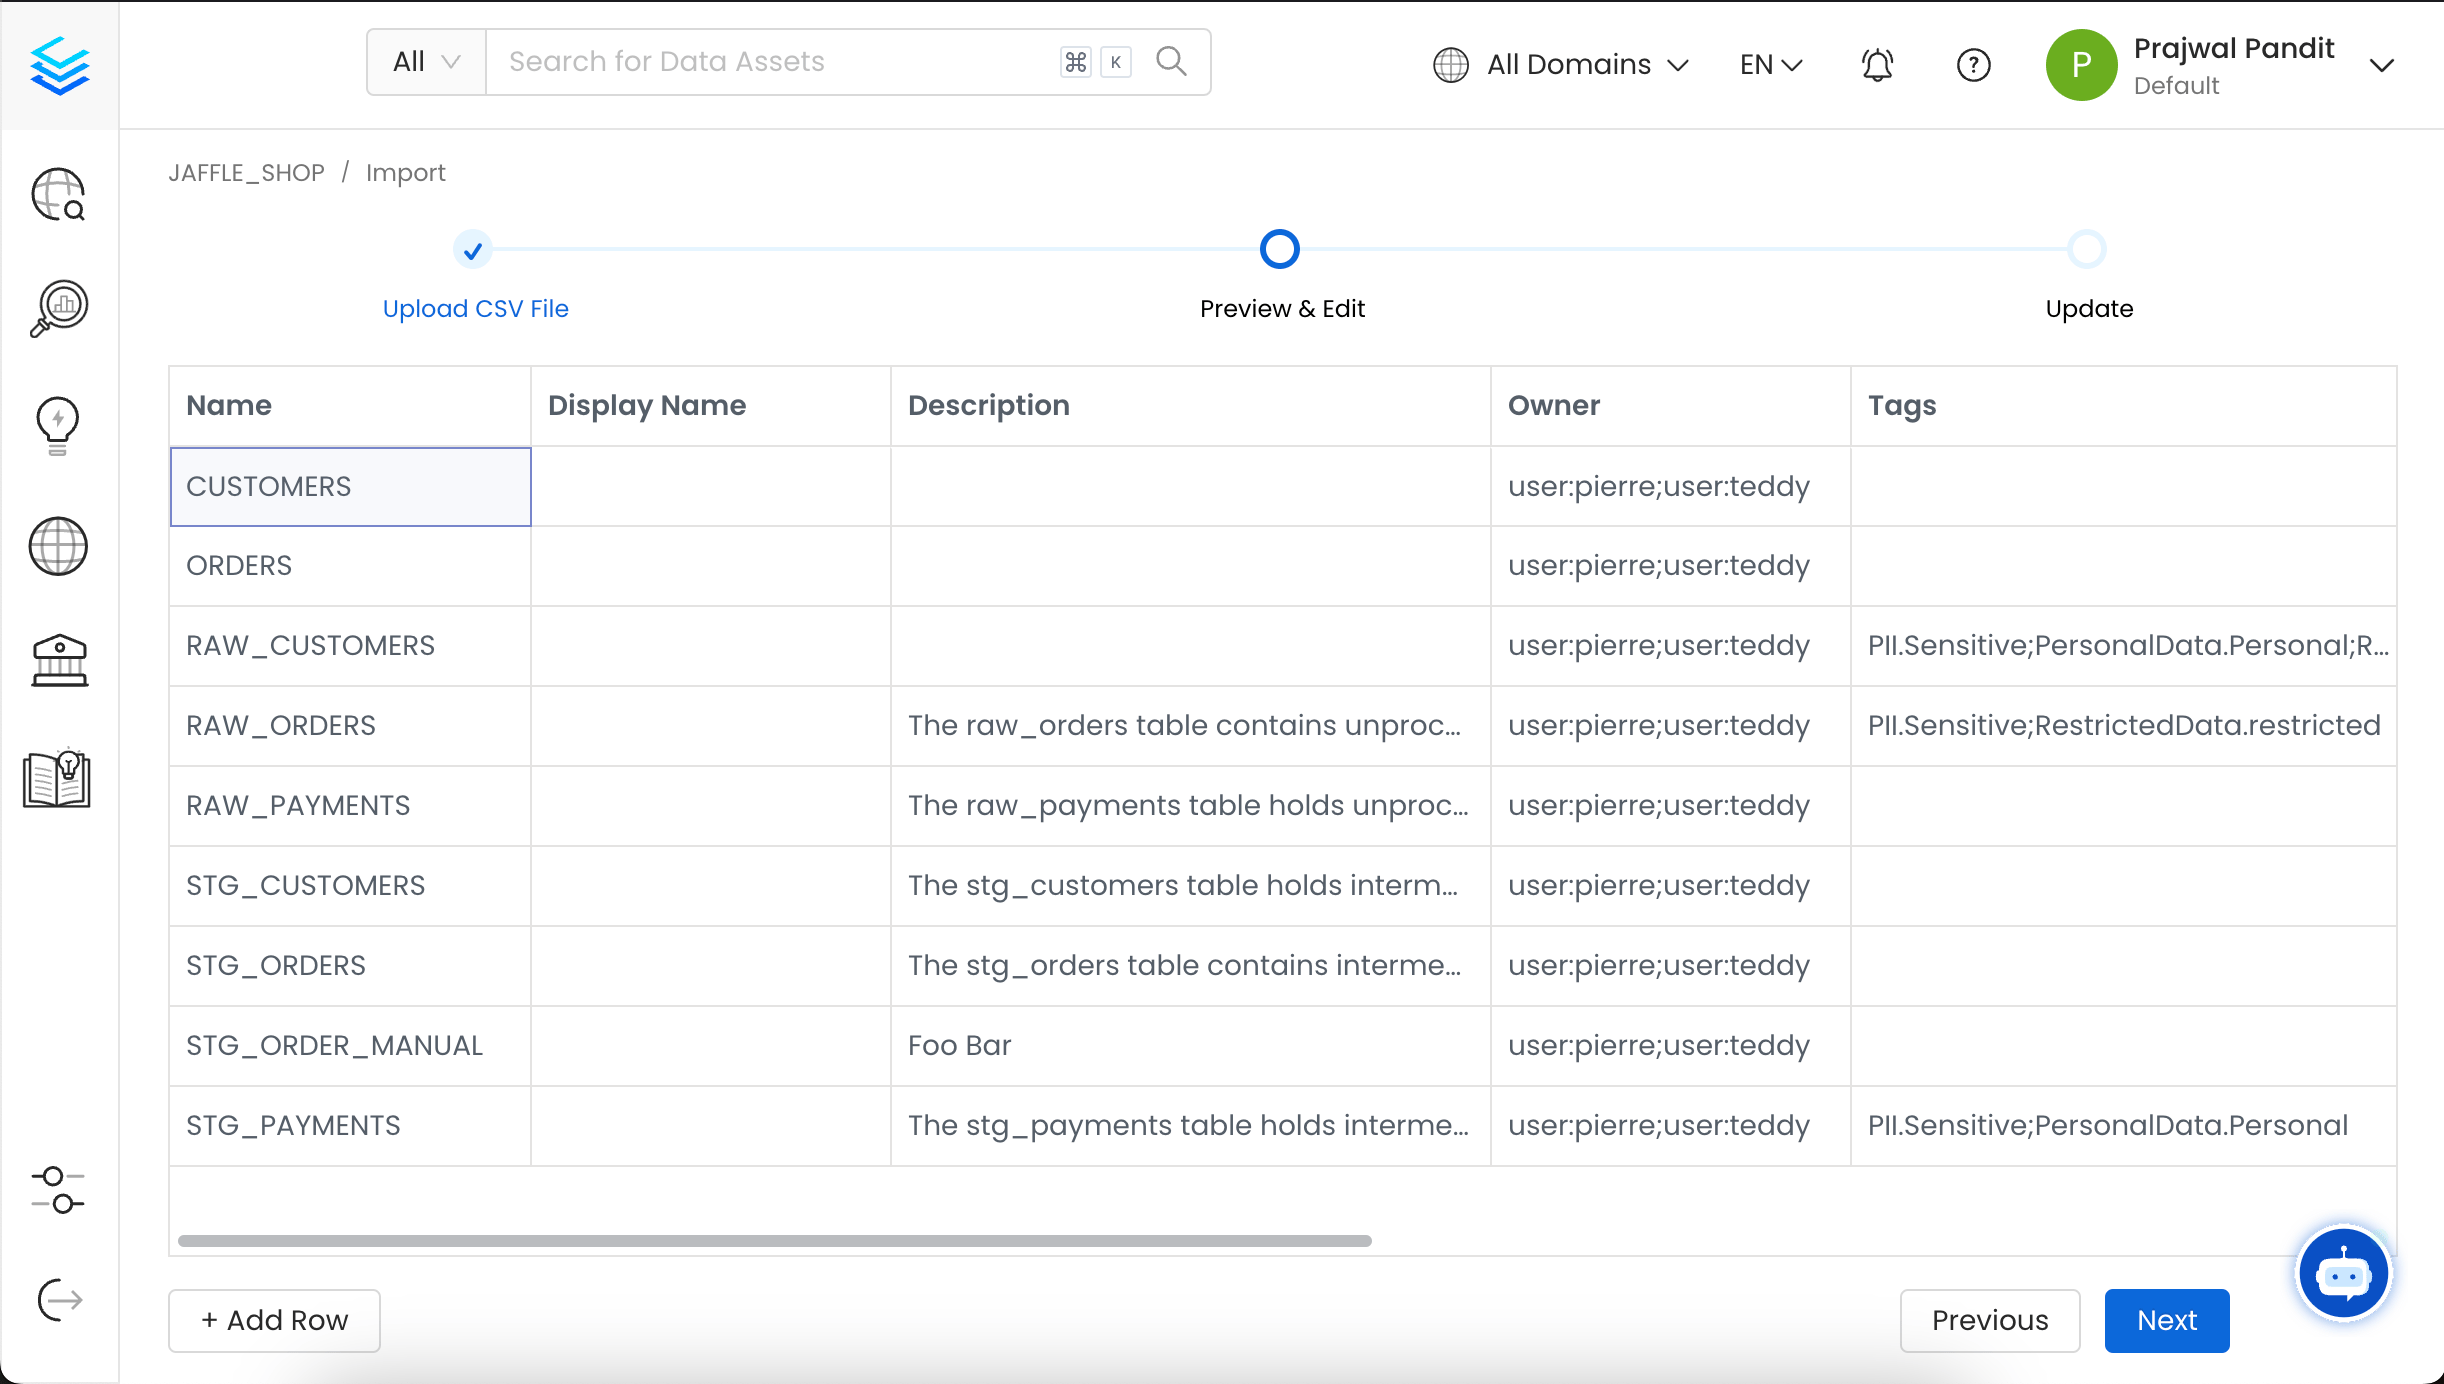 5. Validate the updated Data Assets and confirm the changes. A success or failure message will then be displayed based on the outcome.
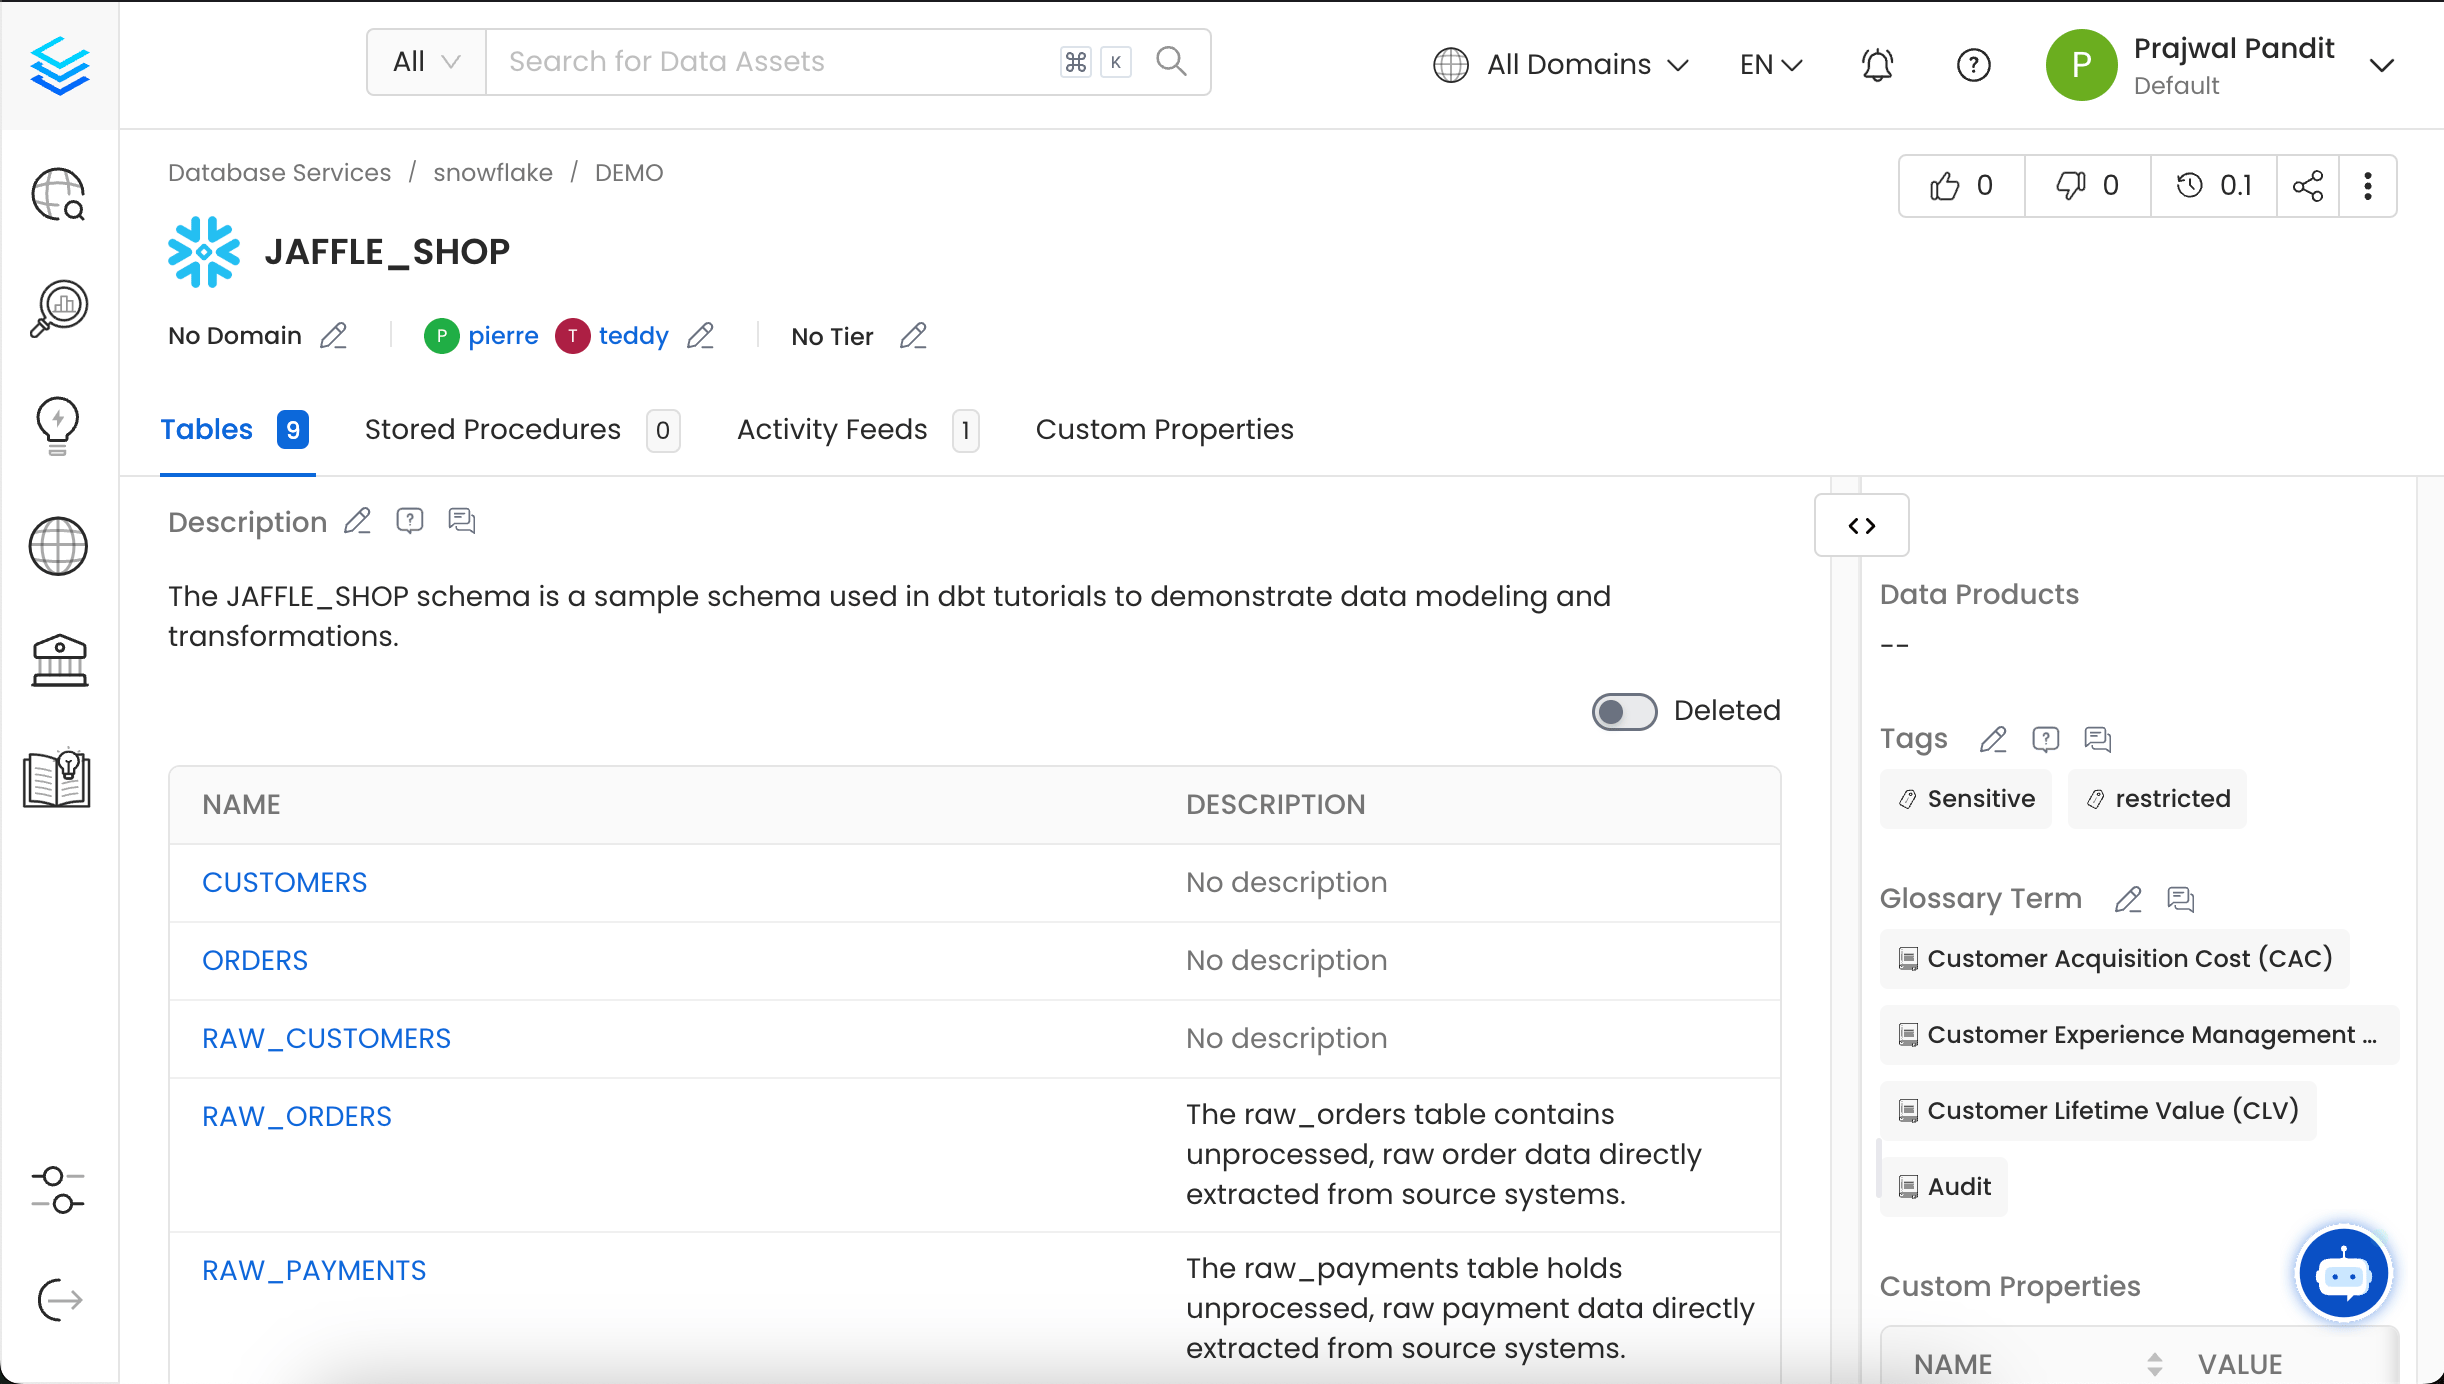
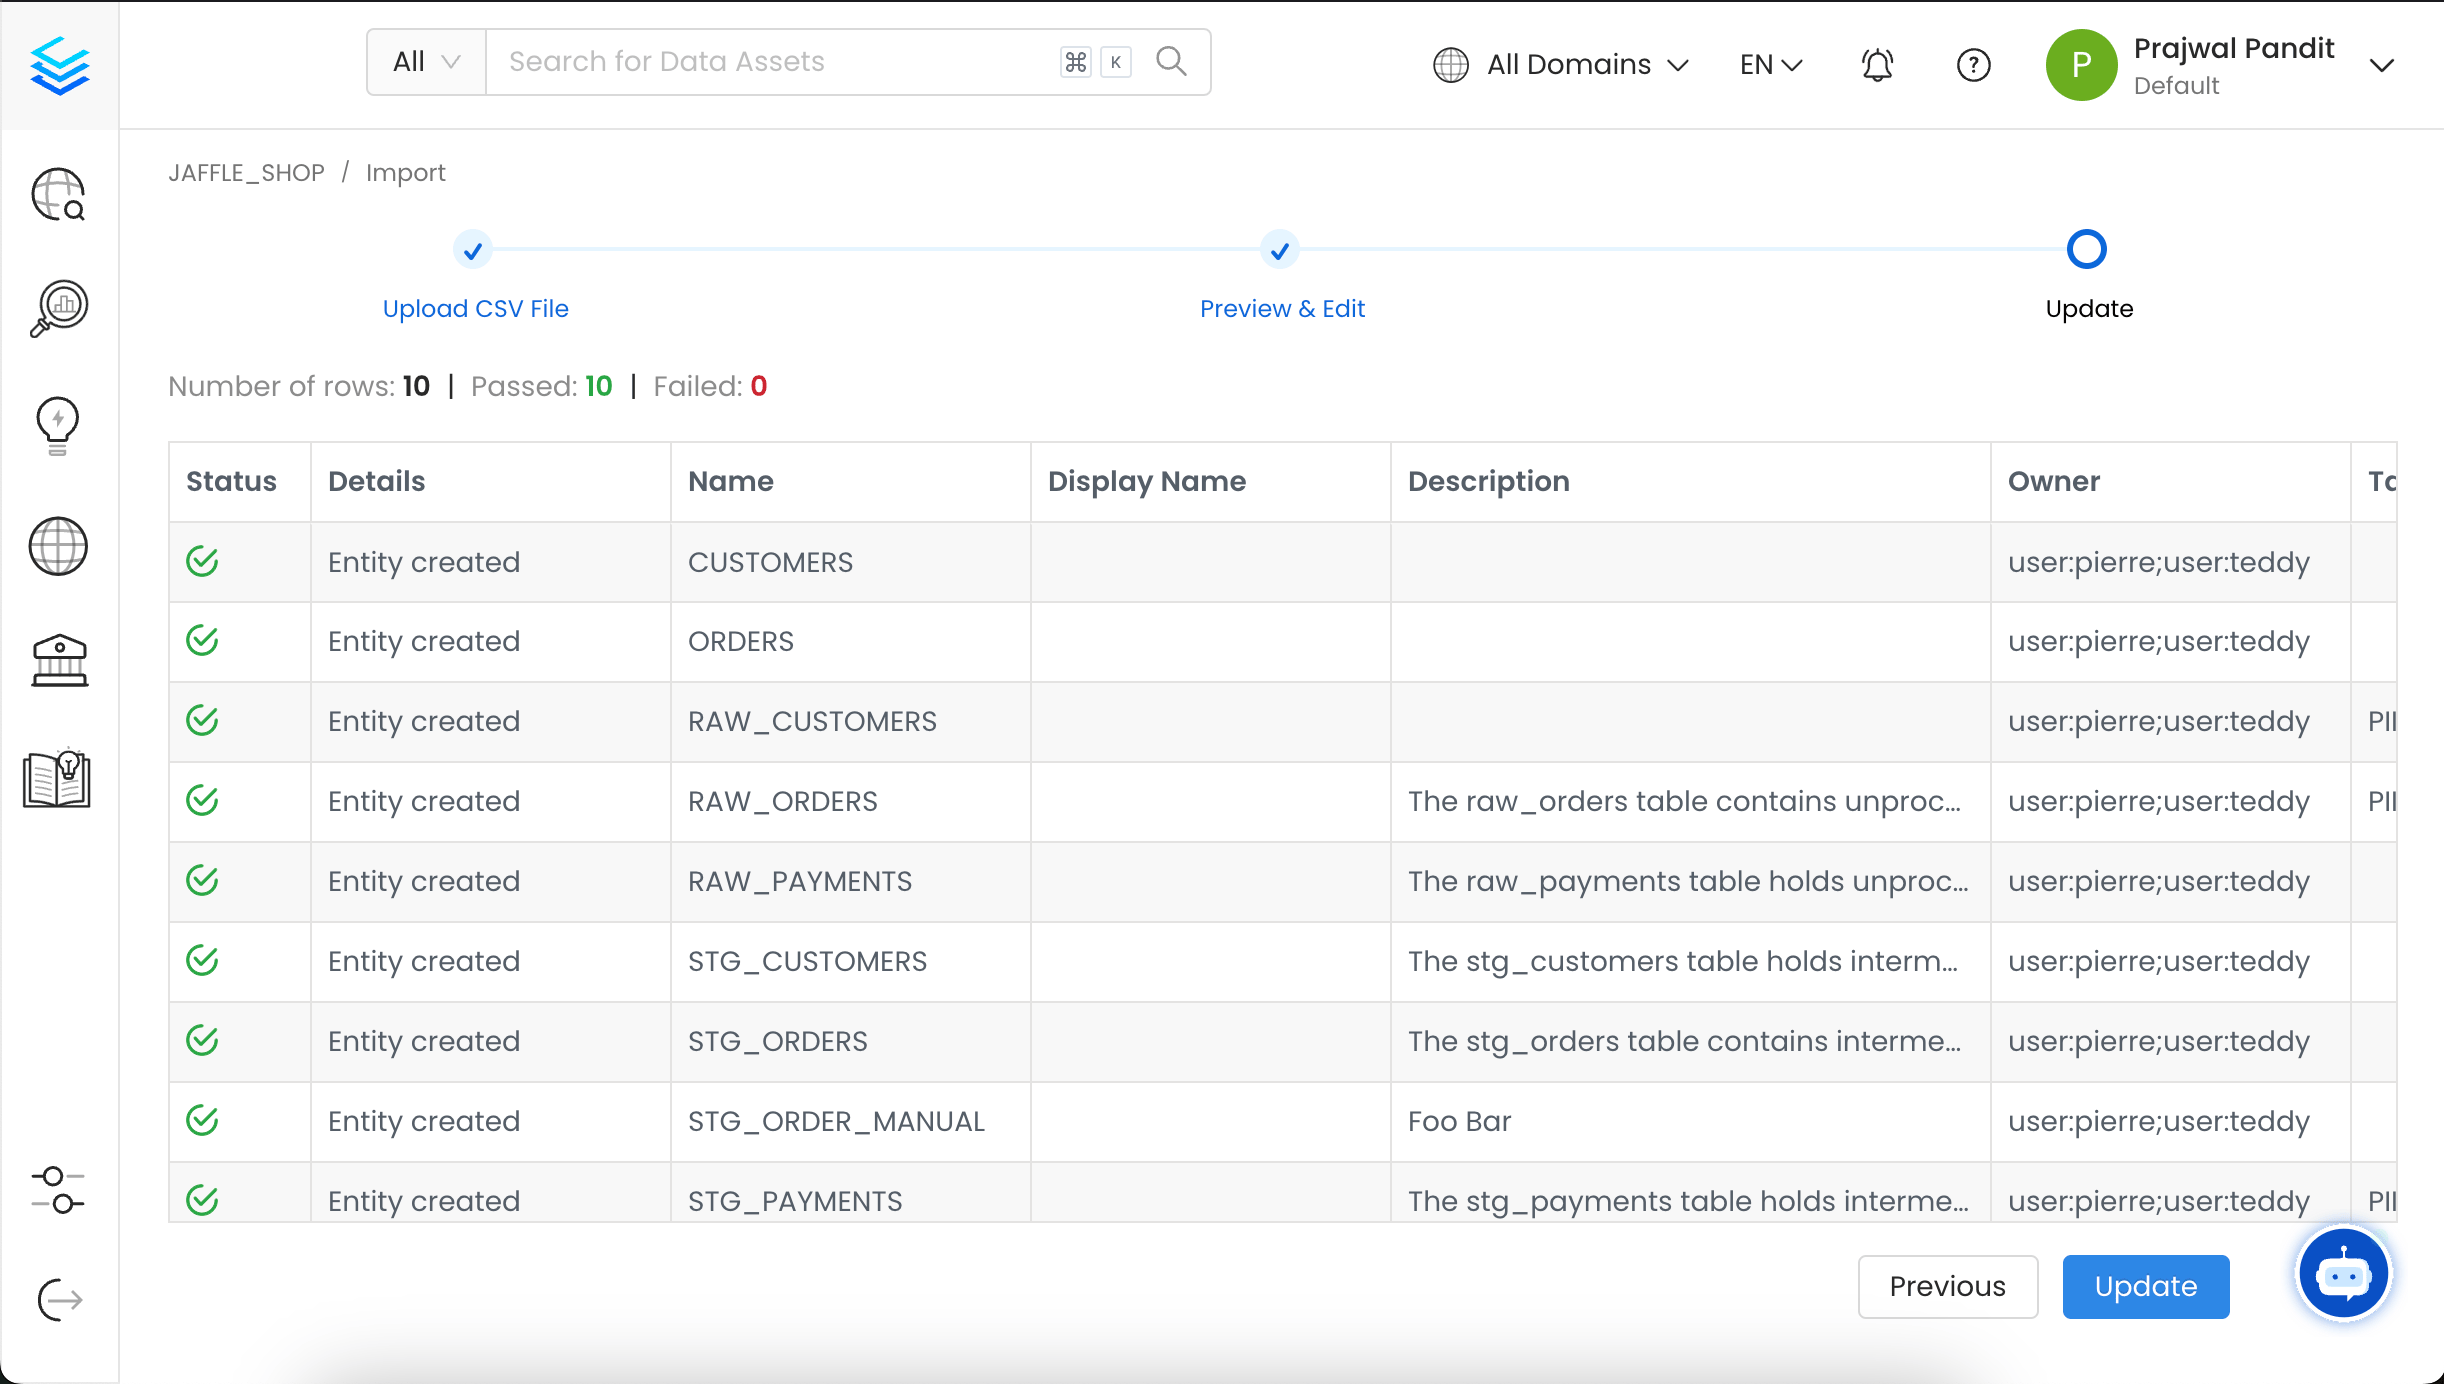 6. The Database Schema has been updated successfully, and you can now view the changes in the Database Schema.
 You can also import the Database Schema using the API with the following endpoint:
`/api/v1/databaseSchemas/name/{name}/import`
Make sure to replace `{name}` with the Fully Qualified Name (FQN) of the Database Schema.
## How to Bulk Import a Table
To import a Table:
1. In this example, we are importing the `CUSTOMERS` table under **Snowflake > DEMO > JAFFLE\_SHOP**.
2. Click on the **⋮** icon and select **Import** to download the Table CSV file.
You can also import the Database Schema using the API with the following endpoint:
`/api/v1/databaseSchemas/name/{name}/import`
Make sure to replace `{name}` with the Fully Qualified Name (FQN) of the Database Schema.
## How to Bulk Import a Table
To import a Table:
1. In this example, we are importing the `CUSTOMERS` table under **Snowflake > DEMO > JAFFLE\_SHOP**.
2. Click on the **⋮** icon and select **Import** to download the Table CSV file.
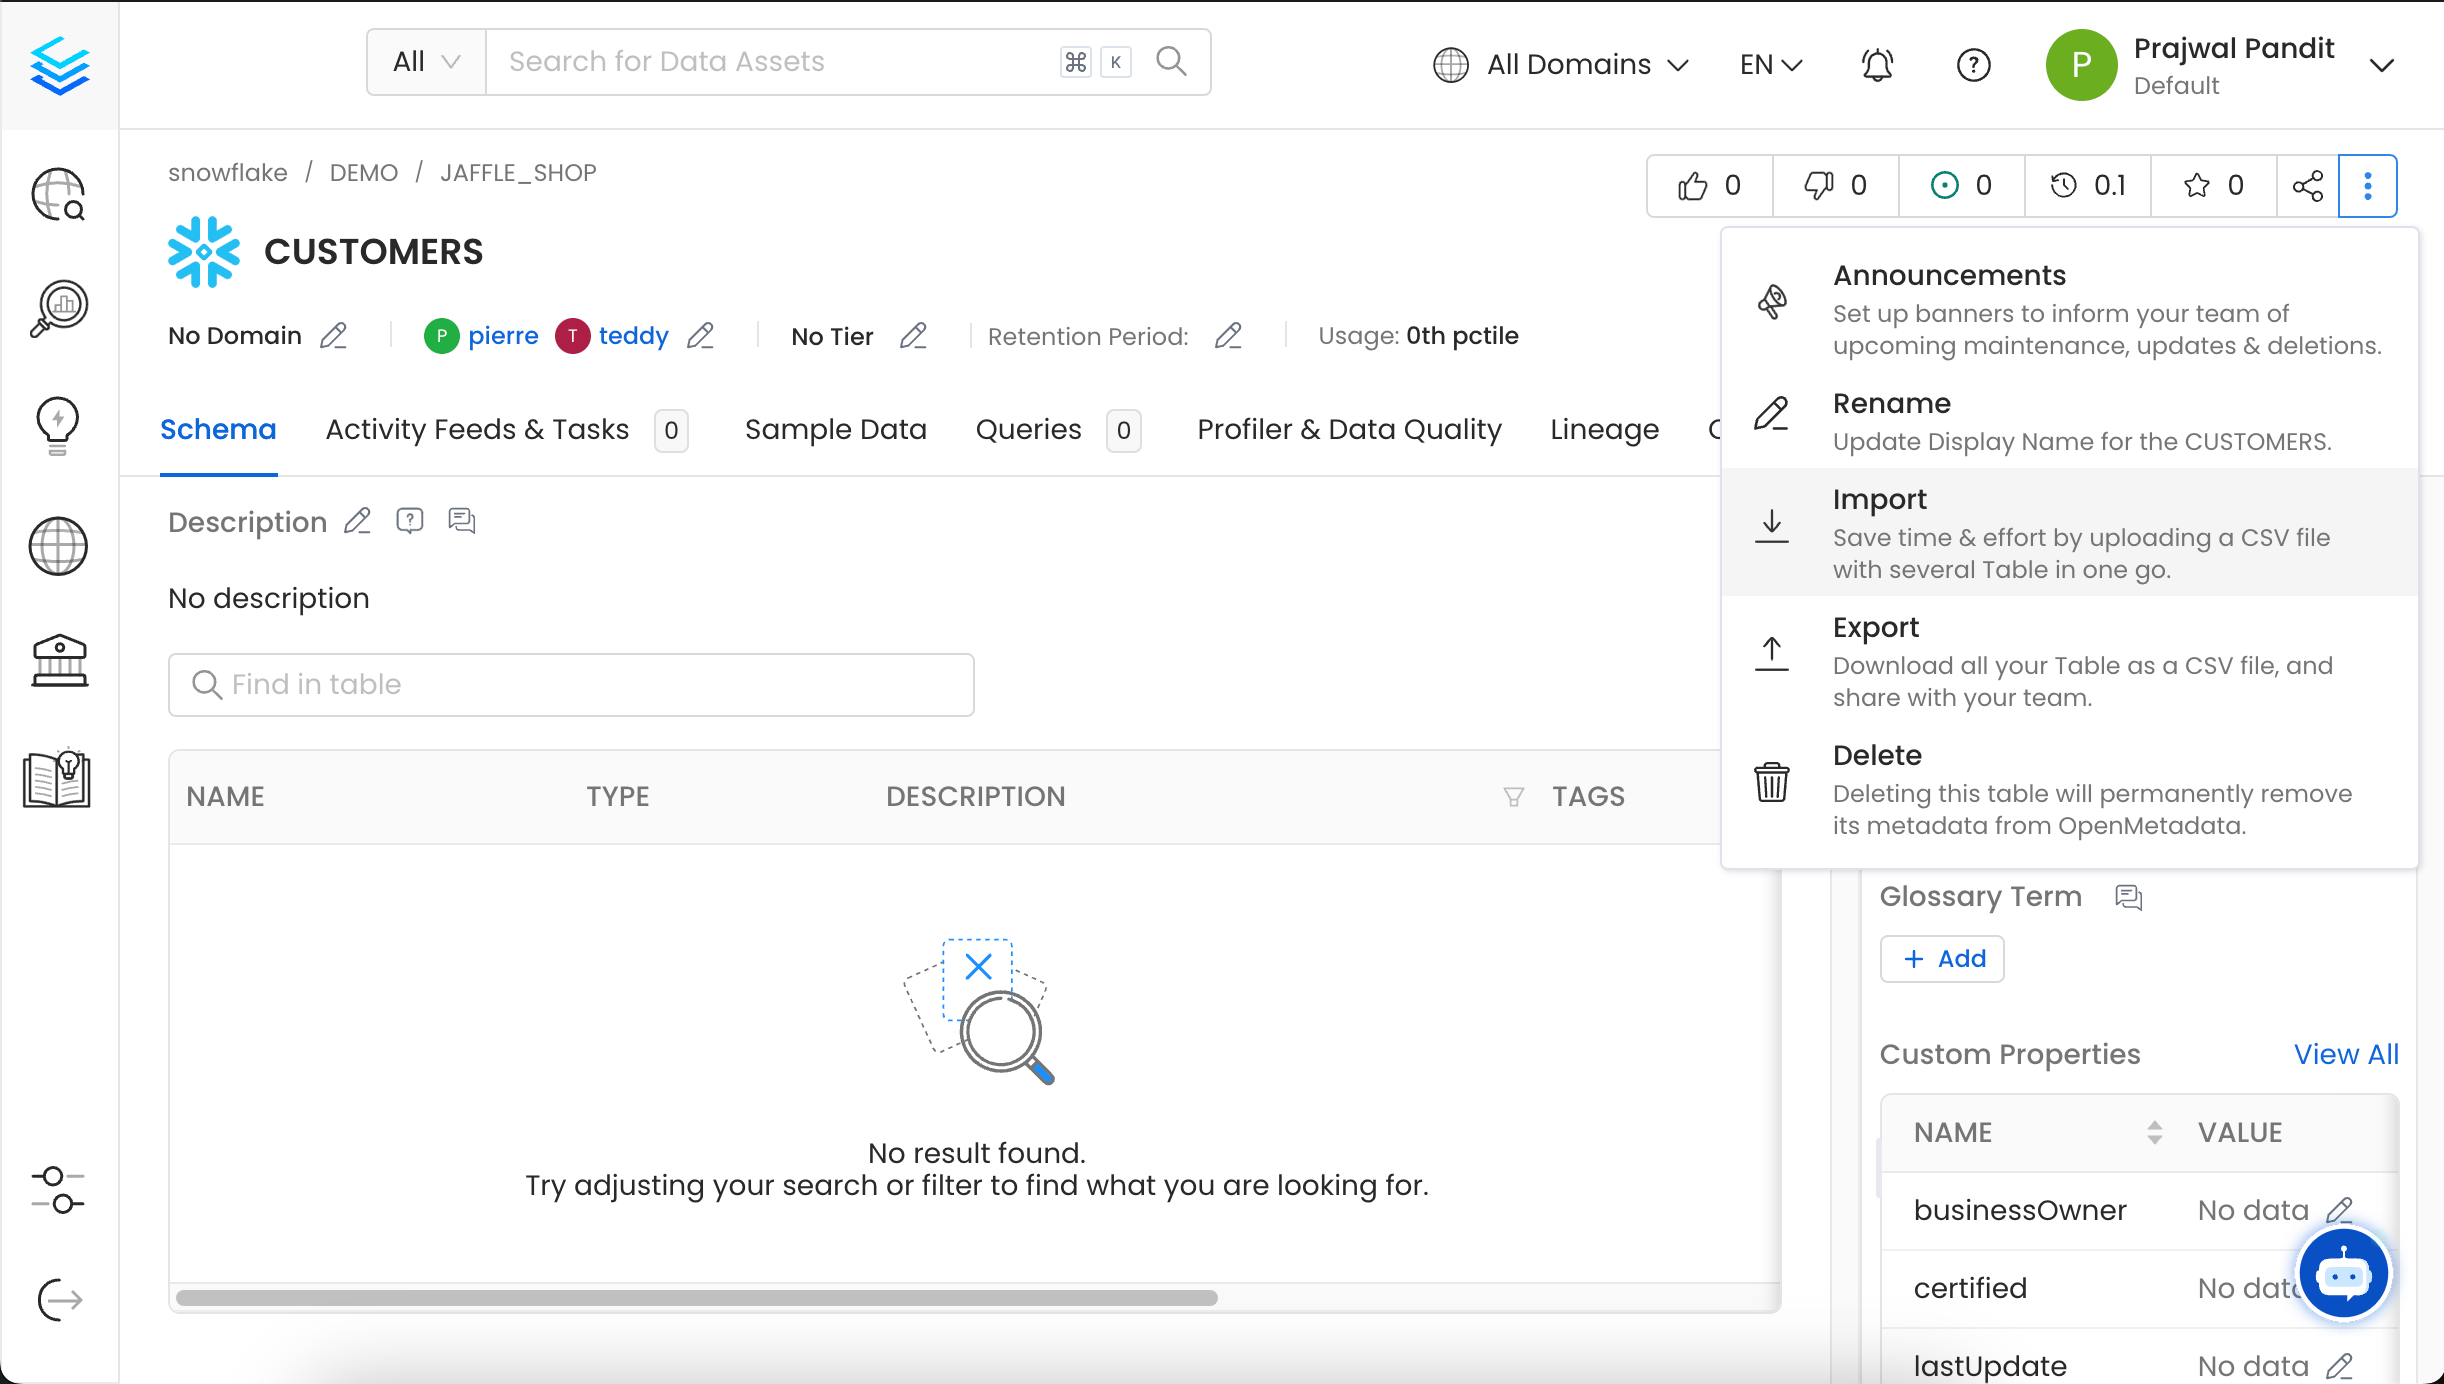 3. Upload/Drop the Table CSV file that you want to import. Alternatively, you can `export` an existing table CSV as a template, make the necessary edits, and then upload the updated file.
Once you have the template, you can fill in the following details:
* **name**: This field contains the name of the table.
* **fullyQualifiedName** (required): This field contains the fully qualified name of the table.
* **displayName**: This field holds the display name of the table.
* **description**: This field contains a detailed description or information about the table.
* **owner**: This field specifies the owner of the table.
* **tags**: This field contains the tags associated with the table.
* **glossaryTerms**: This field holds the glossary terms linked to the table.
* **tiers**: This field defines the tiers associated with the table.
* **sourceUrl**: This field contains the Source URL of the data asset. Example for the Snowflake table: `https://app.snowflake.com//#/data/databases/DEMO/schemas/JAFFLE_SHOP/table/CUSTOMERS`
* **retentionPeriod**: This field contains the retention period of the data asset. Period is expressed as a duration in ISO 8601 format in UTC. Example - `P23DT23H`.
* **column.fullyQualifiedName** (required): This field holds the fully qualified name of the column.
* **column.displayName**: This field holds the display name of the column, if different from the technical name.
* **column.description**: This field holds a detailed description or information about the column's purpose or content.
* **column.dataTypeDisplay**: This field holds the data type for display purposes.
* **column.dataType**: This field holds the data type of the column (e.g., `VARCHAR`, `INT`, `BOOLEAN`).
* **column.arrayDataType**: If the column is an array, this field will specify the data type of the array elements.
* **column.dataLength**: This field holds the length or size of the data.
* **column.tags**: This field holds the Tags associated with the column, which help categorize.
* **column.glossaryTerms**: This field holds the Glossary terms linked to the column to provide standardized definitions.
3. Upload/Drop the Table CSV file that you want to import. Alternatively, you can `export` an existing table CSV as a template, make the necessary edits, and then upload the updated file.
Once you have the template, you can fill in the following details:
* **name**: This field contains the name of the table.
* **fullyQualifiedName** (required): This field contains the fully qualified name of the table.
* **displayName**: This field holds the display name of the table.
* **description**: This field contains a detailed description or information about the table.
* **owner**: This field specifies the owner of the table.
* **tags**: This field contains the tags associated with the table.
* **glossaryTerms**: This field holds the glossary terms linked to the table.
* **tiers**: This field defines the tiers associated with the table.
* **sourceUrl**: This field contains the Source URL of the data asset. Example for the Snowflake table: `https://app.snowflake.com//#/data/databases/DEMO/schemas/JAFFLE_SHOP/table/CUSTOMERS`
* **retentionPeriod**: This field contains the retention period of the data asset. Period is expressed as a duration in ISO 8601 format in UTC. Example - `P23DT23H`.
* **column.fullyQualifiedName** (required): This field holds the fully qualified name of the column.
* **column.displayName**: This field holds the display name of the column, if different from the technical name.
* **column.description**: This field holds a detailed description or information about the column's purpose or content.
* **column.dataTypeDisplay**: This field holds the data type for display purposes.
* **column.dataType**: This field holds the data type of the column (e.g., `VARCHAR`, `INT`, `BOOLEAN`).
* **column.arrayDataType**: If the column is an array, this field will specify the data type of the array elements.
* **column.dataLength**: This field holds the length or size of the data.
* **column.tags**: This field holds the Tags associated with the column, which help categorize.
* **column.glossaryTerms**: This field holds the Glossary terms linked to the column to provide standardized definitions.
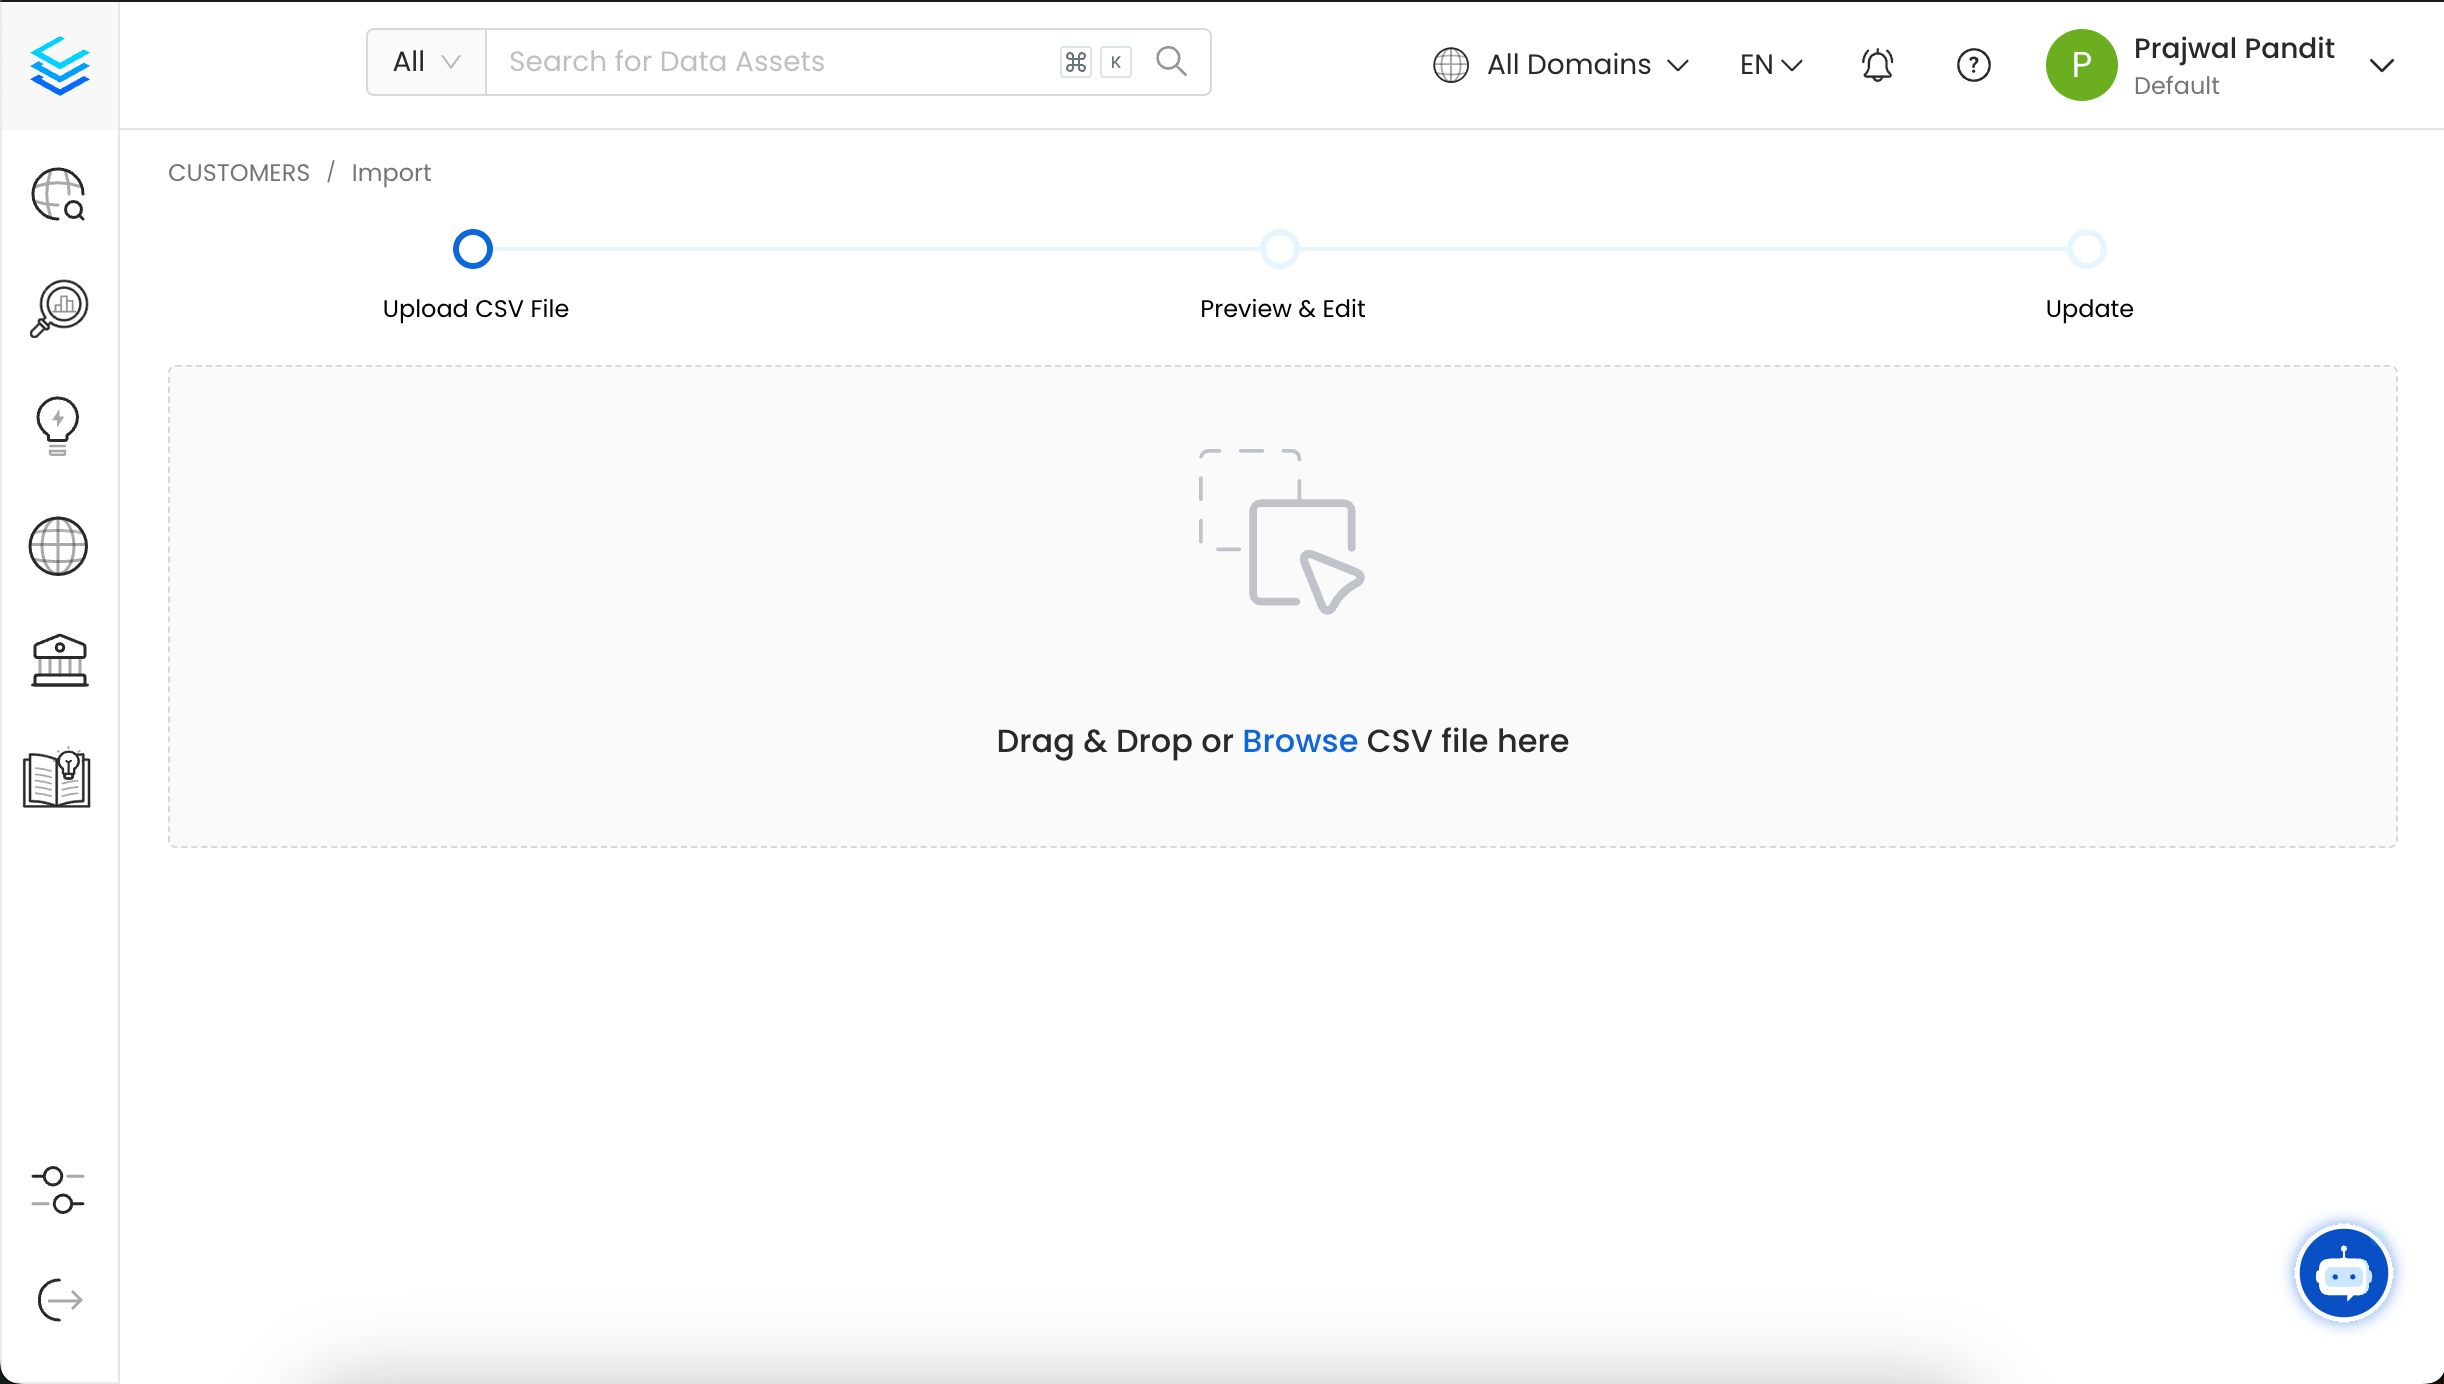 4. You can now preview the uploaded Table CSV file and add or modify data using the inline editor.
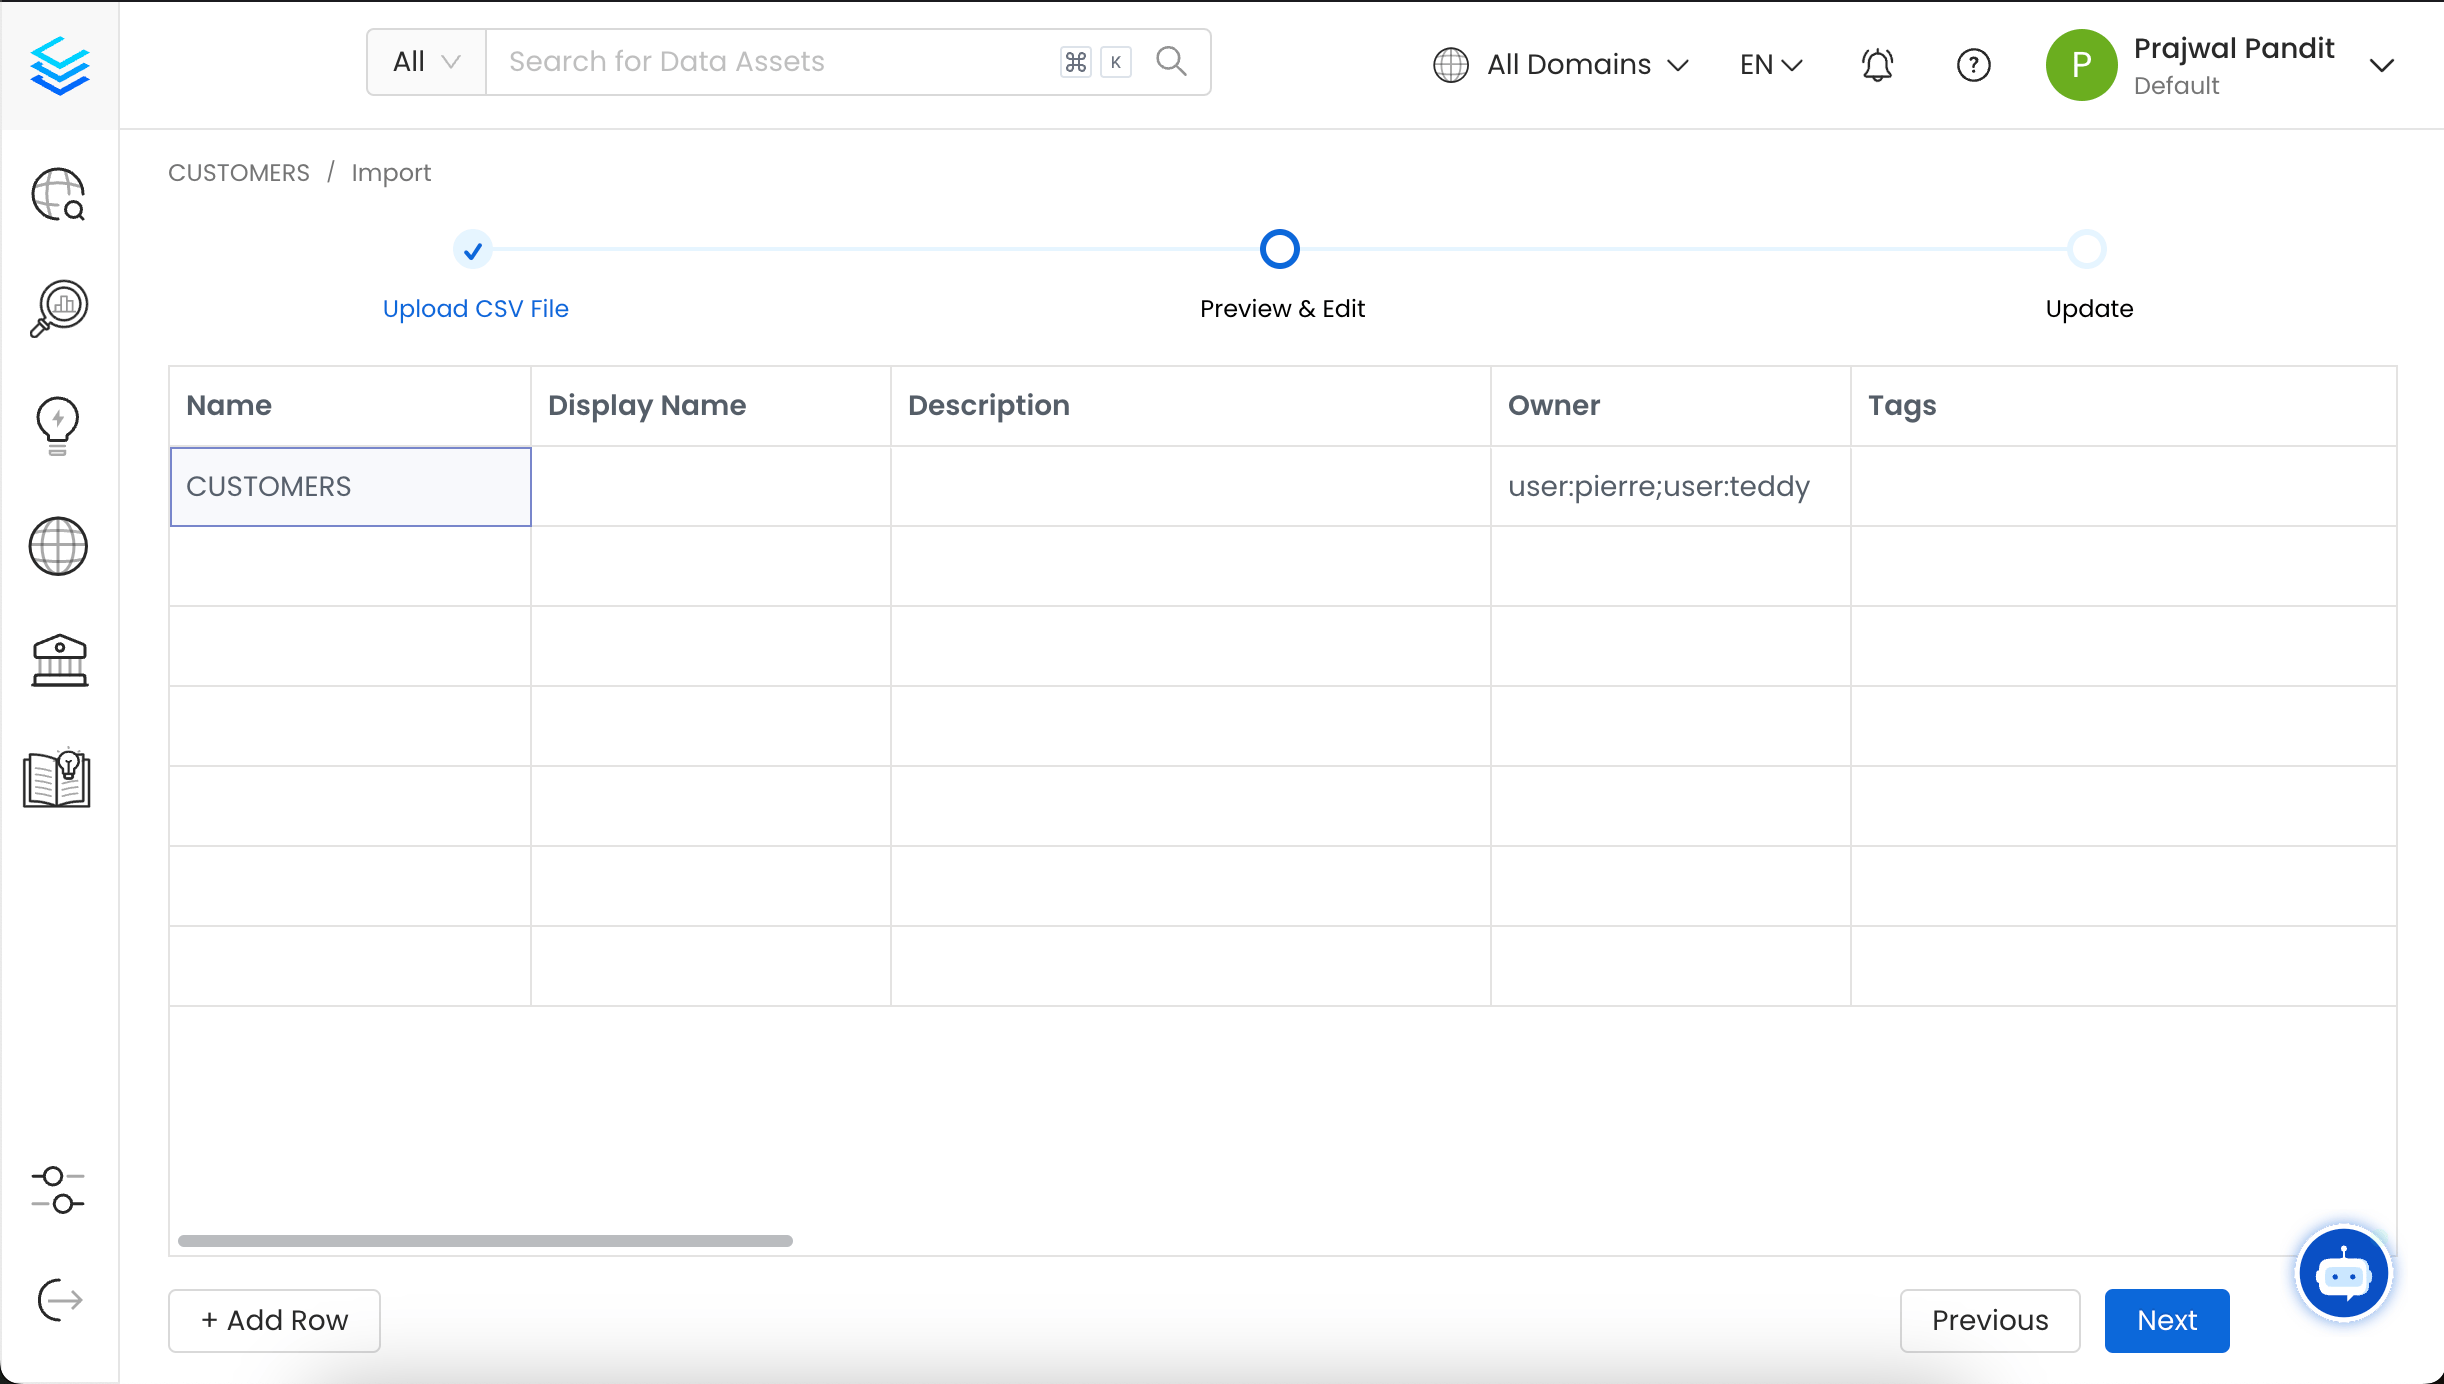 5. Validate the updated Data Assets and confirm the changes. A success or failure message will then be displayed based on the outcome.
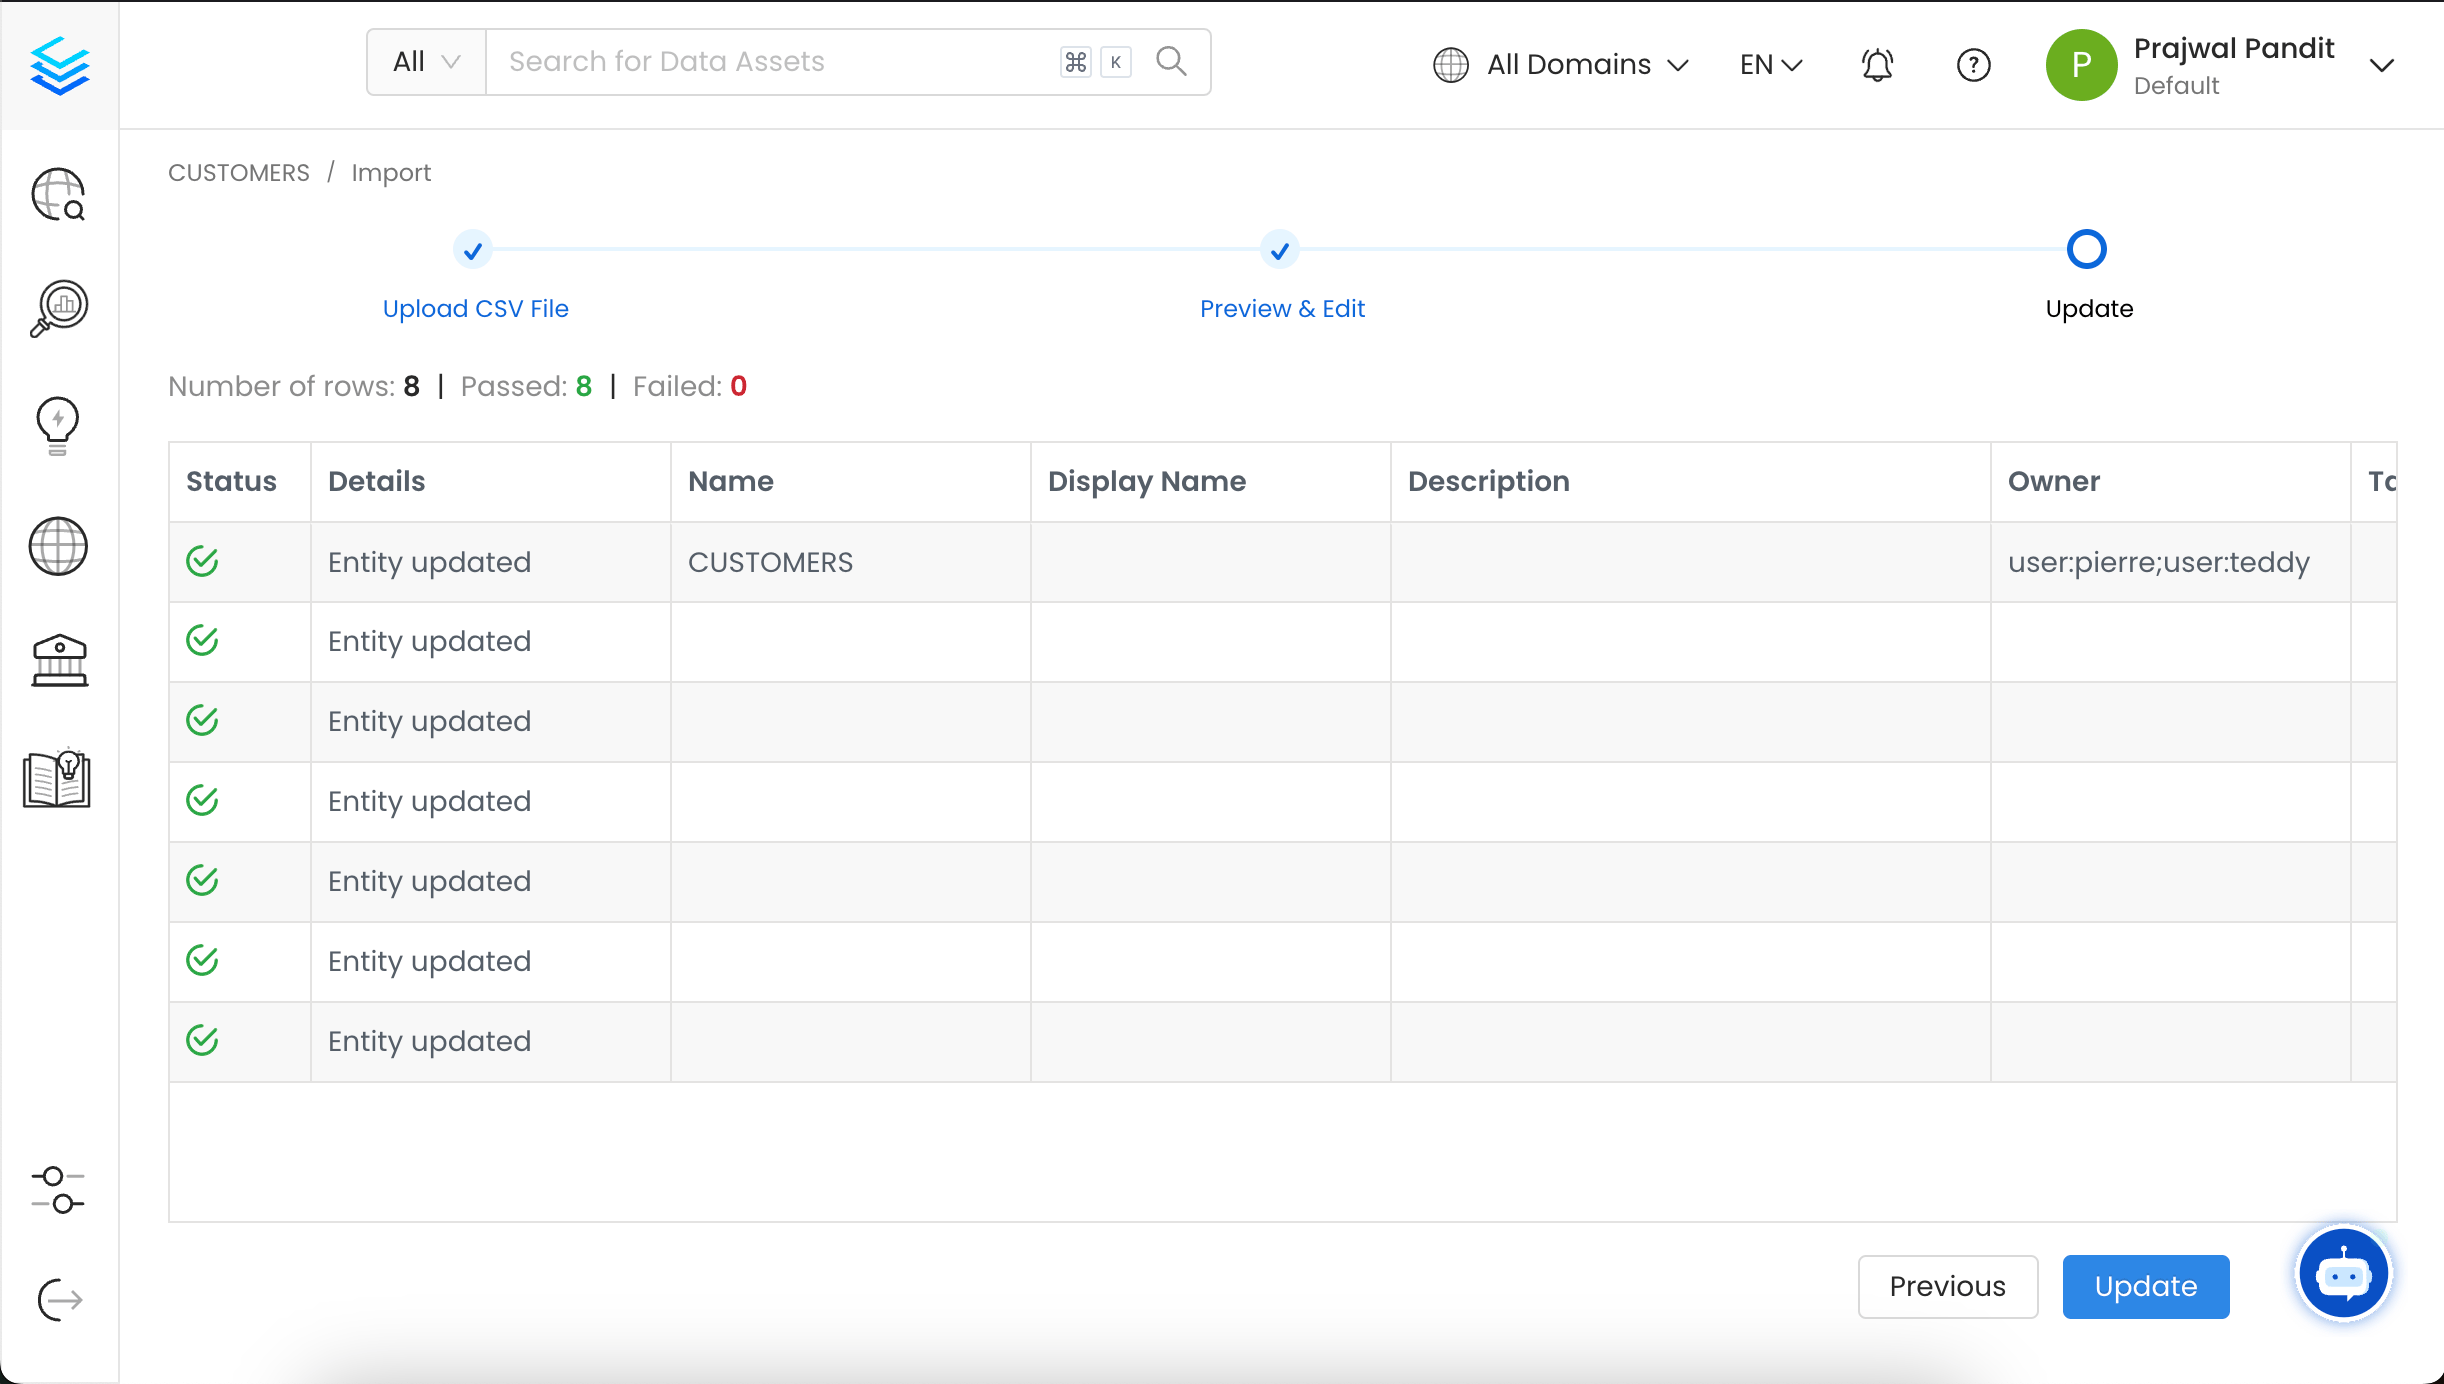 6. The Table has been updated successfully, and you can now view the changes in the Table.
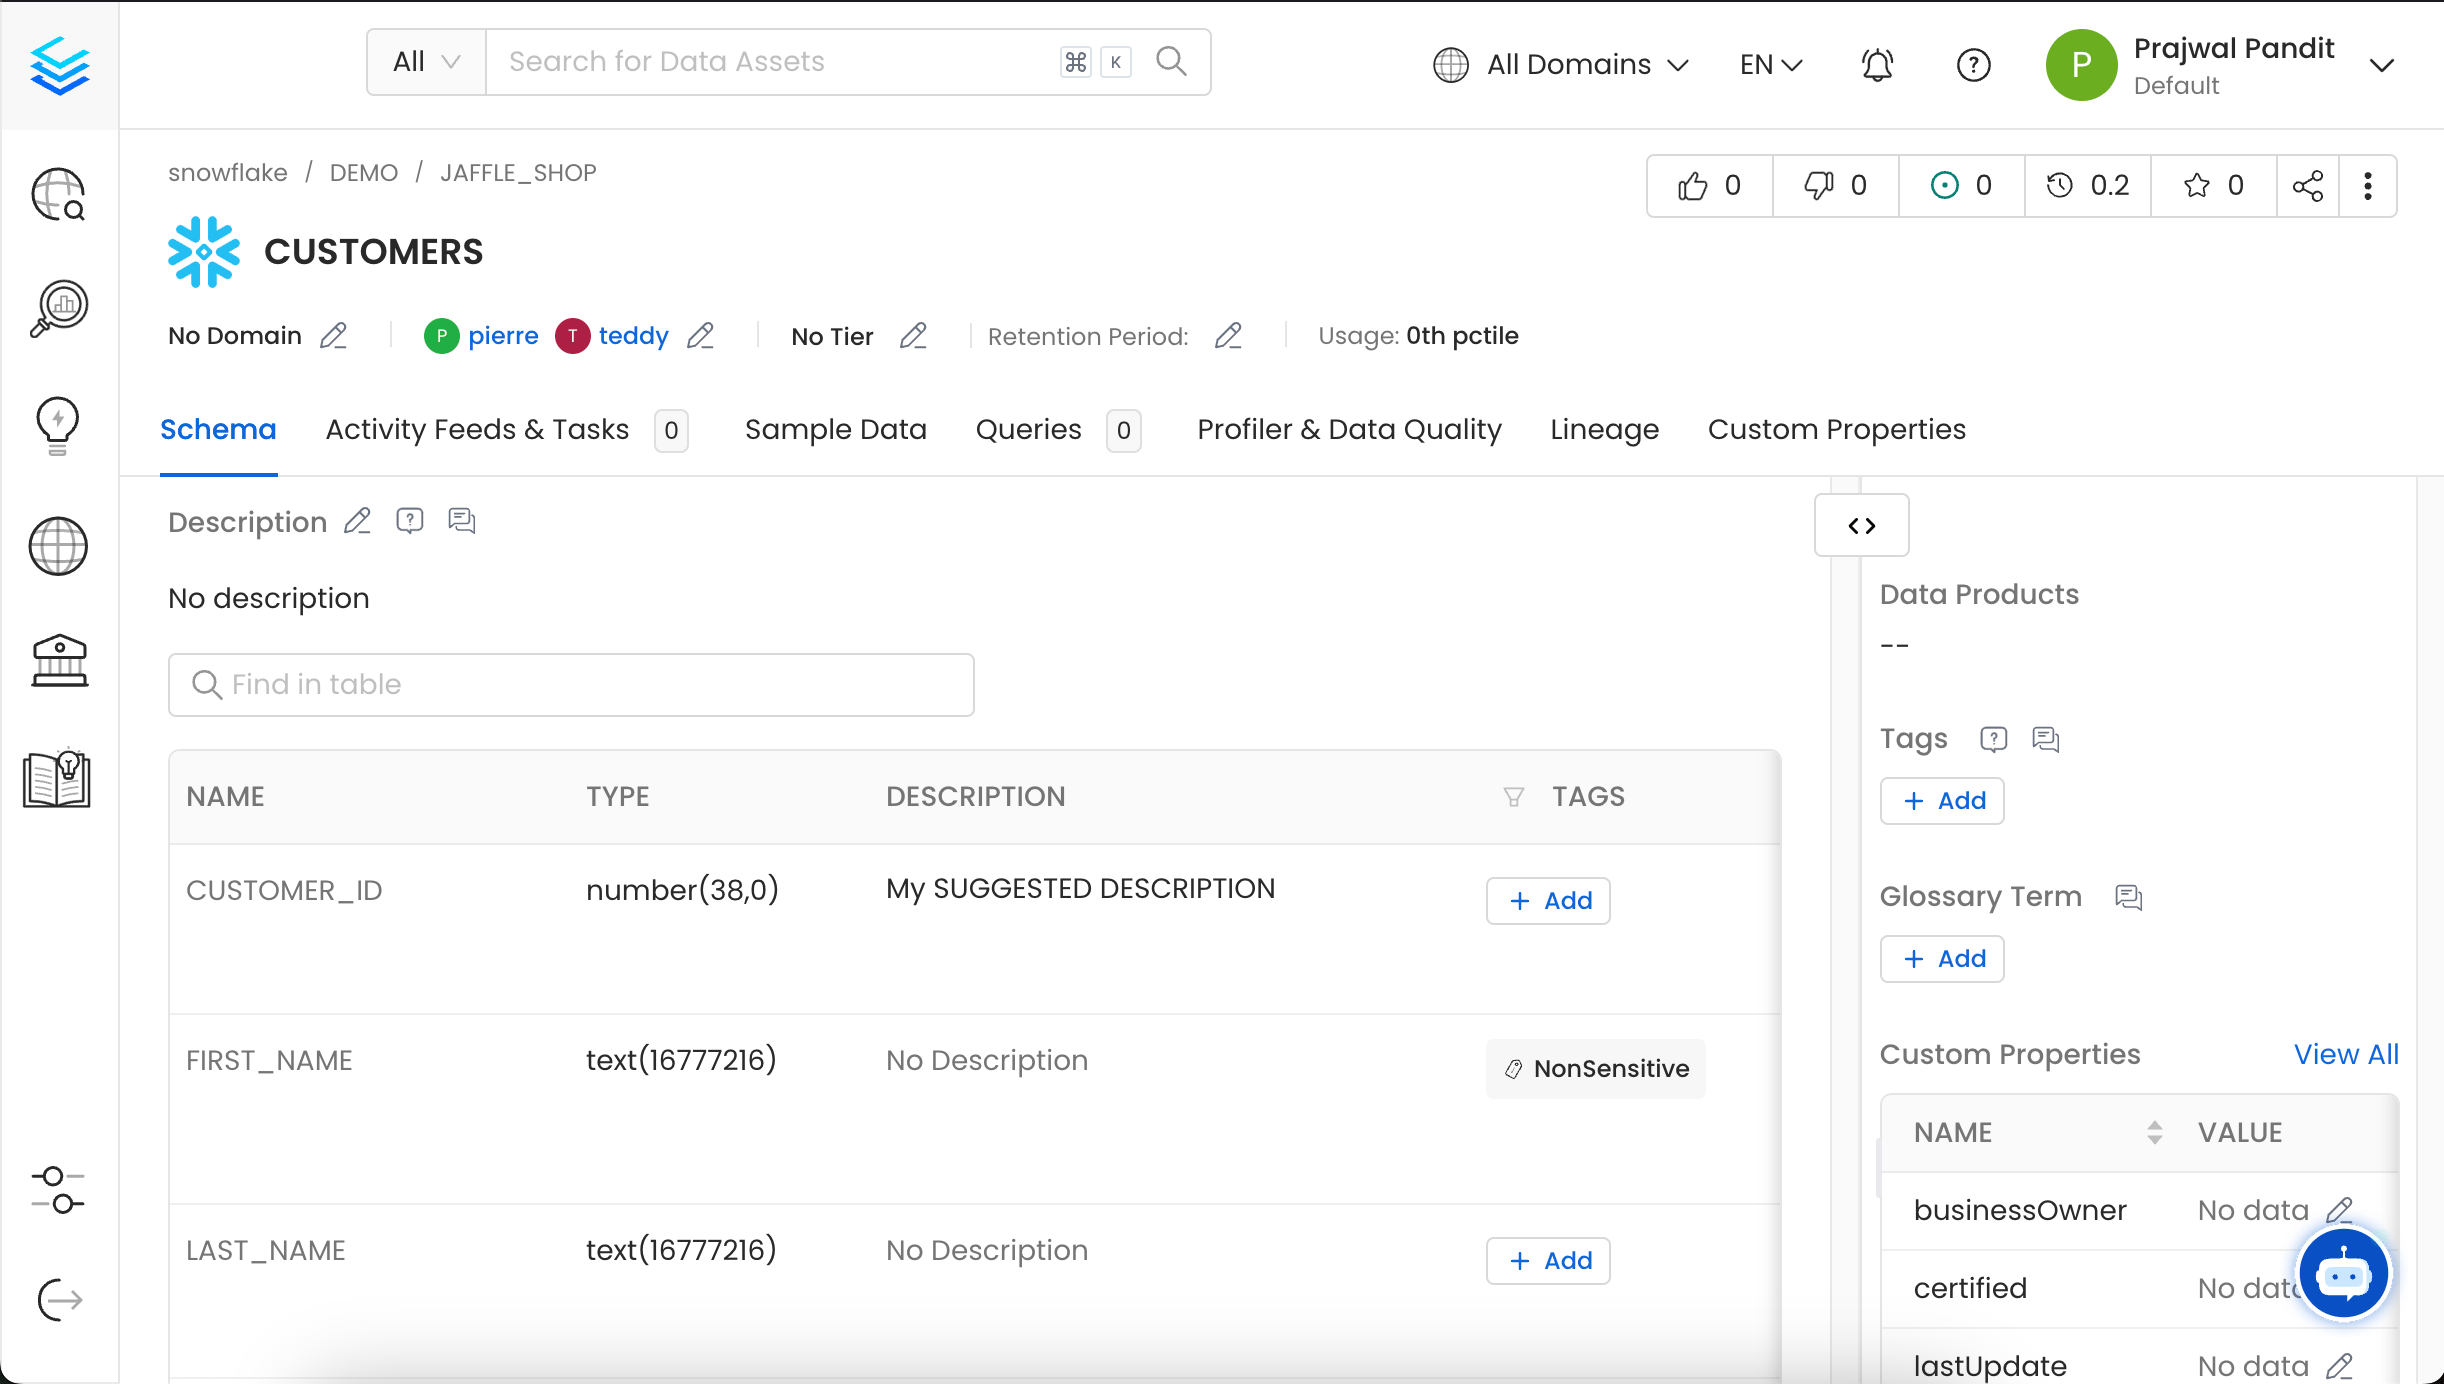 You can also import the Tables using the API with the following endpoint:
`/api/v1/tables/name/{name}/import`
Make sure to replace `{name}` with the Fully Qualified Name (FQN) of the Table.
Quickly export data assets as a CSV file.
You can also import the Tables using the API with the following endpoint:
`/api/v1/tables/name/{name}/import`
Make sure to replace `{name}` with the Fully Qualified Name (FQN) of the Table.
Quickly export data assets as a CSV file.